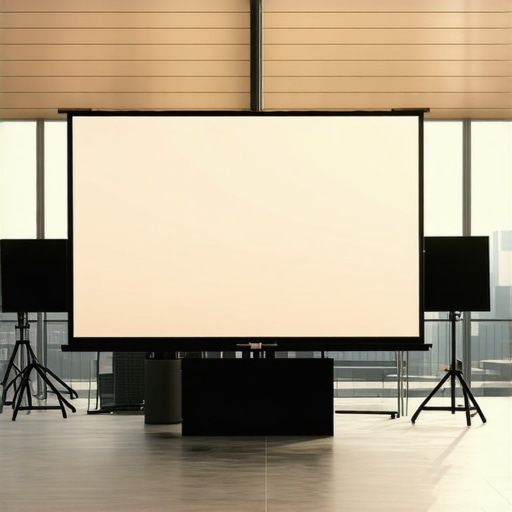
Ever been midway through a midday movie marathon, only to realize the beautiful image you’ve been admiring dims into a washed-out blur? I remember the first time I faced this frustrating phenomenon with my dedicated home theater setup. The sun’s glare, combined with the high-gain ALR screen I had invested so much in, made the picture nearly unwatchable during those bright afternoon hours. It was a lightbulb moment—why was my high-end system failing exactly when I needed it most?
Why Midday Brightness Challenges Are a Big Deal for Home Theater Enthusiasts
The truth is, when the sun is shining directly into your room, your fancy projection setup can struggle to deliver vivid, crisp images. This washout isn’t just an annoyance; it can turn an immersive experience into a disappointing mess. High-gain ALR (Ambient Light Rejection) screens are designed to combat ambient light and boost brightness, but even they can falter during intense midday sunlight, especially if not set up correctly. The importance of understanding the nuances of screen gain and positioning becomes clear when you’re fighting the glare that ruins your viewing.
In fact, a study from the Imaging Science Foundation highlights how ambient light can undermine image quality unless your screen and environment are optimized together. Early on, I made the mistake of assuming a high-gain screen would solve all problems—only to find that poor placement and overlooking room lighting conditions made my investment less effective. Trust me, without proper setup, even the most advanced screens can wash out.
Are you tired of squinting at your screen during bright hours? If so, you’re not alone. Many home theater fans face this issue, and the good news is, there are reliable ways to mitigate it. Next, I’ll share three proven strategies I’ve implemented to keep my images bright, clear, and vibrant—even during the harshest midday sun. Curious how these techniques work? Let’s dive in.
Adjust Your Screen Placement Strategically
When I faced midday washout, the first step I took was repositioning my fixed frame screen to minimize direct sunlight exposure. Think of your screen as a mirror—it reflects light, so the less sunlight hitting it directly, the better your image quality. I moved my setup closer to the shaded corner of the room, similar to how a photographer finds optimal natural light for shooting. For detailed guidance, check this installation guide to ensure proper setup.
Seal Ambient Light Leaks
Next, I sealed gaps around windows and doors to prevent stray sunlight from entering. Use blackout curtains or window films designed to block light—this is like creating a mini cave in your room, turning down ambient illumination. This step is crucial because any stray light can reduce contrast and wash out your projection. Remember, even a tiny crack can let in enough sunlight to ruin a bright scene.
Optimize Your Screen Type and Material
Switching to a high-gain ALR screen made a noticeable difference. High-gain screens are like magnifying glasses—they reflect more light towards your eyes, resulting in brighter images. I chose a 0.8 gain screen, as explained in this comprehensive guide, to maximize brightness without sacrificing contrast. It’s comparable to moving from standard television to a cinema-grade display; the gains are substantial.
Choose the Right Screen for Bright Rooms
Picking the correct screen type matters. I contrasted fixed frame and pull-down screens, finding that fixed frames with a velvet border help reduce hotspots and image washout in bright environments. These screens act like a shield, directing light back toward your viewing position. According to this comparison article, fixed frames often outperform pull-downs in terms of uniformity and durability, especially in bright settings.
Control Room Lighting Effectively
Finally, I installed dimmable lights and added ambient lighting to reduce glare. Using indirect lighting is akin to creating a lounge—brighter lights in the periphery improve contrast perception without reflecting into the screen. Avoid placing light sources directly behind or beside the screen, as this creates hotspots and glare, similar to how headlights wash out a camera lens. For expert tips, explore this lighting optimization guide.
 Many home theater enthusiasts believe that choosing the right screen is as simple as picking a high gain or an ALR (ambient light rejection) fabric. However, this oversimplification can lead to costly mistakes. One widespread misconception is that a high-gain screen automatically guarantees bright, vivid images in all lighting conditions. In reality, increased gain often results in hotspots and reduced viewing angles, especially if the screen isn’t properly calibrated or chosen for the specific environment. This is why understanding the nuances of screen gain and how it interacts with room lighting is crucial; consult this comprehensive guide for more insights.
Can a fixed frame screen outperform a pull-down in every scenario?
Contrary to popular belief, fixed frame screens are not always the best choice for every room or setup. While they offer superior flatness and stability, they also lack the flexibility of motorized pull-downs, which can be smoothed out with proper tensioning and installation techniques. An advanced mistake many make is assuming fixed frames are inherently better, but in rooms with variable lighting or where screen size needs to be adjustable, pull-down screens may actually serve you better. According to this comparison article, selecting between these options should be based on specific room dynamics, not just aesthetics or brand reputation.
Another myth revolves around ALR screens and their ability to handle ambient light. Many think that all ALR fabrics are equal, but some are more prone to shimmer or hotspots than others. For instance, the latest ALR innovations for 2025 reveal that material texture and microstructure impact performance significantly. Choosing the wrong fabric can entail a hidden trap—expecting a bright image, only to experience uneven brightness or shimmer during critical moments. It’s vital to consider both gain and micro-structure, and to select a screen tailored to your specific ambient conditions.
Finally, a common mistake is overestimating the benefits of higher gain at the expense of contrast and black levels. While increased gain boosts brightness in bright rooms, it often compromises contrast ratio, resulting in washed-out blacks. Experts argue that a gain around 0.8 often provides the optimal balance for bright environments, as highlighted in this latest testing report. Don’t fall for the myth that more gain equals better picture quality in every scenario; instead, focus on matching gain with your room’s lighting and your projector’s capabilities.
Have you ever fallen into this trap? Let me know in the comments. Remember, understanding these hidden nuances ensures you make informed decisions that enhance your viewing experience rather than hinder it.Once you’ve invested in the perfect projection setup, consistent maintenance becomes essential to sustain optimal image quality over the long term. One of my go-to strategies is regularly inspecting and cleaning my screen using a microfiber cloth and a gentle, non-abrasive cleaner suggested by the manufacturer—this prevents dust accumulation and hotspots. Additionally, I recommend setting up a dedicated environment with controlled humidity and temperature, as fluctuations can cause tension issues or warping, especially in fixed frame screens. For real-time adjustments, I rely on calibration software like CalMAN, which helps me fine-tune projector settings and ensure consistent color and brightness levels, even after months of use. As projection technology advances, incorporating smart monitoring tools that alert you to performance drops will likely become standard. Looking ahead, I predict that integrated sensor systems will automatically calibrate and maintain screens, reducing manual upkeep and ensuring flawless viewing experiences consistently. To keep your setup running smoothly, make it a habit to refer to the installation guide—like the one available at https://screens.homecinemaessentials.com/fixed-frame-screen-installation-guide-for-home-theaters—once a year, or whenever you notice image degradation. How do I maintain my projection system over time? Beyond routine cleaning, I focus on preserving the tension in my pull-down screens using tensioning hacks, which I’ve detailed in guides like https://screens.homecinemaessentials.com/3-tensioning-hacks-to-stop-pull-down-screen-sag-in-2026. Don’t underestimate the impact of simple tools like high-quality lens cleaners or infrared thermometers—they can reveal hidden issues before they affect your view. For example, using a laser thermometer can help detect uneven projector heat distribution that might warp your screen over time. If you’re serious about your home theater, I suggest trying out a calibration software combo with a colorimeter to automate picture optimization—this small investment can significantly extend your screen’s lifespan and image fidelity.
The Hardest Lesson I Learned About Projection Screens and Room Lighting
One of the most profound insights I gained was realizing that even the best projection screens can’t perform miracles without proper room setup. Investing in a high-gain ALR screen is fantastic, but if you’ve got sunlight pouring in or gaps around your windows, the picture quality can suffer dramatically. I learned this the hard way—by ignoring ambient light control, I compromised the very experience I was after. Now, prioritizing room lighting and placement has become my secret weapon for stunning visuals anytime.
Why High-Gain Screens Can Be Double-Edged Swords
Initially, I believed that cranking up the gain would solve all visibility issues during daytime. However, I discovered that high-gain screens often introduce hotspots and narrow viewing angles, especially if they’re not finely tuned. The real breakthrough came when I focused on understanding the specific microstructure of ALR fabrics, as explained in this guide. Properly matching gain to my environment turned out to be the key to vibrant, uniform images.
Better Fixes Than Relying Only on the Screen
My most valuable takeaway was recognizing that optimizing room conditions and screen placement yields far better results than solely upgrading hardware. From sealing window leaks with blackout curtains to adjusting screen height and angle, each tweak contributed to dramatic improvements. Engaging with expert tips found in the confirmation reinforced that success often stems from small, strategic adjustments—tech alone isn’t the answer.
Don’t Fall for the Illusion of a Perfect Setup
One mistake I made was believing that my setup was perfect—until a friend visited during a bright afternoon and immediately noticed the washout. That wake-up call drove home the importance of periodic evaluation and recalibration, especially as seasons change or room lighting conditions fluctuate. Regularly testing and tweaking my environment, akin to this technique, became essential for ongoing quality. Remember, brilliance isn’t a set-and-forget task.
One Response