As I was finalizing the setup of my home theater last year, I vividly remember staring at my newly installed fixed frame screen, feeling a mix of pride and frustration. The fabric was slightly sagging at one corner, and I couldn’t shake off the worry that I had made a costly mistake. That lightbulb moment taught me the hard way—improper assembly can seriously diminish your viewing experience. If you’re like I was, eager to get everything perfect but unsure of the pitfalls, you’re in the right place.
Why Getting Your Fixed Frame Screen Right Matters
Lining up a fixed frame screen isn’t just about aesthetics; it impacts image quality, brightness, and longevity. A poorly assembled screen might seem fine at first glance, but over time, issues like sagging edges, uneven tension, or misalignment can creep in. These problems can ruin the crispness of your picture, cause hotspots, or even lead to the need for costly re-installations. Considering that many enthusiasts today are investing heavily in 4K and even 8K setups, you want to maximize every pixel—not waste it with avoidable mistakes.
Thinking about tackling your own screen installation? Then understanding the common errors before you begin can save you headaches down the line.
Is Poor Assembly Actually Wrecking Your Viewers’ Experience?
Early in my journey, I made the mistake of assuming that tightening the mounting brackets was enough. I didn’t realize how crucial proper tensioning and frame support are. This oversight led to a wave in the fabric, which affected my contrast and sharpness—something I never expected from just a few loose screws. The discrepancy was glaring, especially during darker scenes.
Properly installing your fixed frame screen isn’t just about following tutorials; it’s about knowing what pitfalls to avoid. For more details on the nitty-gritty, I recommend checking the comprehensive installation guide that walks you through the step-by-step process.
Avoiding these common assembly mistakes will help ensure your home theater remains a place where every cinematic detail is a joy to see—without any pesky distractions or imperfections. Ready to dive into the specific errors to watch out for? Let’s get started.
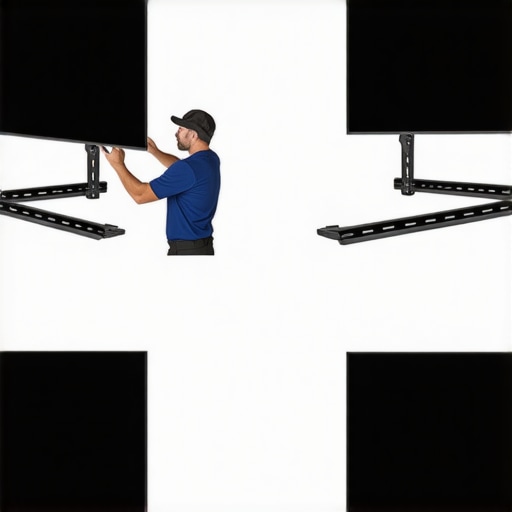
Secure the Mounting Surface First
Begin by choosing a sturdy wall or ceiling with adequate structural support, akin to anchoring a picture frame into solid wood versus drywall. Use a stud finder to locate framing studs—this provides the necessary stability for your weighty fixed frame. When I installed mine, missing a stud led to wobbling and sagging over time; ensuring solid anchors eliminated this. For more detailed guidance, refer to the installation guide.
Accurately Measure and Mark Setup Locations
Measure your projection throw distance and screen size precisely, ensuring the image is centered and at eye level when seated. Using a tape measure and level, mark the exact points for mounting brackets, preventing crooked installation that causes uneven tension—like a crooked picture frame that distorts the image. I once skipped this step and spent hours readjusting, which could have been avoided. Take the extra time to double-check each marking before drilling.
Install Mounting Brackets with Precision
Attach brackets securely according to your model’s specifications, ensuring they’re level and spaced correctly. Think of this as tightening the tension on a trampoline—proper tensioning ensures a smooth, flat surface. Use a level tool to verify alignment. In my case, uneven bracket placement caused fabric waves that distorted the picture; precision here is key. For best practices, consult the blueprint for setup.
Stretch and Attach the Fabric Tautly
Lay the fabric over the frame, then stretch it evenly across all sides, akin to tightening a drum skin. Secure the fabric with staples or clips, starting from the center of each side and moving outward to prevent slack. This creates a taut, flat surface, crucial for crisp images. I once underestimated the importance of even tension and ended with ripples, which blurred my picture. Patience and systematic stretching make all the difference. Need advice on fabric types? Check out projection screen types.
Adjust Tension and Eliminate Sagging
After mounting, step back and assess the surface. Slight waves or sagging can be corrected by tightening the fabric or adjusting mounting screws. Think of tensioning like tuning a guitar—small tweaks result in perfect pitch. In my setup, I used a tensioning tool to pull fabric edges tighter, which completely eliminated waviness, enhancing picture clarity. For solutions to common tension issues, visit screen gain pitfalls.
Fine-Tune Alignment and Frame Positioning
Use a spirit level and laser pointer to ensure the frame is perfectly aligned both horizontally and vertically. Even minor misalignments can cause keystone distortions or image shifts. When I finally leveled my frame meticulously, the projected image became significantly sharper. Take your time here; proper alignment maximizes the viewing experience and minimizes eye fatigue. For precise adjustments, consult the tensioning hacks.
Test the Setup Before Finalizing
Turn on your projector and examine the image from multiple angles. Look for wrinkles, uneven brightness, or distortions; these indicate the need for further tensioning or realignment. I discovered a small wave that affected contrast, which I corrected by re-adjusting the fabric tension. This step ensures you’ll avoid costly re-dos after completion. For optimal image quality tips, explore image enhancement strategies.
Many home theater enthusiasts accept common beliefs about pull-down screens, fixed frame designs, and screen gain without questioning deeper nuances. Let’s dig deeper into the misconceptions that often trip up even experienced users. One prevalent myth is that higher gain always equals brighter images and better contrast. In reality, elevating gain beyond 1.0 can lead to hotspots and reduced viewing angles, especially in larger screens. For instance, experts suggest that for ultra-bright environments, a gain around 0.8 provides a more uniform image without sacrificing brightness excessively. This misconception originates from the idea that more reflectivity means better visuals, but overdoing it causes uneven brightness and glare, which diminish the overall experience. An advanced mistake is selecting a screen solely based on gain without considering ambient light conditions. In a bright room, a high-gain screen may produce dazzling hotspots, while in a controlled environment, a low-gain screen offers better contrast and viewing angles. Advanced users should examine the projection screen types and match gain to their specific room conditions. Moreover, many overlook the role of ALR (ambient light rejecting) screens, which incorporate specialized textures and coatings designed to counteract ambient light without necessarily relying on high gain. Interestingly, some believe that ALR screens are always the best choice for bright rooms, but certain models can cause hot spotting or washed-out images if not selected or installed properly. The key is understanding that the effectiveness of ALR technology depends on proper orientation and room setup, not just the screen’s gain or type. For experts, the nuanced choice involves balancing gain, surface material, and ambient light considerations, often requiring adjustments in projector brightness or room decor. One critical trap is neglecting alignment and tensioning during installation, which can exaggerate or hide gain-related issues. For an in-depth look at perfect setup strategies, visit the blueprint for setup. As technology advances, new surface materials and coating techniques continue to evolve, blurring the lines between traditional gain classifications. Instead of blindly trusting spec sheets, it’s prudent to conduct real-world tests or consult expert reviews to find the optimal balance tailored to your space. Have you ever fallen into this trap of oversimplifying screen selection? Let me know in the comments.Maintaining your projection setup over time ensures consistent image quality and extends the lifespan of your investment. One of the most effective ways to do this is by using specialized tools like tension meters, laser levelers, and cleaning kits designed specifically for projection screens. For instance, a digital tension gauge helps you maintain the optimal fabric tautness, preventing waviness or sagging that can distort images. Likewise, laser levels allow precise alignment of the screen frame, ensuring the projected image remains perfectly centered and square—crucial for an immersive viewing experience. Regular cleaning with manufacturer-approved microfiber cloths and anti-static sprays removes dust, dirt, and fingerprints that can dull the screen’s surface or cause hotspots, especially on high-gain screens where surface cleanliness greatly impacts brightness uniformity. Investing in these tools and adopting a routine maintenance schedule pays off by preserving image clarity, contrast, and color accuracy over the long term. Looking ahead, the integration of smart sensors and IoT-enabled devices promises to streamline maintenance even further, alerting you when adjustments are needed or automatically calibrating your screen to optimal settings. How do I maintain my projection screen over time? Begin by regularly inspecting the tension and alignment using a laser level, adjusting the frame screws as necessary, and scheduling professional calibration every few years to account for material wear and room condition changes. For detailed guidance on proper setup and upkeep, consult the installation guide that emphasizes routine checks. Don’t forget—cleanliness directly affects screen gain and contrast, so keep your surface spotless. After all, a well-maintained screen provides the best platform for enjoying movies, gaming, or presentations with pristine clarity. To optimize your setup, I highly recommend trying a digital tension gauge to measure fabric tautness precisely; it’s a game-changer for preventing sagging and ensuring a flat, professional-looking surface on your fixed frame or pull-down screen. The future of screen maintenance is heading toward smarter solutions, but mastering the basics now will keep your projection system shining for years to come.
The Sneakiest Lesson I Stumbled Into About Screen Setup
One of the most surprising truths I uncovered is how easily tension unevenness or misalignment can introduce subtle distortions that ruin your viewing experience. I once thought I had everything aligned perfectly, only to realize that tiny shifts made my contrast bleed or create annoying waves. That lesson made me commit to meticulous checking — using laser levels and tension meters — and it transformed my setup entirely.
Another unexpected insight was realizing how ambient light rejection (ALR) screens aren’t a magic fix for all rooms. Many assume high gain or specialized coatings automatically solve glare issues, but room-specific factors matter immensely. This understanding pushed me to read in-depth reviews and match my room’s brightness conditions with the right surface, instead of blindly following hype.
A personal regret I often remind myself is skipping routine maintenance, assuming the screen will stay perfect forever. Regular surface cleaning with microfiber cloths and occasional re-tensioning have kept my image sharp and free of wave-induced blur. Investing in tools like tension gauges and laser levelers is a game changer—making future adjustments straightforward and reducing guesswork.
My Toolbox for a Flawless Viewing Experience
For those serious about achieving cinema-quality images, I recommend starting with a digital tension meter. It provides precise measurement of fabric tautness, preventing sagging and wrinkles. A laser leveler is equally essential for ensuring exact alignment, especially when mounting on uneven walls. To keep the surface spotless, I use microfiber cleaning kits designed specifically for projection screens—keeping dust and fingerprints at bay.
If you’re exploring surface materials, expert guides can help tailor your choice to your room’s lighting conditions. Additionally, checking out solutions like the high-gain screens in 2025 can drastically improve brightness in bright rooms.
What’s Next for Home Theater Enthusiasts Like You?
You’re standing at the edge of a new era where manual setup meets smart technology. Adaptive tensioning systems and IoT-connected sensors are beginning to automate adjustments, maintaining perfect tension and alignment over time. Embracing these innovations now will ensure your setup stays head and shoulders above the rest for years to come. Remember, the journey to a cinematic experience is ongoing—continuous learning and routine care keep your system performing at its best.
Have you ever struggled with perfecting tension or alignment during your screen setup? Share your experiences below—I’d love to hear your stories!
No Responses