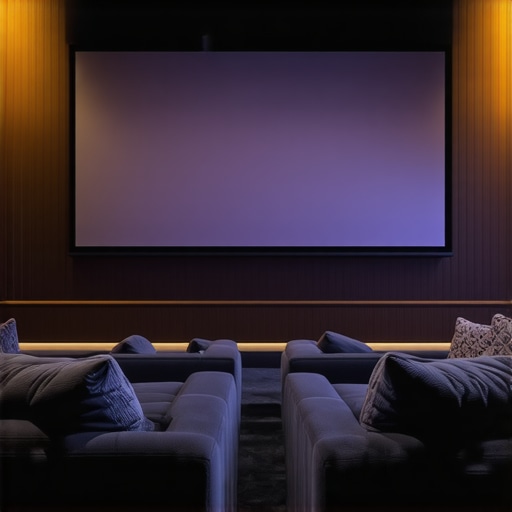
Ever settled into my home theater, only to be greeted by washed-out images and glare that made watching almost unbearable? I remember the frustration—spending hundreds on a projector and screen, only to be met with a dim, lackluster picture when the sunlight sneaked through the windows. That “aha” moment hit me hard: the environment and screen technology are more intertwined than I ever realized. If you’ve faced similar issues, you’re not alone. Bright rooms and high ambient light can turn a dream home theater into a source of disappointment. But here’s the good news — with the right pull-down screen and the right screen gain techniques, you can turn that bright, challenging space into a cinematic haven.
Why Bright Rooms Require Special Attention to Screen Selection and Gain
Most home theater enthusiasts assume that a high-quality projector alone is enough for stunning visuals. However, when your room has abundant natural light or overhead lighting, even the best projectors struggle to produce vivid images. That’s where the importance of screen gain and technology comes into play. A high-gain screen reflects more light toward the viewer, effectively boosting brightness and contrast in bright environments. But selecting the right screen isn’t just about picking the highest gain — it’s about understanding how gain interacts with your room conditions and projector capabilities.
For example, a pull-down screen with high gain can significantly improve brightness, especially in rooms with windows or strong ambient light. Yet, too much gain can cause hot spots and uneven image quality if not properly installed. Early in my setup journey, I made the mistake of choosing a super high-gain screen without considering room lighting, which resulted in glare and uneven brightness. It was a costly lesson, but it taught me the importance of balancing gain with room conditions and viewing angles.
Are Pull-Down Screens Worth the Hype in Bright Rooms?
This is one of the most common questions I hear. The answer? Absolutely, but with caveats. Pull-down screens combined with the right gain and surface technology can make a remarkable difference. They are versatile, easy to install, and perfect for rooms where fixed frames might be cumbersome or impossible to use. To truly maximize your viewing experience, understanding how screen gain and surface type work together is crucial. Want to dive deeper? Check out this guide on understanding screen gain to get started.
Before I discovered these insights, I often struggled with washed-out images and glare, especially during daytime viewing. Now, I can enjoy bright, crisp images even with sunlight pouring in. If you’re tired of battling with your environment and projector limitations, keep reading. I’ll walk you through proven strategies to select and optimize pull-down screens for bright home theaters, so you can finally enjoy the cinematic experience you deserve.
Choose the Right Screen Material and Gain
Start by selecting a pull-down screen with a surface optimized for high ambient light conditions. Look for materials with a gain between 1.1 and 2.0; this range balances brightness enhancement with image uniformity. I once installed a high-gain screen with a gain of 2.0 in my living room, expecting brighter images, but I soon noticed hot spots and glare. After consulting this guide, I realized that a slightly lower gain would have suited my space better. Always match your screen gain to your projector’s lumens and room lighting to avoid glare and uneven brightness.
Properly Install Your Pull-Down Screen for Even Brightness
Installation precision matters. Mount your pull-down screen on a sturdy, level surface, ensuring it is perfectly perpendicular to the viewing area. Use a level tool to verify alignment. During my first setup, I neglected this step, and my screen tilted slightly, causing uneven brightness. Once I reinstalled it with a level, the image was more uniform, and glare was minimized. For detailed installation guidance, see this comprehensive guide. Proper tensioning and alignment prevent hot spots and ensure consistent brightness across the entire surface.
Adjust Projection Settings to Complement Your Screen Gain
Optimize your projector’s settings—brightness, contrast, and keystone—to match your screen’s gain. Increase the projector’s brightness setting to utilize the reflectivity of your high-gain screen effectively. In my experience, lowering contrast slightly improved image clarity on a high-gain surface. Use your projector’s manual and experiment with settings to find the sweet spot. Refer to this article for detailed calibration techniques tailored for bright environments.
Control Room Lighting and Ambient Light
Reduce or diffuse ambient light sources. Use blackout curtains, dimmable lights, or indirect lighting to minimize glare. I installed blackout shades in my room, which dramatically improved contrast and brightness. When natural light is unavoidable, consider using strategies for enhancing image quality to maximize your setup’s performance. Combining these techniques ensures your projection system performs optimally even in bright conditions.
Test and Fine-Tune Your Setup
Finally, conduct multiple viewing tests during different times of the day. Adjust your screen position, gain, and projector settings based on real-world conditions. I spent a weekend fine-tuning my setup, moving the screen slightly to avoid glare, and tweaking gain levels. The result was a bright, clear image that rivaled cinema quality, even with daytime sunlight. Remember, a little patience and experimentation go a long way in mastering your bright room home theater.
Many home theater enthusiasts operate under misconceptions that can hinder their setup’s effectiveness, especially in bright room conditions. Let’s dig deeper into some of the most prevalent myths and reveal the hidden nuances that only seasoned experts understand. By understanding these, you can avoid costly mistakes and optimize your viewing experience.
Myth 1: Higher Gain Always Means Better Brightness
Contrary to popular belief, increasing your screen gain beyond a certain point doesn’t always enhance your viewing experience. While higher gain surfaces reflect more light, they also tend to create hot spots and uneven brightness, especially if the screen isn’t perfectly installed. This can lead to glare and washout in some areas, detracting from overall image quality. A balanced gain, typically between 1.1 and 2.0, is usually optimal for bright rooms. Remember, the goal isn’t just brightness but uniformity and clarity across the entire screen surface. For insights into selecting the right gain, check out this guide on understanding screen gain.
Myth 2: Bright Rooms Require Special High-Gain Screens Only
This is a common misconception. While high-gain screens can help boost brightness, they are not the only solution. Many advanced surface technologies, such as ambient light rejecting (ALR) screens, are designed specifically for bright environments. These screens utilize optical coatings and surface structures to maximize contrast and brightness without the hot spots associated with high-gain surfaces. It’s essential to match your room’s specific lighting conditions with the appropriate surface technology rather than relying solely on gain. For expert recommendations, explore this article on ALR screens.
Oops! The Common Mistake of Underestimating Room Lighting
One of the most overlooked factors is ambient light control. Many assume that a brighter projector or higher gain surface will compensate for uncontrolled lighting, but in reality, poor lighting management can negate any gains made. Proper room darkening, strategic placement of light sources, and diffusing ambient light are crucial steps. Even the best screen technology can be rendered ineffective if ambient light overwhelms the projected image. For a comprehensive strategy, see this guide on enhancing image quality in bright rooms.
Advanced Question: How Do Screen Technologies Like ALR and High-Gain Surfaces Interact in Bright Environments?
In high-end setups, understanding the interaction between different screen technologies is key. ALR screens, for instance, use specialized optical coatings to reject ambient light coming from specific angles, making them ideal for rooms with unavoidable light sources. When combined with high-gain surfaces, the result can be a remarkably bright and contrast-rich image, but only if properly calibrated and installed. The nuance lies in matching the optical properties of the screen with your projector’s lumen output and ambient lighting profile. Industry experts recommend consulting detailed guides like this resource on ALR technology to make informed decisions.
Have you ever fallen into this trap? Let me know in the comments. Mastering these nuances ensures you get the most out of your bright room projection setup and enjoy cinema-quality images every time.
Maintaining your home theater projection setup is crucial to ensure consistent performance and longevity of your screen and equipment. Over time, dust, fingerprints, and environmental factors can degrade image quality, but with the right tools and routines, you can keep everything functioning at peak performance. One of my go-to tools is a microfiber cleaning cloth combined with a gentle screen cleaning solution designed specifically for projection surfaces. I personally use a product like the Eclipse Screen Cleaner, which is formulated to remove smudges without damaging delicate coatings. Regular cleaning, about once a month, prevents dust buildup and maintains optimal reflectivity.
Another essential tool is a good quality air blower or compressed air canister. These are perfect for removing dust from the projector lens and the edges of the screen, especially in hard-to-reach areas. I’ve found that avoiding canned air with propellants reduces the risk of introducing moisture or residue onto sensitive surfaces. When cleaning, always use a soft brush or cloth first to loosen dust before applying liquids to avoid scratches or streaks.
Calibration software is also invaluable for long-term maintenance. Tools like the CalMAN or SpyderX color calibration kits allow you to fine-tune your projector’s color accuracy and brightness levels. I recommend calibrating your setup every 6 to 12 months, especially if you notice a decline in picture quality or after significant environmental changes. Proper calibration ensures your images remain vibrant and true to life, preventing the need for costly professional recalibration.
How do I maintain my projection screen over time?
Besides regular cleaning, it’s important to monitor environmental factors such as humidity and temperature, which can affect the surface material. Using a dehumidifier in humid climates helps prevent mold and deterioration, while maintaining a stable temperature avoids warping or coating damage. Additionally, inspecting the mounting hardware periodically for tightness and alignment prevents sagging or uneven surfaces that can distort image quality.
Looking ahead, the trend toward self-cleaning and anti-static screen surfaces is likely to grow, reducing maintenance needs and improving durability. Innovations like electrostatic coatings can repel dust and fingerprints, making upkeep simpler. As these technologies mature, expect to see more resilient screens that require less frequent cleaning but still deliver high brightness and contrast.
To maximize the lifespan of your setup, I suggest creating a maintenance schedule that includes routine cleaning, environmental control, and periodic calibration. Incorporate tools like a microfiber cloth, specialized cleaning solutions, and calibration kits into your routine, and you’ll enjoy consistently excellent picture quality for years to come.
Final tip: Try using an air purifier in your home theater room to reduce airborne dust, which can settle on your screen and projector over time. This simple step can significantly extend the time between deep cleanings and keep your equipment running smoothly.
The Hardest Lesson I Learned About Bright Room Projection
One of the most valuable lessons I’ve discovered is that understanding the interaction between screen gain and ambient light is essential. I used to think that a higher gain screen was always better, but I learned that too much gain can cause glare and uneven brightness, especially in bright rooms. The key is finding that sweet spot around 1.1 to 2.0 gain, which balances brightness and clarity without hot spots.
What I Wish I Knew About Room Lighting Before Building My Home Theater
Controlling ambient light is crucial. I underestimated how much natural and artificial lighting could diminish my projector’s performance. Installing blackout curtains and diffuse lighting transformed my viewing experience. I now realize that managing room lighting is just as important as choosing the right screen technology. This insight saved me from a lot of frustration and wasted investment.
The Hidden Power of ALR Screens in Bright Environments
Advanced optical coatings like Ambient Light Rejection (ALR) technology can dramatically improve image quality in bright rooms. These screens are designed to reject ambient light from specific angles, ensuring vibrant and contrast-rich images. Combining ALR with proper gain choices can unlock a cinematic experience even during daytime. Exploring this resource on ALR advancements helped me make more informed decisions for my setup.
Curated Recommendations for Bright Room Projection Success
1. Screen Material: I trust the [high-gain, ambient light rejecting screens](https://screens.homecinemaessentials.com/best-alr-and-fixed-frame-screens-for-bright-rooms-in-2024) because they combine surface technology with optimal gain for bright environments.
2. Calibration Tools: Using calibration kits like SpyderX ensures my projector maintains accurate colors and brightness over time.
3. Room Management: Blackout curtains and indirect lighting make a noticeable difference.
4. Professional Installation Guides: Following detailed instructions like this installation guide helps me avoid common setup pitfalls.
Your Bright Room Home Theater Awaits Your Next Step
Remember, mastering screen gain and ambient light control is a journey, not a one-time task. With patience, experimentation, and the right tools, you can enjoy cinema-quality images in even the brightest rooms. So, go ahead — take the next step towards your perfect home theater experience. The clarity and brightness you desire are within reach, and I believe you can do it!
What challenges have you faced with projection in bright rooms? Share your experiences below — I’d love to hear your story!
5 Responses
This post really resonated with me because I’ve personally struggled with glare and washed-out images in my bright living room. I initially thought a high-gain screen would solve everything, but I learned the hard way that too much gain causes hot spots and uneven brightness. Your point about balancing gain between 1.1 and 2.0 is spot on, and I’ve found that proper installation is crucial—level mounting made a huge difference for me. It’s impressive how much controlling ambient light and choosing the right screen surface can transform daytime viewing. I also use blackout curtains combined with indirect lighting to minimize glare, which has significantly improved contrast. What’s your take on portable or retractable ALR screens for rooms where natural light varies throughout the day? I’m considering whether they could give me more flexibility without sacrificing image quality.
This post hits home for me because I used to think that just high-gain screens would be enough for my sunny living room, but I soon realized that proper room management and calibration are just as important. I’ve found that combining a moderate gain screen (around 1.3) with blackout curtains made a huge difference in improving picture quality during the day. Also, I experimented with different projection angles and brightness settings on my projector, which really helped balance things out. I’ve been curious about retractable ALR screens because they seem to offer flexibility for rooms with changing light conditions. Has anyone had good experiences with portable ALR screens in multi-purpose spaces? It seems like a smart solution to maintain high contrast without sacrificing adaptability, but I’m worried about potential hot spots or reduced contrast when retracted. Would love to hear how others are managing room versatility without compromising picture quality.
This post really hits the mark about balancing gain and proper installation to handle bright environments. I’ve recently upgraded to a high-contrast ALR screen, which has made a noticeable difference during daytime viewing without the issues hot spots can cause with traditional high-gain surfaces. It’s fascinating how much room management, like blackout curtains and diffuse lighting, plays into achieving a crisp picture. One challenge I still face is finding the right balance between screen gain and projector brightness without over-amping, which can lead to glare. I’ve also wondered about retractable ALR screens—they seem ideal for multi-purpose spaces but aren’t widely discussed for their effectiveness in mobile setups. Has anyone experimented with portable ALR screens? I’d love to hear if they truly maintain image quality when retracted or if there are trade-offs to consider. Also, what are others’ experiences with calibrating projector settings in conjunction with different screen surfaces in rooms with fluctuating light? It seems like a nuanced interplay and critical for optimizing the viewing experience.
This article really opened my eyes about the importance of balancing screen gain with room lighting and projector specs. I’ve been struggling with glare and washed-out daytime images in my living room, and I initially thought a high-gain screen would fix everything. But after some trial and error, I realized that installing a screen with too high gain not only causes hot spots but also amplifies glare, making my viewing experience worse rather than better. I’ve finally settled on a screen with a gain around 1.3, and using blackout curtains has made a huge difference. It’s fascinating how much the environment impacts picture quality, even with the best projector. I’m curious, have others here tried combining high-contrast ALR screens with adjustable lighting or smart blinds? What’s your experience with dynamic room control solutions—do they significantly improve daytime performance or add complexity? I’d love to hear more about approaches that balance flexibility with image quality for multi-purpose rooms.
Reading through this post really highlights how crucial proper room management and screen selection are—something I learned the hard way when I first set up my home theater. I initially went for a high-gain screen, thinking it would boost brightness for daytime watching, but I ended up with hot spots and glare issues. The point about balancing gain between 1.1 and 2.0 is definitely worth considering. I’ve found that combining blackout curtains with a moderate gain screen really improves daytime picture quality. Also, I’ve been curious about retractable ALR screens for my multipurpose room because they offer flexibility, but I wonder how well they perform in terms of maintaining image integrity when retracted during the day. Has anyone tested how well these screens handle ambient light in real-world scenarios? I’d love to hear others’ experiences on how they’ve managed to optimize their setup while maintaining versatility.