I vividly remember the moment I realized my old projector setup just wasn’t cutting it anymore. Bright sunlight streamed through the windows, making my screen look washed out, and I found myself squinting at tiny details I used to enjoy effortlessly. It was frustrating—and honestly, a bit embarrassing for someone who loves home theater tech. That lightbulb moment pushed me to dig deeper into the world of projection screens designed specifically for bright rooms, and let me tell you, the right choice can transform your viewing experience completely.
Why Bright Room Projection Screens Matter More Than Ever
2024 is shaping up to be a game-changer for home theater enthusiasts dealing with bright ambient light. Thanks to advancements like high-gain screens and ambient light rejecting (ALR) technology, you no longer need a dark room to enjoy stunning visuals. But here’s the catch—choosing the wrong screen can still leave you with a blurry, washed-out picture that ruins the movie magic. That’s exactly what I encountered early on, making me realize I’d made a rookie mistake by settling for a standard screen without considering my room’s lighting conditions.
According to a recent industry report, over 70% of home theaters now operate in rooms with significant ambient light, making specialized screens essential for an optimal experience. If you’ve faced similar frustrations—struggling with poor contrast, glare, or dull colors—know that you’re not alone. The good news is, with the right information and some expert guidance, you can avoid the pitfalls I fell into and craft a setup that shines even in bright environments.
Is All Projection Screens for Bright Rooms Truly Worth the Investment?
Early in my journey, I thought I could just get by with a regular screen and a brighter bulb. Big mistake. That approach only amplified the glare and washed out the image. It wasn’t until I learned about high-gain screens and ALR technology—like those discussed in this in-depth guide—that I saw real improvement. The investment was absolutely worth it, especially when I finally got crisp, vibrant images even during daytime movies.
If you’re tired of battling glare or squinting at your screen, keep reading. I’ll help you understand exactly what features matter, how to pick the best screen for your space, and avoid the common mistakes that could waste your money. Whether you’re upgrading an existing setup or starting fresh, this guide will point you in the right direction.
Ready to ditch the dull, washed-out images and embrace a brighter, more immersive viewing experience? Let’s dive into the practical steps to choose the perfect projection screen for your bright room.
Assess Your Room’s Lighting Conditions
Start by evaluating the ambient light in your space. Bright rooms with large windows or lots of natural light require screens that can combat glare and maintain vivid images. Use a light meter or simply observe the level of sunlight during peak hours to determine the necessary screen features. For instance, a room with direct sunlight may need an ambient light rejecting (ALR) screen with a high gain rating to reflect projected light effectively and improve contrast.
Select the Right Screen Type for Your Setup
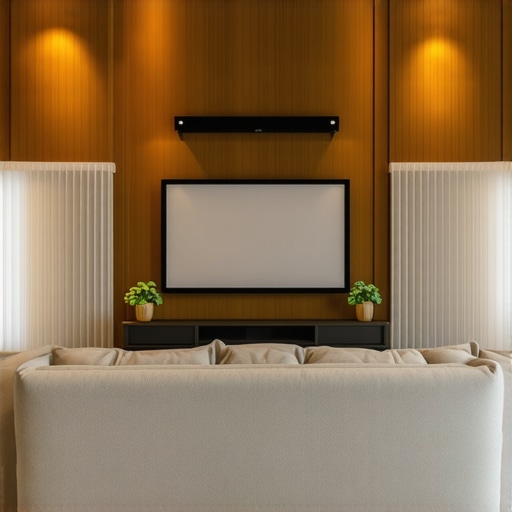
Decide between a fixed frame or pull-down screen based on flexibility, aesthetics, and space. Fixed frame screens offer a sleek, taut surface ideal for dedicated home theaters, while pull-down screens provide versatility and easier installation in multi-purpose rooms. When choosing, consider the room’s height and the projector’s throw distance. For example, if you need a retractable option for space-saving or multi-use purposes, a motorized pull-down screen might be the best fit.
Prioritize Screen Gain and Technology
Understand that screen gain influences brightness and contrast. A gain of 1.0 is standard, but in bright rooms, consider screens with higher gain ratings like 1.3 or 1.5. These reflect more light toward viewers, enhancing visibility in ambient light conditions. Explore ALR (ambient light rejecting) technologies that feature special surface coatings designed to mitigate glare and ambient light interference. For an in-depth understanding of how screen gain and ALR technology can improve your setup, check this comprehensive guide.
Measure and Prepare for Installation
Accurately measure your room and determine the ideal screen size and aspect ratio. Use a tape measure to mark the exact spot for mounting your screen, ensuring that the top edge allows comfortable viewing angles. For fixed frame screens, follow the installation guide to secure the frame to a sturdy wall or ceiling bracket, ensuring no sagging or warping over time.
Install with Precision for Optimal Results
Align your projector with the screen at the correct height and angle. Use a level to ensure the screen is perfectly horizontal, avoiding distortions. For fixed frame screens, secure mounting brackets directly into wall studs or ceiling joists to prevent wobbling. If you opt for a pull-down screen, ensure the housing is flush with the ceiling and the retraction mechanism operates smoothly. For detailed setup advice, see the projection screen comparison.
Fine-Tune Image Quality
Adjust your projector settings to complement your new screen. Increase contrast and brightness settings to match the high-gain surface. Use the proven strategies to maximize clarity and color accuracy. Regularly clean the screen surface to prevent dust buildup, which can diminish image quality over time.
Experiment and Optimize
Test different viewing angles and seating positions to find the sweet spot where image brightness and clarity are maximized. Small adjustments in projector height or angle can significantly impact picture quality. Consider investing in a high-quality mount or adjustable brackets to make fine-tuning easier. Remember: patience during setup can dramatically enhance your overall viewing experience.
Many home theater enthusiasts fall into the trap of oversimplifying what it takes to get a vibrant, high-contrast image in bright environments. A prevalent misconception is that simply choosing a high-gain screen or a more powerful projector will solve all visibility issues. However, the reality is far more nuanced. As someone deeply involved in optimizing projection setups, I can tell you that these assumptions often lead to subpar results and wasted money.
One myth I frequently encounter is that high-gain screens always improve brightness. While it’s true that higher gain surfaces reflect more light, they also come with the downside of reduced viewing angles and potential hot spots—bright patches that can distort the image. This can be especially problematic in rooms where viewers are seated at different angles. The key is to balance gain with your room’s layout, which is where advanced technology like ambient light rejecting (ALR) screens really shine. These screens are designed to mitigate glare and ambient light interference without sacrificing uniformity, making them a smarter choice for bright rooms.
How can I avoid falling for these misconceptions and truly optimize my setup?
First, recognize that understanding the specific technological features of your screen and projector is crucial. Relying solely on specifications like gain ratings can be misleading if you don’t consider factors such as viewing angles and ambient light conditions. Consulting expert resources, like this detailed guide, can help you make informed decisions. Additionally, avoid the trap of expecting a single upgrade—whether a brighter bulb or a higher gain screen—to solve all issues. Often, a combination of properly calibrated equipment and the right screen technology yields the best results.
Another common mistake is neglecting proper installation. Even the best screen will underperform if not mounted correctly or if your projector isn’t aligned properly. Precise calibration of your projector and ensuring the screen surface is clean and free of dust are simple steps that can significantly enhance image quality. For detailed installation tips, check out this installation guide.
Finally, don’t fall into the trap of thinking that brighter is always better. Sometimes, a well-optimized ambient light rejecting (ALR) screen with moderate gain can outperform a high-gain surface in a bright room by providing better contrast and uniformity. As industry experts suggest, understanding the specific properties of your screen and room conditions is essential to achieving cinematic quality, even in daylight.
Have you ever fallen into this trap? Let me know in the comments. For more insights on selecting the best screen technology for your setup, visit this comprehensive guide.
Maintaining your projection screen and related equipment is essential to preserve image quality and extend the lifespan of your home theater investment. Over time, dust, fingerprints, and environmental factors can degrade your screen’s surface and affect projection clarity. That’s why I rely on specific tools and methods to keep everything in top shape, ensuring your viewing experience remains crisp and vibrant.
How do I keep my projection setup in prime condition over the years?
First, regular cleaning is non-negotiable. I use a microfiber cloth and a gentle, screen-safe cleaner like a 50/50 mixture of distilled water and isopropyl alcohol to wipe down the screen surface. Avoid harsh chemicals or abrasive materials that can damage delicate coatings. Additionally, I invest in a high-quality air blower to remove dust from the projector lens and screen edges without scratching or leaving residues. For precision calibration, I use a colorimeter such as the X-Rite i1Display Pro. It’s a game-changer for maintaining accurate color reproduction, especially as projector lamps age and brightness diminishes.
To monitor the health of your projector lamp, I set reminders for lamp replacement based on manufacturer guidelines, typically after 2,000 to 3,000 hours of use. This prevents dimming and color shifts that can compromise image quality. Upgrading to a model with better lumen output or advanced cooling features can also help sustain brightness levels longer, especially in rooms with ambient light challenges.
For long-term performance, I recommend using a surge protector to shield your equipment from power fluctuations. This simple step can prevent costly damage and ensure continuous operation. Additionally, consider installing a dedicated circuit or UPS (Uninterruptible Power Supply) to stabilize voltage and prevent sudden shutdowns during storms or outages.
Looking ahead, advancements in smart calibration tools and environmental sensors will make maintenance even more seamless. Future projection systems might automatically adjust settings to compensate for dust buildup or lamp aging, reducing manual intervention. Industry trends suggest that AI-driven diagnostics will become standard, alerting users when maintenance is needed and even guiding repairs remotely.
Why is routine maintenance critical for optimal performance?
Routine maintenance not only preserves the visual clarity of your projection but also safeguards your investment. Neglecting cleaning or calibration can lead to uneven brightness, color inaccuracies, and eventual equipment failure. By proactively addressing these issues, you ensure your setup remains reliable and delivers cinema-quality images, whether you’re watching during the day or at night.
To streamline your maintenance routine, I suggest setting monthly reminders to inspect and clean your equipment. Also, keep a log of lamp hours and calibration dates to track performance trends. This record helps you anticipate replacements and upgrades, avoiding unexpected downtimes.
If you’re interested in professional-grade tools and techniques, I recommend exploring calibration software like this guide. It covers everything from basic calibration to advanced adjustments, ensuring your system remains optimized over time.
Start implementing these maintenance tips today, and you’ll enjoy stunning images and a hassle-free setup for years to come. Remember, a well-maintained projection system is the key to achieving the ultimate home theater experience.
Lessons I Never Expected to Learn About Bright Room Projection Screens
- One of the toughest lessons was realizing that higher gain screens aren’t always better—especially if your seating arrangement isn’t ideal. The hot spots and limited viewing angles caught me off guard, teaching me the importance of balancing gain with room layout.
- Another revelation came when I discovered that ambient light rejecting (ALR) screens are not just a luxury but a necessity for daytime viewing in bright rooms. Their surface technology genuinely transformed my viewing clarity, proving that investing in the right technology pays off.
- The biggest lightbulb moment was understanding how proper projector calibration and mounting can make or break your setup. Even the most advanced screen can underperform if not installed correctly, emphasizing that setup precision is crucial.
My Go-To Resources for Elevating Bright Room Projection
- This comprehensive guide on screen gain and ALR technology has been my bible for understanding how to optimize brightness and contrast in bright rooms. It’s packed with practical advice that I trust because it’s rooted in real-world testing.
- The installation instructions for fixed frame screens helped me avoid common pitfalls during setup. Following their step-by-step process ensured my screen was perfectly aligned and stable, which made a noticeable difference in image quality.
- Expert reviews of the latest ALR screens keep me updated on the newest breakthroughs. They help me choose technology that offers the best value and performance for my bright room setup.
- Contact me anytime if you need personalized advice—sharing experiences with fellow enthusiasts keeps me inspired and motivated to keep improving.
Your Bright Room Projection Journey Begins Today
Embrace the challenge of bright room projection with confidence. Remember, mastering your setup isn’t just about equipment—it’s about understanding your space and making informed choices. The future of projection technology is exciting, with innovations like smarter ALR screens and AI-driven calibration tools coming soon. Don’t wait to upgrade—your perfect home theater experience is within reach. Dive into the world of high-gain, ambient light rejecting screens, and watch your movies come alive in the brightest rooms. Your next step is just a click away—start today and enjoy the cinematic magic you deserve. How have you tackled ambient light in your setup? Share your story below.
2 Responses
Reading this post really resonated with my own experience in trying to upgrade my home theater for brighter environments. I initially thought that just increasing the projector brightness or opting for a higher gain screen would be sufficient, but I quickly learned those quick fixes don’t always deliver the best results. What made a significant difference for me was investing in an ambient light rejecting (ALR) screen with a moderate gain and calibrating the setup properly. I also found that the placement of the screen and projector alignment are critical—tiny misalignments can cause hotspots or uneven brightness. Have others here experimented with different mounting methods or calibration tools like colorimeters? I’d love to hear what has worked best in different room setups. It’s fascinating how much small details can impact picture quality, especially in rooms with lots of ambient light.
This post really hits home for me, as I’ve been struggling with optimizing my projector setup in a fairly bright living room. I used to think that simply bumping up the projector’s lumen output would solve the glare issues, but I’ve since realized that the type of screen plays a crucial role. Investing in a high-gain ALR screen made a noticeable difference, especially during daytime viewing. What I’ve found most helpful is combining that with precise projector calibration and ensuring proper mounting — tiny misalignments can cause hotspots and uneven brightness, detracting from the overall experience. I’m curious, has anyone experimented with different mounting heights or adjustable mounts to fine-tune the alignment? I think that great setup is often overlooked but makes such a difference in picture quality, particularly in rooms where lighting conditions are less than ideal. Also, I’d love to hear about any specific calibration tools or techniques others have used successfully to enhance image uniformity and clarity.