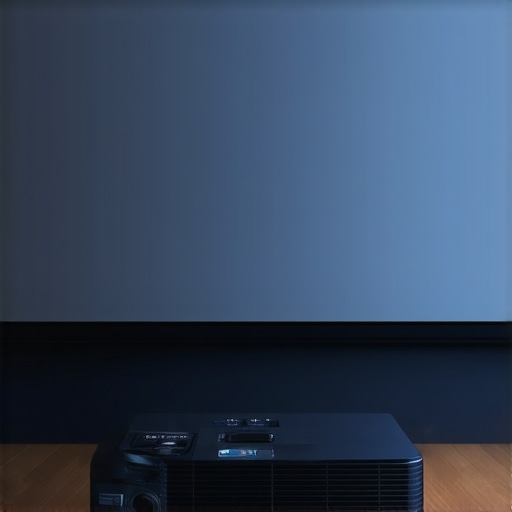
Ever spent hours setting up your home theater, only to be disappointed by washed-out images and glare that ruin the viewing experience? I’ve been there—fighting with curtains, adjusting projectors, and still ending up frustrated because the picture just wouldn’t pop, especially during daytime watching. That lightbulb moment hit me hard when I finally realized the problem wasn’t my projector or even my room, but the screen itself. It was a classic case of not understanding how different screen technologies and gains could make or break my setup.
Why Choosing the Right Screen Matters More Than Ever in 2024
Today, with more of us investing in high-quality projectors and brighter environments, the need for a screen that can handle ambient light without sacrificing image quality is crucial. I learned this through trial and error—trust me, I wasted a lot of money on screens that promised the world but delivered glare and dull visuals. Once I started exploring advanced solutions like Ambient Light Rejection (ALR) screens and high-gain projection screens, my viewing experience transformed completely. Now, I want to help you avoid my early mistakes and guide you towards smarter choices that will elevate your home theater in 2024.
Are ALR Screens Really Worth the Hype?
Early on, I thought ALR screens sounded too good to be true. I made the mistake of dismissing them as just another gimmick. But after reading real user reviews and expert insights, I discovered how they can significantly improve brightness and contrast, especially in rooms with some ambient light. It’s a game-changer for anyone who wants a bright, crisp image without darkening the entire room. If you’ve ever worried about investing in a specialized screen, I’ll show you exactly why ALR technology might be your best bet for 2024.
So, if you’ve faced the frustration of washed-out images or struggled with glare that ruins your movie nights, stay with me. We’ll explore how to choose the right screen based on gain, technology, and your room’s lighting conditions. Plus, I’ll share insider tips on avoiding common pitfalls and making sure your investment pays off. Ready to take your home theater to the next level? Let’s dive into the details and get your setup shining bright with the right screen technology.
Assess Your Room’s Lighting Conditions
Start by evaluating your space. Turn off all lights and observe how ambient light affects your projection. If glare or washed-out images are an issue, you need a screen designed to reject ambient light effectively. I remember my first attempt—trying to use a standard matte screen in a bright room—and it was a disaster. I quickly learned that understanding your room’s lighting is critical before choosing an ALR or high-gain screen. For detailed insights, check out the best ALR screens for bright rooms in 2024.
Match Screen Gain to Your Projector’s Brightness
Screen gain is like the volume knob for brightness. A higher gain increases the perceived brightness but can reduce the viewing angle, making the picture look washed out from the sides. Conversely, a lower gain spreads the light more evenly but might not be bright enough in well-lit rooms. I once used a 3.0 gain screen with my 2000-lumen projector, and the image was stunningly bright straight on but dimmed at the edges. To find the perfect balance, measure your projector’s lumen output and select a screen gain that complements it. For an in-depth guide, refer to understanding screen gain and how to optimize brightness.
Choose the Right ALR Technology
Not all ALR screens are created equal. Some use optical coatings to reject ambient light at specific angles, others rely on layered materials for better contrast. I experimented with a basic ALR screen, but upgrading to a screen with advanced optical filtering transformed my viewing experience. The key is to match the technology to your room’s typical lighting conditions. For instance, if your windows face the projector, an ALR screen with wider rejection angles will serve you better. For expert advice, see the expert tips on choosing ALR screens.
Properly Install Your Screen for Optimal Gain
Installation matters. A poorly mounted screen can cause uneven gains or distortions, defeating the purpose of your investment. I followed the detailed projection screen installation guide to ensure my screen was perfectly aligned and tensioned. Use a level and measure carefully—small deviations can lead to big quality drops. Remember, a stable mount ensures consistent gain and prevents sagging, which can distort your image over time.
Test and Adjust for Best Results
After installation, test your setup with a variety of content. Adjust the projector’s brightness, contrast, and keystone settings while observing the image. I found that slight tweaks to my projector’s settings, combined with the right gain and ALR technology, produced the clearest, brightest picture. Keep notes of your adjustments so you can replicate the best setup. For advanced calibration techniques, visit image quality enhancement strategies.
Stay Updated on Technology Trends
Finally, technology evolves fast. Stay informed about upcoming ALR breakthroughs and high-gain innovations by following the latest updates at ALR technology breakthroughs in 2025. This knowledge helps you make smarter investments and future-proof your home theater setup. Remember, the right combination of gain, ALR technology, and proper installation can turn your space into a cinematic haven—bright, sharp, and immersive, even in challenging lighting conditions.Many home theater enthusiasts fall for the misconception that all projection screens are created equal, but this is far from the truth. One of the most persistent myths is that higher gain always means better brightness and contrast. In reality, high-gain screens can cause a narrow viewing angle and unwanted hotspots, especially if not matched properly with your projector’s lumen output. This often leads to uneven brightness, making the viewing experience less immersive and more frustrating. To avoid this trap, it’s crucial to understand how gain impacts your setup and select a screen that complements your projector’s capabilities. For a detailed explanation, check out our guide on [understanding screen gain and how to optimize brightness](https://screens.homecinemaessentials.com/understanding-screen-gain-how-to-optimize-brightness-and-clarity).
Another common mistake is assuming that ALR screens work perfectly in all lighting conditions. While they are designed to reject ambient light, not all ALR screens are equal. Some use optical coatings that are angle-specific, which means if your seating arrangement or room layout changes, the screen’s effectiveness can diminish. Moreover, many buyers overlook the importance of proper installation; a poorly mounted ALR screen can cause light leakage or distortions that negate its benefits. I learned this the hard way, and I recommend thoroughly reviewing [expert tips on choosing ALR screens](https://screens.homecinemaessentials.com/choosing-the-best-alr-screen-expert-insights-and-tips).
One advanced nuance often missed is the impact of screen material and layering on image clarity. Some high-end screens incorporate multiple optical layers that enhance contrast and color fidelity, but only if installed correctly. A mismatch here can lead to image degradation, such as color shifting or reduced sharpness. This is why professional installation is so vital—small misalignments can have outsized effects on picture quality. For guidance, see our [installation guide for fixed-frame screens](https://screens.homecinemaessentials.com/fixed-frame-screen-installation-guide-for-home-theaters).
Have you ever fallen into these traps? Let me know in the comments! Remember, the key to a stunning home theater isn’t just picking the most expensive equipment but understanding these hidden nuances that can make or break your setup.
Maintaining your projection screen isn’t just about simple cleaning; it requires a strategic approach to ensure long-term clarity, brightness, and overall performance. Over time, dust, fingerprints, and even ambient humidity can degrade image quality, making regular upkeep essential. I personally rely on a combination of professional-grade cleaning tools and software calibration to keep my setup in top shape. In this article, I’ll share the exact tools I recommend and my routine to ensure your home theater screen continues to impress for years to come.
How do I maintain my projection screen over time?
First, invest in a high-quality microfiber cleaning cloth specifically designed for delicate surfaces. I prefer the Zeiss Microfiber Cleaning Cloth because it traps dust without scratching the surface. For stubborn smudges or fingerprints, I gently dampen the cloth with distilled water or a mild screen cleaning solution that’s free of alcohol or ammonia, which can damage the coating. Always avoid harsh chemicals that can strip the optical layers of your screen.
Next, consider using a soft, anti-static brush for dust removal. Regularly dusting your screen prevents buildup that can cause hotspots or glare issues. I perform this weekly, especially in dry environments where static can attract more dust.
Calibration is equally important to maintain image quality. I use a professional calibration tool like the X-Rite i1Display Pro. This device allows me to fine-tune my projector’s color settings, contrast, and brightness, ensuring that the image remains vibrant and accurate. The software accompanying this tool guides you through a step-by-step calibration process, which I highly recommend doing at least twice a year, especially if you notice color shifting or dimming.
For ongoing performance analysis, I turn to software solutions like CalMAN. It helps me identify deviations in color accuracy and brightness, allowing me to make precise adjustments. This is particularly useful if you have a high-gain or ALR screen, where small calibration errors can significantly impact visual quality.
Looking ahead, I believe the trend in maintenance tools will move towards smart calibration systems embedded directly into projectors or screens. These systems could automatically detect performance drops and adjust settings in real-time, saving us time and ensuring consistent quality. Companies like Sony and Epson are already experimenting with such features, and I predict this technology will become standard by 2025.
Try This Advanced Maintenance Tip
One simple yet effective tip is to keep a log of your calibration settings and cleaning schedule. This helps you recognize patterns—such as brightness drops after humid days—and adjust your routine accordingly. Also, consider investing in a humidifier or dehumidifier to stabilize room conditions, which is especially crucial if you use a high-gain screen susceptible to moisture fluctuations. Regular maintenance using these tools and techniques will keep your projection setup dazzling for years to come. For more detailed guidance, visit our proven strategies for enhancing image quality.
The Hidden Lessons I Learned About Screen Gains and Ambient Light Rejection
One of the toughest lessons I faced was realizing that not all high-gain screens deliver the brightness I expected. I once thought a 3.0 gain screen would make my living room pop, but I didn’t account for the narrow viewing angles and hotspots that came with it. That experience taught me to balance gain with my projector’s lumen output and room layout. Another insight was understanding that ALR screens are not magic—they work best when matched with specific ambient light conditions and proper installation. I learned this through trial, error, and a lot of frustration, but it ultimately helped me avoid costly mistakes. Lastly, I discovered that the quality of the screen’s optical layers makes a huge difference in contrast and color fidelity, which is why investing in professional installation and calibration is worth every penny.
2 Responses
Reading this guide really resonated with my own experience setting up a home theater. I initially underestimated the importance of matching the screen gain with my projector’s lumen output, which led to overly bright spots and hotspots with my previous high-gain screen. Since adjusting the gain and choosing an ALR with a wider rejection angle, the clarity during daylight has improved tremendously. One challenge I faced was ensuring the screen was perfectly aligned during installation—small deviations really affect the image quality. I found that using a laser level and taking my time made a big difference.
I’m curious if others have noticed significant differences after calibration or installation tweaks? Also, with some of the newer smart calibration systems emerging, do you think they’ll become essential for achieving consistent picture quality in home theaters? Overall, this article offers great insights for anyone looking to elevate their viewing experience, especially in rooms with ambient light considerations.
This article really hits the mark on the importance of selecting the right screen technology for specific room conditions. I’ve been experimenting with different gain levels in my setup—initially, I tried a high-gain screen, expecting a brighter picture. However, I quickly noticed the hotspots and narrow viewing angles made the experience frustrating for viewers sitting off-center. Switching to a medium gain, coupled with an ALR screen designed for ambient light, was a game-changer. It’s fascinating how subtle adjustments like mounting angle, calibration, and even room lighting can dramatically improve the overall picture quality.
One thing I’ve been considering is how future advancements in smart calibration might streamline these tweaks. Do you think automated systems that calibrate and adjust in real-time will become standard, especially for home theaters that aren’t professionally configured? Personally, I see it as a valuable tool to maintain consistency, particularly as equipment becomes more sophisticated. Would love to hear others’ experiences with automation—have you found it effective, or do you prefer manual calibration for finer control? Thanks for the insightful guide, very helpful for both newbies and seasoned enthusiasts alike.