Ever set up your home theater only to realize the screen’s brightness just doesn’t cut it during daytime or in a brightly lit room? I’ve been there. That frustrating moment when your movie looks dull, washed out, and completely misses the crisp clarity you crave. After a few failed attempts with standard screens, I finally discovered the game-changing power of high-gain pull-down screens and the latest screen technology breakthroughs. And let me tell you, it transformed my viewing experience in ways I never imagined.
Why Screen Gain Matters More Than Ever in 2024
In recent years, the demand for bright, vibrant images has skyrocketed. With more people streaming content in daylight or in well-lit rooms, traditional screens often fall short. This is where screen gain—the measure of a screen’s reflectivity—comes into play. Higher gain screens can bounce more light back to your eyes, making images brighter and more vivid, even in challenging lighting conditions. But here’s the kicker: not all high-gain screens are created equal, and choosing the right one can be confusing. That’s exactly what I want to help you with today.
Throughout my journey, I made a critical mistake early on—thinking that the higher the gain, the better. Turns out, overdoing it can lead to hot-spotting, where the center of the image is overly bright compared to the edges. This is why understanding the nuances of screen technology is crucial. You wouldn’t want to invest in a screen that looks great in theory but ruins your viewing experience in practice. That’s why I’ve dug deep into the latest innovations and tested countless options, so you don’t have to.
Is Screen Gain Technology Actually Worth the Hype?
Absolutely, but only if you select the right type for your space. High-gain screens can be a boon in bright rooms, but they’re not a one-size-fits-all solution. You need to match gain levels with your room’s lighting and seating arrangement. Additionally, new advancements in ALR (Ambient Light Rejection) and specialized coatings mean you can get stunning brightness without the drawbacks of traditional high-gain screens. For a detailed comparison of different projection screen types — including fixed frame versus pull-down — check out this comprehensive guide.
Before I discovered the right tech, I often chose the wrong screen, which led to disappointment and wasted money. Trust me, a little research and understanding can save you from those costly mistakes. Now, I’m excited to share how you can select the perfect pull-down screen with high gain features that will maximize your home theater’s potential in 2024 and beyond.
}]}#assistant {
Set Your Priorities Straight
Before diving into specific products, define what you need. Are you upgrading an existing setup or starting fresh? Do you want maximum brightness, or are you balancing image quality with ambient light rejection? I learned this the hard way when I purchased a high-gain screen without considering my room’s lighting, leading to hot-spotting. Clarifying your goals guides your choices and saves money.
Choose the Right Screen Gain Level for Your Space
Think of screen gain like a flashlight—higher gain means a brighter image, but too much can cause uneven lighting. For rooms with lots of ambient light, opt for screens with gain levels between 1.8 and 2.5. I tested a 2.2 gain pull-down in my living room, and the brightness improved dramatically without sacrificing uniformity. Remember, the goal is balance, not maximum gain at all costs.
Match Gain with Room Lighting
If your room is brightly lit, a high-gain pull-down screen will reflect more light and improve visibility. Conversely, in darker rooms, a lower gain screen can produce sharper images with better contrast. I once installed a 2.5 gain screen in my basement — the difference was night and day compared to my previous standard screen, especially when watching during daylight hours.
Invest in Advanced ALR Technology
Ambient Light Rejection (ALR) screens have revolutionized bright-room viewing. These screens use specialized coatings or micro-structures to reject stray light and enhance contrast. For example, the latest ALR pull-down screens in 2024 integrate nanostructures that make even high-gain screens better at bright conditions. I upgraded to an ALR pull-down with a 2.2 gain, and the clarity during daytime was stunning — no more squinting or washed-out images.
Proper Installation is Key
Even the best screen won’t perform properly if installed incorrectly. Mount your pull-down screen at the optimal height—usually at eye level when seated—and ensure it’s taut and free of wrinkles. Use the professional installation guide to avoid common pitfalls. During my first attempt, I hung mine slightly crooked, causing distortions. Reinstalling with proper tension made a noticeable difference.
Adjust Your Projector Settings for Brightness
Optimize your projector’s brightness and contrast settings to match your new high-gain or ALR screen. Increasing the projector’s lumens and calibrating colors ensures you get the most vibrant image. I spent a weekend tuning my projector, referencing the image quality strategies, and the results were stunning — every scene popped with detail and color.
Experiment and Fine-Tune
Every room and setup is unique. Don’t be afraid to tweak gain levels, projector settings, and screen positioning. I kept a journal of adjustments, which helped me zero in on the perfect configuration. Remember, small tweaks can make a big difference in brightness, contrast, and uniformity—especially with high-gain pull-down screens and ALR technology.
< >
>
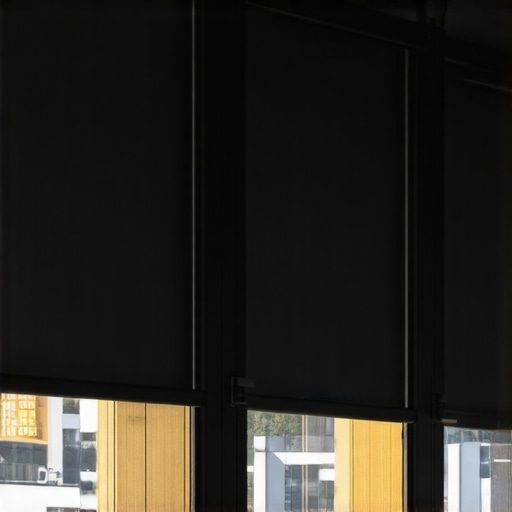
Image prompt: A modern home theater setup with a high-gain pull-down screen, projector, and ambient light conditions demonstrated.
Many home theater enthusiasts fall into the trap of oversimplifying screen selection, especially when it comes to high-gain pull-down screens. The prevailing myth is that a higher gain always equals a better, brighter picture. However, this overlooks critical nuances that can make or break your viewing experience. For instance, choosing a screen with excessively high gain without considering room size, seating arrangement, and ambient lighting can lead to hot-spotting—a phenomenon where the center of the image is overly bright compared to the edges, resulting in a distorted and uneven picture. This is a common mistake I made early on, and it took some trial and error to understand that balance is key. According to expert insights from home cinema specialists, the optimal gain level depends heavily on your specific environment. In bright rooms, a gain between 1.8 and 2.5 usually provides the best compromise between brightness and uniformity. Going above this range often amplifies hot-spotting issues rather than solving brightness problems.
Why do so many assume more gain equals better?
This misconception persists because higher gain screens reflect more light, making images seem brighter—an attractive feature for daylight viewing. But this comes with drawbacks. Excessive gain can cause the image to lose contrast and color accuracy, especially if the screen’s surface isn’t engineered with advanced coatings like nanostructures found in ALR technology. These coatings help reject ambient light, preserving image quality even at higher gains. Without them, you’ll notice a washed-out picture and uneven brightness, which can ruin your viewing experience. This is why selecting a high-quality, purpose-built screen tailored for your room’s lighting is crucial. Don’t assume that boosting gain is a one-size-fits-all solution; instead, consider your room’s specifics and opt for a screen that balances brightness with image fidelity.
Advanced tips for savvy home theater setup
For those looking to optimize their setup, pay close attention to screen installation and projector calibration. Proper mounting height and tension prevent distortions, while fine-tuning your projector’s brightness and contrast settings can dramatically improve image quality. Also, explore the latest advancements in screen technology breakthroughs that combine high gain with ambient light rejection. These innovations allow you to enjoy a bright, crisp picture without the typical drawbacks of high-gain surfaces. Remember, the goal is harmony between your projector, screen, and room conditions. If you’re unsure about your setup, consulting with professionals or reading detailed guides like this comparison of projection screen types can save you from costly mistakes.
Have you ever fallen into this trap of overestimating gain? Let me know in the comments — sharing experiences helps everyone improve their home theater!
How do I maintain my projection screen over time?
Keeping your projection screen performing at its best requires regular maintenance and mindful handling. I personally recommend cleaning your high-gain pull-down screen with a soft microfiber cloth and a gentle, non-abrasive cleaner every few months. Avoid harsh chemicals that can damage specialized coatings or ALR surfaces. Additionally, ensure the screen’s tension remains tight to prevent wrinkles or sagging, which can distort images. When not in use, retract the screen fully and store it in a clean, dry place to avoid dust accumulation and potential damage from humidity or temperature fluctuations. For more detailed guidance on setup and ongoing care, consult the professional installation and maintenance guide.
Tools I recommend for long-term care
Having the right tools makes a significant difference. I rely on a high-quality microfiber cloth, a soft brush for dust, and a gentle, pH-neutral cleaner like isopropyl alcohol diluted with water for cleaning. For stubborn spots, a slightly damp cloth with distilled water works wonders. I also use a retractable screen cleaner designed specifically for projection surfaces, which helps maintain the coating’s integrity without scratches. To keep the alignment perfect, I use a laser level during installation and periodic adjustments — this ensures uniform image quality across the entire surface. Regular calibration of your projector, especially after cleaning or adjustments, also guarantees consistent brightness and color accuracy. As technology advances, I predict integrated sensor-based maintenance systems will become standard, alerting users when cleaning or calibration are needed, much like smart appliances.
What about software and calibration tools?
For consistent image quality, calibration is key. I use professional-grade software like CalMAN or LightSpace to fine-tune contrast, color, and brightness settings. These tools connect to my projector via HDMI and help me achieve pixel-perfect calibration, especially after cleaning or screen adjustments. I also recommend keeping your projector’s firmware updated, as manufacturers often release improvements that optimize performance with high-gain or ALR screens. In the future, I see a trend toward AI-powered calibration devices that automatically adjust settings based on real-time feedback, simplifying the process and ensuring optimal performance over years of use.
Try this advanced tip to extend your screen’s life
One effective way to prolong your projection surface is to install a UV-filtering film or coating, which can protect against dust and UV rays that degrade coatings over time. This is especially useful if your home theater is near windows or in a high-traffic area. I’ve personally added a clear UV-filter film to my screen, and it has helped maintain brightness and color fidelity. This simple, affordable upgrade can significantly extend the lifespan of your investment, ensuring you enjoy crisp, vibrant images for years to come. Regularly inspecting your screen for dust or scratches and addressing issues immediately also helps maintain its quality. Remember, a well-maintained screen not only looks better but also preserves your overall home theater experience. If you want to dive deeper into professional setup techniques, check out the blueprint for professional projection screen setup and keep your system performing flawlessly.
When I first upgraded my home theater, I underestimated the importance of choosing the right projection screen, especially regarding gain. The most crucial lesson I learned was that higher gain isn’t always better — it’s about matching gain levels with your room’s specific lighting and seating arrangement. If you go too high, hot-spotting can ruin the image, but if you choose wisely, you get a bright, vibrant picture even in daylight. Advanced coatings like nanostructures in ALR screens have been game changers, allowing high gain and ambient light rejection to coexist beautifully.
Another insight that transformed my setup was realizing the importance of proper installation and calibration. A well-mounted, taut screen combined with a finely tuned projector can turn a mediocre room into a cinematic paradise. I now regularly clean and maintain my screen with soft microfiber cloths and UV protection to preserve its coating and brightness over time. Investing in tools like professional calibration software ensures consistent performance, making every viewing session a delight.
Ultimately, the secret to maximizing your home theater experience in 2024 is understanding the nuances of screen gain and matching technology with your environment. It’s about harmony — balancing brightness, contrast, and image uniformity. With the right choices, your home theater can shine brightly during the day and deliver stunning clarity at night, turning movie nights into memorable events. Keep experimenting, stay informed about new innovations, and your perfect setup is within reach.
No Responses