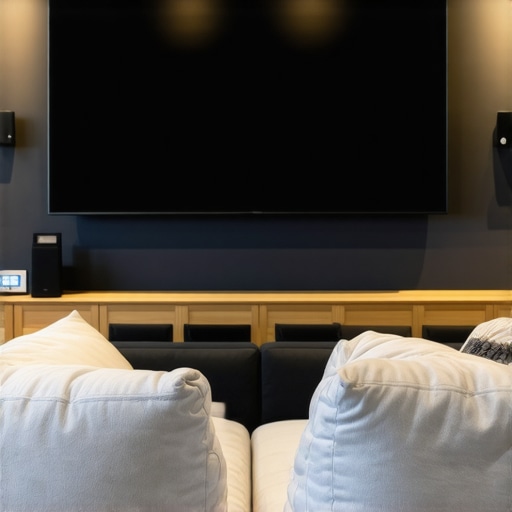
Have you ever settled into your cozy sofa, eager to enjoy a movie night, only to be greeted by washed-out images and glare ruining the experience? I’ve been there too. That frustrating moment when the bright afternoon sunlight hits your screen just right, turning your vibrant visuals into a dull blur. It’s like trying to watch TV through a foggy window. The realization hit me hard—my old projection screen just couldn’t handle my bright room anymore.
Decoding the Bright Room Challenge
That light infiltration isn’t just an annoyance; it fundamentally hampers your viewing quality. Traditional projection screens, especially those designed for dimly lit rooms, struggle to deliver sharp, vivid images when ambient light is high. That’s when I discovered that not all screens are created equal—some are specifically engineered to combat these bright conditions with advanced tech like Ambient Light Rejection (ALR) and high screen gain.
Is the Hype Over ALR and Fixed Frame Screens Justified?
At first, I was skeptical. The claims sounded too good to be true, and I wondered if investing in an ALR or fixed frame screen was just another marketing gimmick. I recall making the mistake of choosing a budget pull-down screen without considering its gain or ambient light handling—big mistake. The image was grainy and washed out, especially during daytime or in well-lit rooms. Learning from that, I dove into the latest breakthroughs in screen technology, like those highlighted on ALR advancements for 2025, which clarified the critical differences. Now, I understand that choosing the right screen makes all the difference in creating a true home theater experience that can shine even in bright environments.
Ready to banish the glare and boost your visuals? Let’s explore how to select the best projection screens for bright rooms in 2024, ensuring you get stunning images no matter the lighting conditions. If you’ve faced this problem, stick around. There’s a solution tailored for you, and I’m here to guide you through it with practical insights to help you make the right choice.
Select a Screen that Tackles Brightness
Start by assessing your room’s lighting conditions and understanding how different screen types handle ambient light. Opt for high-gain screens or those with Ambient Light Rejection (ALR) technology, which can reflect projected light directly to your eyes, minimizing glare. When I upgraded my setup, I chose a high-gain ALR screen based on reviews and testing, which immediately improved image clarity during daytime viewing. The key is to focus on screens designed specifically for bright environments, as they contain coatings or materials optimized to bounce light efficiently without washing out the image.
Match Your Screen Type to Your Space
Decide between a fixed frame or pull-down screen depending on your room layout and aesthetic preferences. Fixed frame screens offer a taut, flat surface, providing superior image sharpness, much like a perfectly stretched canvas. Pull-down screens are versatile and easier to retract, but they may introduce slight wrinkles or unevenness if not installed properly. In my experience, installing a fixed frame screen with proper attention to the mounting process yielded a crisp picture even in rooms with windows and strong ambient light, illustrating the importance of choosing the right mount and setup. Use this comparison guide to make an informed decision.
Optimize Screen Gain and Positioning
Screen gain measures how much light the surface reflects; higher gain screens (above 1.3) focus more light toward viewers, enhancing brightness but reducing viewing angles. Think of gain as a flashlight beam: high gain concentrates light directly at your eyes, which helps in bright rooms but can cause hotspotting. I installed a 1.4 gain screen, which significantly brightened my image without sacrificing clarity, thanks to careful positioning and angling. Remember, proper placement is crucial: position the screen perpendicular to your projector for even illumination. For detailed insights, consult this guide on screen gain.
Fine-Tune Your Projector Settings
Adjust your projector’s brightness and contrast to match the reflective qualities of your chosen screen. Increasing projector lumens ensures your image remains vivid without washout. I learned this through trial and error—first setting my projector to default, then gradually increasing brightness and fine-tuning contrast until the blacks and whites balanced out. Pairing a high-lumen projector with an appropriate screen gain creates a synergy that vastly improves visibility. Check out this resource for advanced calibration techniques.
Address Installation and Light Control
Securely mounting your screen using the proper hardware prevents sagging or warping—both of which degrade picture quality. Use a level during installation and follow a comprehensive installation guide to ensure accurate alignment. Additionally, controlling ambient light with curtains or blinds enhances performance—think of it as turning down the background noise so your audio or video stands out. I added blackout curtains to my room, which further improved visibility, emphasizing that light management is just as critical as the screen choice itself.
Leverage Technology Upgrades for the Future
Stay informed about latest innovations like the advancements in ALR technology highlighted for 2025. Upgrading your screen incrementally can yield better results, especially as new materials and coatings become available. For current recommendations, review this latest list of projection screens designed specifically for bright environments. Remember, combining the right technology with precise setup transforms your viewing experience, making every movie or game session visually stunning regardless of external lighting.
Debunking the Myths and Revealing the Hidden Nuances
One prevalent misconception is that all ALR (Ambient Light Rejection) screens are created equal. Many assume that investing in any ALR screen guarantees a vibrant, glare-free experience in bright rooms. However, the technology behind ALR is nuanced, involving various coatings, materials, and designs that influence performance significantly. According to industry experts, not all ALR screens handle ambient light effectively; some produce hotspots or reduce contrast, defeating their purpose. It’s essential to scrutinize the specific tech used—researching breakthrough innovations slated for 2025 can provide insights into what truly elevates performance.
Furthermore, many users overlook the importance of screen gain—assuming higher gain always means better brightness. In reality, excessive gain can lead to uneven images and hotspots, especially if the projector isn’t perfectly aligned. A balanced approach involves selecting a gain that complements your projector’s lumen output and room conditions. For example, a 1.4 gain screen often provides bright enough images without sacrificing uniformity, as highlighted in recent studies on screen gain optimization.
Regarding pull-down screens, the popular belief is that they are inferior to fixed frame options due to potential wrinkles and warping. While this can be true if installed improperly, high-quality motorized or manual pull-down screens with tensioned surfaces can match or surpass fixed frame screens in clarity and flatness. The choice largely depends on installation precision—a mistake many make by rushing setup or neglecting proper mounting techniques, which can degrade image quality over time. A comprehensive installation guide can help avoid this trap.
As for fixed frame screens, some assume their rigidity always guarantees superior quality. However, without considering material coatings and optical properties, a fixed frame might underperform in bright conditions compared to specialized ALR models. Upgrading to a fixed frame that incorporates advanced ALR tech, as outlined in expert guides, can deliver outstanding results even in challenging lighting environments.
Finally, in my experience, one common trap is believing that larger screens always mean better image quality. In fact, bigger screens require careful calibration, higher projector lumens, and precise placement to prevent loss of detail. This emphasizes the importance of understanding the interplay between screen size, gain, and projector capabilities—making informed decisions that go beyond basic specs.
Making the right choices in projection screen technology involves understanding these nuanced differences and avoiding assumptions based on common myths. For a detailed comparison and tips on optimizing your setup, consider consulting trusted resources or experts, like those available here. Stay vigilant: the key to a stunning home theater is mastering the details, not just trusting surface-level claims.
Have you ever fallen into this trap? Let me know in the comments!
Essential Tools to Maintain Your Projection Setup
Maintaining your home theater projection system requires more than just occasional cleaning; it involves precise calibration, monitoring, and using the right equipment to ensure consistent quality over time. One tool I highly recommend is a color calibration device like the X-Rite i1Display Pro, which allows you to accurately calibrate your projector and screen, ensuring color accuracy and contrast remain optimal. Regularly calibrating with this device helps preserve vibrant images and prevents color shifts that can occur with age or environmental changes.
Another critical piece of equipment is a light meter, such as the Sekonic L-308X-U, which enables you to measure ambient light levels and adjust your projector settings accordingly. Managing room lighting with accurate data ensures your images stay bright and clear, especially essential when dealing with high-gain or ALR screens that are sensitive to light conditions.
Investing in a good-quality microfiber cloth, like the AmazonBasics Microfiber Cleaning Cloth, helps keep your projection surface free of dust, fingerprints, and smudges. Dust buildup can significantly affect image sharpness and contrast, especially for fixed frame screens with a taut surface. Regular cleaning, coupled with gentle dusting, extends the lifespan of your screen and maintains its optical properties.
For ongoing adjustment, I use digital pattern generators like the Disney WOW and AVPro Edge Color Calibration Tools. These allow for precise image tests and fine-tuning of projector settings such as brightness, contrast, and color balance. Performing these calibrations every six months or after major environmental changes (like new window treatments or significant dust) helps sustain an ideal viewing experience.
How do I keep my projection setup performing over time?
Consistent maintenance hinges on routine calibration, cleaning, and environment control. Incorporate periodic calibration sessions with your colorimeter and light meter to adapt to seasonal lighting or room modifications. Keep your screens and projectors protected from dust and direct sunlight—using covers and blackout curtains where possible. Additionally, monitor projector lamp hours; replacing lamps before they reach their end-of-life prevents lumen drop and color shifts, ensuring long-term brightness and clarity. Technology advances suggest that in the near future, integrated sensor systems may automatically calibrate your setup, reducing manual upkeep. For now, adhering to regular calibration schedules and investing in reliable tools like these proven techniques will keep your system performing at its best.
For the meticulous homeowner, consider adding a dust-free environment or a dedicated projection room with controlled temperature and humidity. Such environments prevent fiber and material degradation, doubling the lifespan of your screen and projector components. Remember, consistent maintenance not only preserves image quality but also extends the overall life of your theater investment.
Don’t forget to check for updates on maintenance practices. Keeping tabs on latest industry advancements—like upcoming improvements in ALR tech discussed here—can give you an edge in optimizing your setup. Try setting a biannual calibration calendar, and you’ll notice how your system continues to deliver stunning visuals, room after room.
Lessons that Changed My Projection Game
- High gain isn’t a one-size-fits-all solution: I initially believed that the higher the gain, the better my screen would perform in bright rooms. It wasn’t until I experimented with a 1.4 gain ALR screen that I realized balance is key—too high, and hotspots appeared. Now, I understand that choosing the right gain depends on room lighting and projector lumens, not just a number.
- Not all ALR screens are created equal: My first purchase was based on marketing claims, but I ended up with disappointing washed-out images. It wasn’t until I researched the latest breakthroughs in ALR technology for 2025 that I found models with superior coatings and optical designs, dramatically improving daytime picture quality.
- Proper installation is the secret sauce: A beautiful screen won’t perform well if it’s sagging or misaligned. I learned to use a level and follow detailed installation guides to ensure the surface remained taut. This simple step can make or break your image clarity, especially in bright environments.
- Room light control goes hand-in-hand with screen choice: Even the best screen can’t outperform good ambient lighting management. Blackout curtains transformed my viewing experience, proving that combining technology and environment control maximizes brightness and contrast.
- Calibration is an ongoing journey: Regularly using tools like colorimeters and light meters keeps my setup performing at peak levels. It’s worth investing time and equipment for consistently stunning visuals, especially when dealing with high-gain or ALR screens designed for bright rooms.
Tools and Resources That Elevated My Home Theater
- Latest ALR innovations for 2025: Staying updated ensures I choose screens with cutting-edge coatings and optical designs that handle ambient light better than ever.
- Installation guides: Precise mounting makes a noticeable difference in picture quality, especially for fixed frame screens in bright rooms.
- Screen gain tips: Learning how to match gain with projector lumen output helps prevent hotspots and uneven brightness, a crucial factor for bright-room setups.
- Choosing the right screen type: Whether fixed frame or pull-down, understanding their advantages ensures your setup fits your space and lighting conditions.
Take Your Projection to the Next Level—It’s Within Reach
Designing a projection system that excels in bright environments isn’t just about buying the fanciest screen; it’s about understanding the synergy between technology, environment, and setup. By applying these insights and continuously experimenting, you’ll transform your home theater into a space that defies ambient light constraints. Remember, every tweak and upgrade brings you closer to cinematic perfection, encouraging you to push beyond perceived limitations. Embrace the journey—your brightest, clearest home theater awaits.
What feature or tip from this journey resonated most with you? Share your experiences or ask your questions below, and let’s elevate our projection game together!
One Response
This post offers a really comprehensive breakdown of what to consider when upgrading your projection setup for bright rooms. I recently replaced my old screen with a high-gain ALR model after realizing how much ambient light was ruining my movie nights. The difference was night and day—images are now much clearer during the daytime, and glare is almost nonexistent. What I’ve learned from my experience is that proper installation and room light management are just as crucial as choosing the right screen tech. I especially appreciate the emphasis on balancing gain and projector lumens, as I used to assume that higher gain always meant better brightness. Have others found that a certain gain level works best for their room size and lighting? I’m curious about different setups’ real-world outcomes. Adjusting projector settings and controlling ambient light have really made a huge impact for me, but I wonder if there are other proven tips for optimizing brightness without sacrificing picture quality?