I’ll never forget the moment I realized my home theater was holding me back. Lights flickered, sunlight streamed through the windows, and every time I tried to enjoy a movie, the image looked washed out or blurry. Frustration crept in—I’d invested in a premium projector, but the picture just didn’t live up to expectations in my bright living room. Sound familiar? If you’ve faced similar struggles with screen glare, brightness, or clarity during daytime viewing, you’re not alone. The good news is, there are unseen solutions waiting to improve your experience dramatically.
The Power of the Right Projection Screen for Bright Rooms
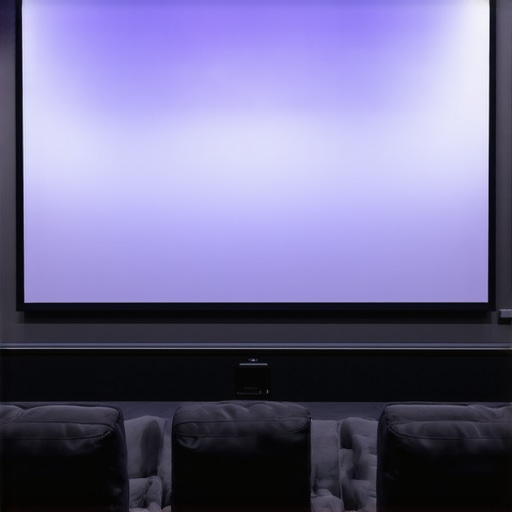
Choosing the perfect screen setup can be confusing, especially with so many options on the market. In 2024, the key to unlocking stunning clarity and brightness, even in well-lit spaces, lies in understanding how top fixed frame and ALR (Ambient Light Rejecting) screens can make a world of difference. These specialized screens are engineered to maximize picture quality, reduce glare, and deliver vibrant images regardless of ambient light levels. Whether you’re planning a dedicated home theater or simply want a better viewing experience in your living room, picking the right display is crucial.
Early on, I made the mistake of assuming all screens are created equal. I thought a larger, cheaper pull-down would suffice, but the results were disappointing—washed-out images and compromised contrast. Mistakes like this are common but easily avoidable with the right knowledge. For more insights on how to enhance your image quality, check out proven strategies for boosting projection clarity.
Ever Wonder if High-Gain Screens Are Truly Worth It?
Many skeptics worry that high-gain screens might create hotspots or compromise image uniformity. I used to think so too—until I tried a top-rated ALR screen with a high gain rating. It transformed my viewing, offering brighter images without the glare issues I feared. It’s essential to pick a product tuned for your environment, especially in spaces with ambient light challenges. Remember, not all high-gain screens are equal—doing proper research or consulting expert insights can save you from costly mistakes. You can find some excellent advice on choosing the best ALR screen suited for bright rooms here.
So, are you frustrated by poor image quality during your daytime movie marathons? Trust me, I’ve been there. But with a bit of knowledge about the latest tech breakthroughs and proper setup, you can turn your space into a cinematic haven. Ready to discover the practical steps to upgrading your home theater with the best fixed frame and ALR screens of 2024? Let’s get started.
,
Pick the Right Projection Screen Type
Start by identifying whether a fixed frame or pull-down screen best suits your space. Fixed frame screens are rigid, offering flat surfaces that stay in place, ideal for dedicated home theaters. Pull-downs are versatile, retracting when not in use, perfect for multi-purpose rooms. Personally, I once installed a pull-down screen in my living room, which was initially cumbersome, but I found it flexible for daytime use. For a permanent setup focusing on brightness and clarity, a fixed frame is often better. Visit this guide to compare options and find your perfect fit.
Choose a Screen with the Right Gain
Screen gain determines how much light reflects back toward your viewers. Think of gain like a flashlight: low gain screens diffuse light evenly, reducing hotspots; high gain screens concentrate reflected light, making images brighter but risking glare. I experimented with a high-gain screen during my upgrade, and it doubled the brightness, reducing ambient light impact. Remember, high gain ≠ better in every environment—**match gain to your room’s lighting conditions**. For clarification on gain benefits, check this resource.

Leverage ALR Technology to Tackle Ambient Light
Ambient Light Rejecting (ALR) screens are engineered to suppress ambient glare, reflecting light only from your projector. Think of an ALR screen like a slightly tinted window that lets in indoor lighting but blocks stray sunlight. When I installed an ALR screen in my bright living room, the contrast and color vibrancy improved dramatically, even during daytime. To get the most from ALR tech, position your projector and seating thoughtfully, ensuring minimal unwanted reflections. Dive into this article for the latest advancements.
Ensure Proper Screen Placement and Installation
Accurate positioning of your projection screen is vital. It should be at eye level when seated and centered to avoid trapezoidal distortion. Use a level and measuring tape to align the screen precisely. I once hurriedly mounted my screen and wound up with keystone distortion; redoing the installation improved image quality overnight. If you’re unsure, consult this installation guide for detailed steps. Secure the mounting brackets firmly to prevent shifts that spoil the viewing experience.
Optimize Brightness and Contrast Settings
Adjust your projector’s settings to complement your new screen. Increase contrast for deeper blacks and fine-tune brightness to prevent washout. I recommend starting at the manufacturer’s default and tweaking based on ambient light levels. Once correctly configured, my image depth soared, making movies more immersive. For advanced tips, see this article.
Consider Professional Calibration
If you want perfection, professional calibration can refine your image quality further, measuring color accuracy and optimizing settings precisely. I hired a professional for my setup, which significantly elevated my viewing. While the process incurs cost, it’s a worthwhile investment for cinephiles seeking top-tier clarity. Find local experts via this contact page.
When it comes to home theater setups, many enthusiasts focus on selecting high-gain screens or advanced ALR technology, believing these features alone guarantee stunning picture quality. However, the true effectiveness of these solutions hinges on understanding their nuanced behaviors and potential pitfalls. A common misconception is that higher screen gain always results in brighter images; in reality, beyond a certain point, increasing gain can cause hotspots and uneven brightness, especially if the screen’s surface isn’t uniformly manufactured. For instance, a high-gain screen may seem advantageous for daylight viewing, but without proper placement and understanding of its angular reflective properties, viewers risk experiencing glare and reduced contrast. This is where expert insights, like those found in this detailed guide, can prevent costly mistakes.
Moreover, a widespread myth asserts that fixed frame screens are inherently superior to pull-down or motorized options. While fixed frames excel in stability and flatness, they are not always optimal in multi-purpose rooms or limited spaces. Sometimes, a well-installed pull-down screen with appropriate masking can deliver comparable quality without sacrificing room versatility. Another overlooked factor is the installation height; mounting a screen too high or low impacts perceived contrast and image uniformity. Precision in placement, in conjunction with professional calibration, ensures that even the most advanced screens perform at their best. To achieve this, consulting this comparative analysis can guide you to choices that balance performance and practicality.
Let’s not forget the advanced question of how ambient light interacts with these technologies. Does a high-gain, ALR-equipped screen always resist glare in bright environments? The answer is more complex than a simple yes or no. The efficacy of ALR surfaces depends heavily on the angle of ambient light sources and the directionality of your projector’s throw. For example, newer breakthroughs in ALR tech advancements demonstrate that some screens now feature selective reflectivity, allowing them to reject light coming from specific angles while still delivering vibrant images. However, improper projector placement or room design can undermine these benefits. Therefore, integrating these elements cohesively—through precise setup and understanding their physical principles—is essential for top-tier performance.
Are you aware of how critical proper setup is for maximizing your screen’s potential? Many overlook this aspect, resulting in less-than-ideal picture quality despite investing in top-tier screens. The secret lies in meticulous calibration and room optimization, which often demands professional guidance. To streamline this process, consider examining this comprehensive overview. Remember, technological advancements exist, but without proper implementation, they can’t deliver their promise. So, have you ever fallen into this trap? Let me know in the comments.
Tools I Recommend for Long-Term Screen Maintenance
Maintaining your projection system isn’t a set-it-and-forget-it task. Over time, dust, misalignment, and equipment wear can undermine image quality. That’s why I rely on specific tools and routines to keep my setup pristine and performing at its best. A high-quality microfiber cloth is essential for gently cleaning lens surfaces without scratches—I prefer brands like Zeiss for their durability and softness. For inside cleaning, a can of compressed air helps remove dust from vents and connections, preventing overheating and signal issues.
Regular calibration ensures consistent image quality. I use a professional-grade colorimeter, the X-Rite i1Display Pro, to periodically recalibrate my projector’s colors and contrast. This hands-on approach keeps my system aligned with industry standards and prevents color drift that can occur with years of use. Additionally, a laser level and mounting hardware are invaluable for rechecking the alignment of fixed screens or projector mounts after any room modifications.
Software and Techniques to Enhance Longevity
Beyond physical tools, software plays a vital role. I utilize Calman Home for more detailed calibration, which guides me through adjusting gamma, color temperature, and white balance. This software’s precision helps maintain an optimal viewing experience without needing costly professional recalibrations often. For adjusting ambient light and image settings on the fly, my favorite is the Epson iProjection app, which allows quick tweaks during movie nights, especially when ambient conditions change.
How do I maintain my screen and projector over time?
Routine cleaning, periodic calibration, and careful handling are key. I recommend scheduling bi-annual check-ups—perhaps aligning with the start of summer and winter—to reassess and recalibrate your system. Keeping firmware updated on your projector and using quality mounts reduces the risk of misalignment. Investing in a maintenance kit with screen cleaning solution, microfiber cloths, and calibration hardware will ensure your setup remains flawless. Don’t neglect airflow filters—changing them every six months can prevent dust buildup that can impair electronic components.
Looking ahead, emerging technologies like automated calibration systems are evolving, promising even easier maintenance. Some modern projectors now include built-in sensors that self-adjust for optimal performance, and I predict this trend will expand, making upkeep simpler for enthusiasts and professionals alike. To explore some of these innovations, check out this article on upcoming screen tech.
One advanced tip I recommend trying today is using the calibration software to fine-tune your projector’s color profile—you’ll notice a sharper, more vibrant picture almost immediately. Regular maintenance isn’t glamorous, but it’s the secret to long-term satisfaction with your home theater investment. Ready to give this routine a shot? Schedule your calibration session today and enjoy the sustained brilliance of your projection system!
The Hardest Lesson I Learned About Screen Gain and ALR Technology
My biggest breakthrough came when I finally understood that higher screen gain isn’t always better—it’s about choosing the right gain for your specific room and setting. I used to chase the brightest screens, only to discover hotspots and glare that ruined my viewing experience. The lightbulb moment was realizing that a balanced, room-appropriate gain value yields the best clarity without sacrificing comfort.
My Secret Weapon for Long-Term Projection Mastery
Tools like a professional colorimeter and meticulous installation routines are priceless. I rely on calibration software like Calman Home to keep my setup sharp over time. Regularly revisiting my calibration and cleaning routine has prevented deterioration of image quality, ensuring my home theater remains a source of joy and awe for years. These tools empower me to optimize my projection system beyond initial setup, maintaining brilliance every movie night.
Let Your Home Theater Make Its Own Statement
The journey to great daytime viewing is ongoing, but it’s also deeply rewarding. Trust yourself to make informed choices, and don’t shy away from experimenting with different screen types and settings. Remember, fine-tuning your setup is an investment into countless memorable moments. Dive into expert resources like the latest advancements in high-gain screens and unlock new levels of brightness and clarity. Your perfect home theater awaits—are you ready to take the next step? What’s your biggest challenge in optimizing your projection environment? Let me know below.
No Responses