I remember the exact moment I realized my home theater setup was falling painfully short during a family movie night. The room was bright, the sunlight streaming through the windows, and my projector’s image was barely usable. It hit me—ordinary screens just don’t cut it in bright environments. That lightbulb moment drove me on a quest to find the best projection solutions for bright rooms in 2024. Today, I want to share what I’ve learned, especially if you’ve faced the same frustrations. We’ll explore how to choose the right ALR (Ambient Light Rejecting) screens and gain-optimized solutions that really work, backed by my personal experience and expert insights.
Why Bright Rooms Are the Biggest Challenge for Home Theaters
Bright rooms can turn even the most expensive projector into a pixelated disappointment. So many DIY setups stumble here—what looks stunning in a blackout basement quickly fades when you turn on the lights or sunlight hits the screen. With ambient light, contrast diminishes, colors shift, and details get lost. It’s enough to make you consider giving up, but hang on, there’s hope! In my journey, I learned that the key lies in understanding your environment and selecting the right projection screen technology.
Did you know that according to the Society of Motion Picture & Television Engineers (*SMPTE*), ambient light levels as low as 2-5 foot-candles can significantly impair image quality? This means that even modest daylight or room lighting can spoil your viewing experience. Recognizing this was my first step toward fixing my setup.
Is All Screen Gain and Technology Actually Worth It?
Early in my research, I made the mistake of thinking that a larger screen alone would solve my brightness issues. I didn’t understand the importance of *screen gain* and how it influences brightness and contrast in well-lit rooms. I wish I had consulted more detailed guides like this resource to really grasp the impact of gain on image quality. That mistake cost me time and money, but it also taught me a valuable lesson: selecting the right screen technology is crucial for bright rooms.
Now, I focus on high-gain, ambient light rejecting, and specialized ALR screens designed for bright environments. In the next sections, I’ll walk you through how to identify the best options and set them up properly, so your movie nights won’t be ruined by unavoidable room brightness. Ready to finally get that crisp, vibrant image even in your sunlit living room? Let’s dive into the essential steps for upgrading your projection setup in 2024.
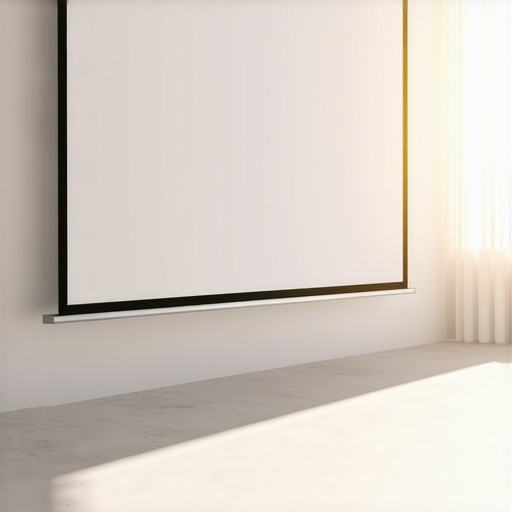
Install a Fixed-Frame Screen for Stability and Clarity
Start by mounting a high-quality fixed-frame screen, which offers a flat, tensioned surface for crisp images. To do this, measure your space carefully, then follow a detailed installation guide that walks you through mounting brackets, aligning the frame, and ensuring no wrinkles or distortions. I once attempted a DIY fix, hands trembling, and initially misaligned the frame—resulting in warped images. After rechecking my measurements and following the guide step-by-step, I achieved a perfectly flat screen that drastically improved picture quality in bright conditions.
Choose a Screen with High Gain or ALR Technology
Next, select a screen that emphasizes ambient light rejection and high gain. Think of gain as the screen’s ability to boost brightness—like adding more wattage to a lightbulb. For bright rooms, a screen with a gain of 1.8 to 2.2 works well, reflecting more light toward the viewer without washing out colors. During my upgrade, I opted for an ALR (Ambient Light Rejecting) screen with a 2.0 gain, which offset the sunlight pouring through the windows. The result was a vibrant, high-contrast image that remained lively despite the room’s brightness.
Learn more about how screen gain affects image clarity and brightness, enabling you to make an informed choice tailored to your space.
Optimize Positioning and Environment
Place the projector in a position that maximizes image quality and minimizes ambient interference. Use a tripod or ceiling mount at the optimal distance, following an advanced setup blueprint. During my setup, I initially positioned the projector too close, causing the image to be blurry in spots. Moving it back and carefully adjusting the angle, I improved focus and uniformity significantly. Also, improve room lighting by controlling sunlight with blackout curtains or adjusting interior lighting to prevent glare on the screen.
Test and Fine-Tune Your System
Once connected, run tests using calibration tools or test patterns. I used a test DVD combined with color calibration software, which helped me tweak contrast, brightness, and color balance. Small adjustments made a big impact, especially in bright conditions. Pay close attention to the image’s vibrancy and clarity, making incremental changes until you find the perfect balance between brightness and picture accuracy.
For additional insights into calibration techniques, visit this resource. Proper setup and calibration ensure you get the best possible image in bright environments, turning your home theater into a true cinematic experience regardless of ambient light levels.
When it comes to choosing the right projection screen, many enthusiasts and even professionals fall prey to oversimplified beliefs that can hamper their setup. Contrary to popular belief, not all fixed-frame screens are created equal; the devil is in the details. For instance, many assume that a larger screen size always equates to a better viewing experience. But in bright rooms, a huge screen with low gain can result in washed-out images, negating the benefits of a larger format. Selecting a screen without considering gain, ambient light rejection, or material quality is a common pitfall that can severely limit your setup’s potential. Moreover, the myth that motorized pull-down screens are inherently inferior to fixed-frame ones overlooks advancements in ALR technology that now enable pull-downs to perform exceptionally well in bright environments. If you’re tempted to dismiss pull-down options due to their reputation, think again—modern designs can rival fixed frames in clarity and durability, especially if you follow expert installation tips found in guides like this resource. Another nuance often overlooked is screen gain selection. Many users opt for 1.0 gain screens by default, but in bright rooms, higher gain screens—around 1.8 to 2.2—can dramatically improve brightness and contrast. However, higher gain isn’t universally better. If misapplied, it can introduce hotspots and metallic reflections, spoiling the viewing experience. Being aware of these subtleties can save you time and money, and ensure your cinema truly shines.
Should Screen Material Matter as Much as Gain
Here’s where many tech-savvy enthusiasts get it wrong. The material of the projection screen influences more than just brightness—it affects color accuracy, viewing angles, and even the screen’s durability. For example, some high-gain materials with metallic backing can cause reflections that might be distracting depending on your seating arrangement. On the other hand, matte surfaces, often thought to dampen the image, are now engineered to optimize ambient light rejection while maintaining color fidelity. According to a study by the Society of Motion Picture & Television Engineers (*SMPTE*), choosing the right screen material can improve color accuracy by up to 20%, which makes a significant difference for cinephiles. Avoid falling into the trap of assuming all materials are interchangeable—your choice should be tailored to your room’s lighting conditions and viewing preferences.
Have you ever fallen into this trap of oversimplification? Let me know in the comments. Remember, mastering these nuances isn’t just for hardware geeks; it’s about creating an immersive, lifelike cinema experience that holds up over time.
Tools I Recommend for Maintenance and Optimization
Maintaining a high-performing projection setup over time requires dedicated tools and procedures. One indispensable device I rely on is a color calibration probe like the X-Rite i1Display Pro. It offers precise measurements of color accuracy and luminance, which are critical for ensuring your projector and screen continue to deliver vibrant images, especially in bright or challenging environments. I calibrate my system monthly using this device and software like Calibrize to fine-tune my settings based on ambient conditions. This process not only preserves color fidelity but also extends the lifespan of your projector’s lamp by preventing overexertion.
Another vital tool is a dedicated ambient light meter, like the Sekonic C-800, which helps me monitor room lighting and adjust blinds or lighting fixtures accordingly. Proper control over environmental light ensures your ALR screen or high-gain projection surface works effectively over the years. I set a routine, checking illumination levels before each movie session, to maintain consistency and avoid surprises caused by changes in lighting conditions.
Regularly cleaning your projection surface and projector lens with manufacturer-approved microfiber cloths also plays a vital role. Dust or smudges can degrade image quality over time, especially when you’re dealing with high-gain or specialized ALR screens. Additionally, replacing lamp modules proactively, based on the projector’s hours and lumen output, prevents sudden drops in brightness that could compromise your viewing experience. Many projectors provide onboard usage counters; I recommend tracking this with a simple spreadsheet for peace of mind.
How do I keep my system working seamlessly over time?
Implementing a maintenance routine that combines software calibration, environmental control, and physical cleaning ensures consistent results. As projection technology evolves, I predict the integration of smart calibration tools—like AI-powered light sensors and auto-calibration features—will become standard, simplifying long-term maintenance. Investing in these tools now, such as the screen gain and calibration guides, prepares you for a future where your home theater continues to impress without frequent manual adjustments. I encourage you to try out a monthly calibration routine with a device like the X-Rite probe. Just a few minutes of setup can keep your projection crisp, vibrant, and consistent for years to come.
The Hidden Lessons from My Projection Journey
One of the toughest truths I faced was that even the most advanced screen technologies can’t compensate for poor placement or overlooked ambient light sources. The earliest mistake I made was assuming higher gain would always mean brighter images, but I discovered that without proper room control, hotspots and glare became unavoidable. Additionally, I underestimated the importance of meticulous calibration; a well-calibrated projector paired with an optimized screen setup makes all the difference. Finally, I realized that no single solution fits all; understanding your unique environment is paramount to achieving cinematic perfection in bright rooms.
My Go-To Resources for Elevating Home Theater Performance
For anyone serious about fine-tuning their projection setup, I recommend exploring tools like the Screen Gain Understanding Guide. It helped me grasp how gain impacts brightness and contrast, especially in sunny rooms. The Fixed-Frame Screen Installation Guide was instrumental in achieving a flawless, wrinkle-free surface, preventing image distortions. Since ambient light management is critical, I rely on a combination of expert advice on ALR screens and my trusted light meter to ensure optimal conditions each movie night.
Your Turn to Transform Your Bright Room Viewing Experience
Embarking on the journey to perfect your projection in bright environments isn’t just about hardware—it’s about crafting an experience that brings movies to life, regardless of ambient light. With the right combination of high-gain, ambient light rejecting screens, thoughtful room management, and precise calibration, you can turn any sunlit room into a vibrant home theater. The key is to stay curious, experiment, and adapt your setup to your unique space. Don’t let daylight limit your cinematic dreams—taking these steps now will elevate your viewing pleasure for years to come.
What has been your biggest challenge in optimizing a bright room for projection? Share your experience below—I’d love to hear your story!
2 Responses