I vividly remember the moment I realized my home theater setup wasn’t living up to its potential. The picture was dull, colors lacked vibrancy, and on-screen details seemed lost in a haze. Frustration mounted as I fiddled with settings, convinced I was missing something obvious. Then, it hit me—my choice of projection screen and its characteristics might be the missing puzzle piece.
Deciding to upgrade my screen was no small decision. I dove into research, learning about screen gains and fixed frame benefits, and discovered how critical they are to achieving that crisp, immersive quality we all crave in our home theaters. This journey transformed not just my setup but my understanding of what separates a good home theater from a truly spectacular one.
Have you faced similar struggles, feeling your images fall flat despite investing in a high-quality projector? If so, you’re far from alone. Many enthusiasts underestimate how essential the right screen properties are; even the best projectors can underperform if paired with the wrong screen technology.
Let’s explore what I learned through personal trial and error about top projection screen gains and why fixed frame benefits can elevate your viewing experience beyond expectations.
Why Picking the Right Screen Elevates Your Home Theater Game
Choosing the perfect projection screen is more than just a surface to project onto—it’s a critical component that determines brightness, contrast, and color accuracy. A well-chosen screen amplifies your projector’s capabilities, transforming a decent setup into a stunning visual experience.
Early on, I made the mistake of assuming all screens are created equal. I went for a basic pull-down model, thinking it was a budget-friendly choice. But after some research, I learned that fixed frame screens offer advantages like tautness and better edge-to-edge focus, which significantly enhances picture sharpness. Pairing that with the right gain level—an aspect I initially overlooked—can make or break your room’s brightness and clarity.
High-gain screens, especially those with ALR (Ambient Light Rejection) technology, are designed to combat ambient light issues common in bright rooms—a feature I wish I had appreciated sooner. To ensure I was making an educated choice, I looked into resources like [this comprehensive guide](https://screens.homecinemaessentials.com/proven-strategies-for-enhancing-image-quality-with-projection-screens), which helped me understand how screen gain impacts image quality.
Getting these details right has a profound effect on your overall viewing pleasure. Whether you’re watching movies, sports, or gaming, the clarity and vibrancy provided by the correct screen setup will be immediately noticeable.
Finally, I want to emphasize that unexpected mistakes can happen even to seasoned hobbyists. I once installed a screen that was too reflective for my room, creating glare issues I hadn’t foreseen. That taught me the importance of understanding room conditions and matching your screen technology accordingly. For more insights, I recommend reviewing [this expert tips article](https://screens.homecinemaessentials.com/choosing-the-best-alr-screen-insights-tips).
In the next sections, I’ll share practical steps that helped me select the right projection screen gain and the benefits of fixed frame designs, so you can avoid common pitfalls and make informed decisions for your home theater upgrade.
Assess Room Conditions and Lighting
Start by evaluating your room’s ambient light levels. Bright rooms demand specialized screens; if sunlight or indoor lighting can’t be controlled, opt for high-gain or ALR (Ambient Light Rejection) screens that reject ambient light and boost contrast. I once measured my living room’s light with a lux meter during the day, revealing the need for a high-gain screen to prevent washed-out images. Installing window coverings significantly improved picture clarity, highlighting the importance of room assessment.
Identify Your Viewing Priorities
Decide if brightness, contrast, or color accuracy matters most. For vivid visuals in daylight, a high-gain or ALR screen can enhance brightness without sacrificing contrast. Conversely, for controlled lighting environments, a standard matte screen might suffice. I experimented with different screens in my setup, swapping between matte and high-gain options, and noticed that my preference shifted towards high-gain for daytime viewing, ensuring vibrant colors even with ambient light.
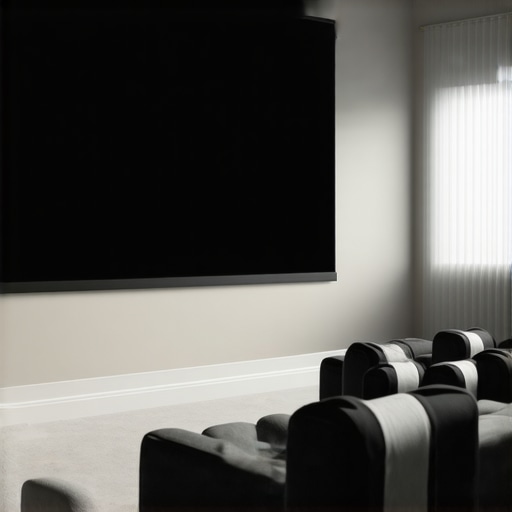
Choose Between Fixed Frame and Pull-Down
Fixed frame screens are rigid, resulting in a taut surface that produces sharper images and less glare. Pull-down screens are versatile and easier to hide when not in use but might sag over time, affecting image quality. I installed a fixed frame screen guided by this comparison article, which clarified that for a dedicated theater, fixed frames optimize image focus and consistency.

Visual comparison of fixed frame and pull-down screens highlighting shape and tautness.
Optimize Screen Gain for Brightness and Clarity
Screen gain indicates how much light the surface reflects. Higher gain translates to brighter images, ideal for bright rooms. However, excessively high gain can cause hotspots and reduce viewing angles. When I tested a 2.8 gain screen in my space, colors appeared vivid, but I noticed light falloff at the edges. Reading this gain guide helped me select an optimal 1.8 gain screen that balanced brightness with uniformity.
Embrace the Benefits of Fixed Frame Installation
Proper installation ensures the screen remains taut and aligned, preventing image distortion. Use a level and secure mounting brackets to avoid wrinkles or sagging. During my own setup, I followed this installation guide and achieved a perfectly flat screen, which instantly improved focus and contrast. Remember, a well-installed fixed frame maximizes your projector’s performance and enhances picture sharpness.
Experiment and Fine-Tune for Perfect Results
After choosing your screen type and gain, calibrate your projector’s settings, such as contrast, brightness, and color profiles, to match your screen’s characteristics. I spent evenings adjusting my setup, and even small tweaks made significant visual differences. Regularly reviewing this setup blueprint helped me understand how to dial in optimal picture quality. Don’t be afraid to try different configurations—each room and preference is unique.
While many believe that selecting the right screen type or gain is a straightforward decision, the reality is more complex and full of subtle pitfalls that can undermine your visual experience. **Contrary to popular belief, higher screen gain doesn’t always equate to better brightness or contrast.** In fact, excessive gain can lead to hotspots and narrow viewing angles, creating uneven image quality across your screen. For example, a common misconception is that a 2.8 gain screen will automatically improve daytime visibility, but without considering room-specific factors like ambient light distribution, it may cause glare or color washout. Understanding screen gain helps you navigate these intricacies to optimize your setup effectively. **Many enthusiasts assume fixed frame screens are inherently superior to pull-down varieties, but this is only true when installation is flawless; otherwise, sagging or misalignment can degrade image sharpness.** Precise mounting and tensioning are crucial, and neglecting these details often results in blurry edges or focus issues. Additionally, some believe that ALR (Ambient Light Rejection) screens are suitable for any environment, but their performance heavily depends on specific room lighting conditions and projector compatibility. Not every ALR screen is designed for ultra-short throw projectors or high-gain applications. For a nuanced comparison, see this detailed guide. Moreover, a common myth is that the greenest option—completely matte surfaces—always translates to better image quality. In reality, if your room is brightly lit, a well-chosen high-gain or ALR screen tailored to ambient conditions can dramatically enhance contrast and color vibrancy. The key lies in understanding the unique interplay between room lighting, projector lumens, and screen properties.
How do I match my screen gain with my projector’s lumen output to avoid washed-out images or insufficient brightness?
Expert insights suggest that calibrating projector brightness based on screen gain and ambient light levels creates balanced results. For instance, pairing a 1.8 gain screen in a moderately lit room with a projector capable of 2,500 lumens typically yields optimal contrast without sacrificing detail. Consulting professional setup blueprints can help you fine-tune this balance. To avoid the ‘oops’ trap of mismatched specs, always cross-reference your projector’s brightness with your screen’s gain and your room’s lighting conditions. Many home theater enthusiasts overlook this interplay, leading to dissatisfaction despite investing in top-tier equipment. By recognizing these hidden nuances and applying precise calibration, you maximize both image quality and viewing comfort. As you refine your setup, remember that minor adjustments—like repositioning your projector or adding window treatments—can significantly boost your experience. Have you ever fallen into this trap? Let me know in the comments.
Keep Your Screen in Top Shape with the Right Tools
Ensuring your projection screen remains flawless over time requires the right tools and a disciplined maintenance routine. I personally rely on a microfiber cloth and a gentle, non-abrasive cleaning solution to keep my fixed frame screen free of dust and smudges. Regularly wiping the surface prevents dust buildup, which can diminish image clarity. For more stubborn spots, using a soft brush attachment on a vacuum cleaner can help remove accumulated debris without risking damage.
Beyond cleaning, I use a moisture meter to monitor room humidity. Maintaining optimal humidity levels—ideally between 40-60%—prevents the material from warping or developing mold. Climate control is crucial, especially for long-term investments like ALR screens, which can be sensitive to environmental changes. In my setup, an air purifier with a hygrometer has been invaluable for maintaining stable conditions.
Tools I Recommend for Proper Alignment and Calibration
Achieving perfect image quality isn’t just about the screen; precise alignment and calibration are equally vital. I swear by a laser level and a digital caliper to ensure the projector’s lens is perfectly centered and aligned with the screen edges. Misalignment can cause focus issues and uneven brightness, undermining your investment. For color calibration, I use the CalMAN Ultimate software, which allows for detailed adjustments and color profiling. It has dramatically improved the vibrancy and contrast of my projected images, especially when paired with an advanced calibration disc like the Spears & Munsil HDR Benchmark.
Long-Term Results Require Consistent Care
Consistent maintenance extends the lifespan of your screen and preserves image integrity. Periodic recalibration of your projector, especially after hardware changes or updates, ensures consistent performance. Additionally, inspecting mounting brackets and tensioning systems for fixed frame screens prevents sagging—an issue I encountered when I ignored early signs of slack. Implementing routine checks every six months helps catch potential issues early, saving time and money in the long run.
How do I maintain fixed frame and projection screens over time?
Regular cleaning with soft cloths and appropriate cleaning solutions keeps the surface dust-free, while environmental controls like humidity and temperature stabilizers prevent material degradation. Proper alignment tools, such as laser levels and calibration software, help maintain focus and color accuracy. For fixed frame installations, periodic tensioning adjustments and inspections of mounting hardware are essential. Consider setting reminders to perform these checks, especially after major room modifications or projector upgrades. I’ve found that a proactive approach with dedicated tools like a hygrometer and calibration equipment significantly extends your screen’s life and keeps your image quality consistently superb. Start by integrating a digital caliper and a calibration disc into your maintenance routine—your future self will thank you! For more detailed guidance on calibration techniques, visit this comprehensive setup blueprint.
Throughout my journey, I realized that the most overlooked yet impactful aspect of home theater setups is often the projection screen itself. Investing in top-tier projectors matters, but pairing them with the correct screen technology—the right gain, fixed frame stability, and ambient light rejection—can be the game-changer. My biggest lightbulb moment? Understanding that optimizing these elements isn’t just about technical specs; it’s about creating an immersive, vibrant experience tailored to your unique space.
If you’re serious about transforming your home theater, remember that minor details—like choosing the correct gain level or ensuring your fixed frame remains taut—have outsized effects on picture quality. As I experimented, I uncovered little tricks, such as proper tensioning and calibration, that elevate a good setup to spectacular. And the knowledge is power: understanding how screen properties interact with room lighting can save you time and money while maximizing your viewing pleasure.
So, take these insights seriously. Your next upgrade isn’t just about the latest projector—consider how your choice of screen, installation precision, and calibration techniques can unlock your room’s full potential. The effort you invest today will pay off in breathtaking visuals tomorrow.
3 Responses
Reading this article really makes me reflect on my own home theater upgrade journey. I used to think that investing in a high-quality projector alone was enough, but I soon realized that the projection screen’s properties—like gain and mounting stability—are just as crucial. For example, I installed a fixed frame screen, which made a noticeable difference in sharpness and edge focus. However, I underestimated ambient light and selected a standard matte screen initially, which wasn’t sufficient in my bright living room. Upgrading to an ALR high-gain screen really improved my contrast and colors during daytime viewing. It’s this attention to detail that separates a good setup from a truly immersive experience, don’t you think? Since calibrating the projector and ensuring the screen remains taut, my picture quality has significantly improved. Have others experienced similar improvements by fine-tuning these elements? I’d love to hear about your personal tricks or challenges in matching the right gain with your room’s lighting conditions.
This article really hits home for me because I’ve been struggling with how ambient light affects my projector’s image, especially in the afternoons. I initially overlooked the importance of a high-gain or ALR screen, thinking that the projector’s lumen output alone would do the trick. After some trial and error, I finally invested in a 1.8 gain ALR screen, and the difference was night and day—colors became much richer, and the contrast improved significantly even during daylight. I also realized that proper alignment and tensioning are key; a sagging screen can really ruin image sharpness, as I learned the hard way. The tips on calibration tools like a laser level and software are great; I’ve started using them and have seen consistent improvements in picture quality. My question is, how do others decide on the best gain level based on their room’s specific light conditions? Do you balance that with your projector’s lumen capacity, or do you go for higher gain screens regardless? Would love to hear more about how you all approach this delicate balance.