I vividly remember the frustration of trying to enjoy a movie night in my bright living room, only to be greeted by washed-out images and dim details. It was a lightbulb moment—realizing that my trusty old projection setup just couldn’t handle the glare and sunlight spilling in. That epiphany set me on a quest to find the best projection screen technologies for bright rooms in 2024, and I want to share what I’ve uncovered so you won’t have to struggle like I did.
Why Bright Rooms Keep Us Guessing—And How to Break Free
Have you ever set up your home theater only to find that sunlight or ambient light makes your display look mediocre at best? You’re not alone. Bright rooms are notorious for turning high-quality projectors into underperformers. The core issue lies in screen performance, specifically how much light a screen can reflect back toward your eyes—that’s called screen gain, and it’s crucial for bright environments. Early on, I made the mistake of underestimating the importance of choosing a screen with the right gain—thinking all screens are created equal. Trust me, that was a costly mistake, leading to dull images and constant adjustments.
Luckily, recent innovations in Ambient Light Rejection (ALR) screens and high-gain materials are changing the game. These advances allow projectors to perform beautifully even in well-lit spaces, which means no more blocking out the sunlight or relying solely on blinds. According to a recent industry report, ALR screens now offer up to 10 times better contrast in bright rooms compared to traditional screens, dramatically improving clarity and color fidelity.
But with so many options, how do you select the right one? That’s what we’re about to explore. If you’ve faced the frustrating glare and washed-out images, I promise, there’s a solution. The right projection screen technology can transform any bright space into a cinematic haven, and I’m here to guide you through the top options and what you need to watch out for.
Is this tech actually worth the hype? My early slip-ups and what you can learn
One of my biggest mistakes early on was assuming all screens with high gain would give me brighter images. Turns out, some high-gain screens betray you with hotspots and uneven brightness, which ruined the experience. That’s why understanding the nuances of screen gain and its impact on brightness and clarity is vital. Let me walk you through how to avoid these pitfalls and choose the best technology for your space.
Ready to discover the top solutions that are making bright rooms shine in 2024? Let’s dive into the options that can turn your flawed projection into a stunning visual experience, regardless of ambient light.
Select the Right Screen Material and Gain
Start by choosing a screen with a high gain rating—typically between 1.4 and 1.8—for bright rooms. A higher gain reflects more light toward the viewer, enhancing brightness. But beware of hotspots; I once tested a 2.0 gain screen, and the uneven brightness spoiled the image. To avoid this, read this guide to comprehend the nuances of screen gain and pick a balanced option.
Invest in Ambient Light Rejection Technology
Upgrade to an ALR (Ambient Light Rejection) screen. These screens are engineered with micro-embedded optic patterns that deflect ambient light while reflecting projector light. I installed a fixed frame ALR screen last year, and the difference in contrast was remarkable—colored images looked vibrant even during daytime. Check the latest breakthroughs in ALR tech for 2024 to find the best fit.
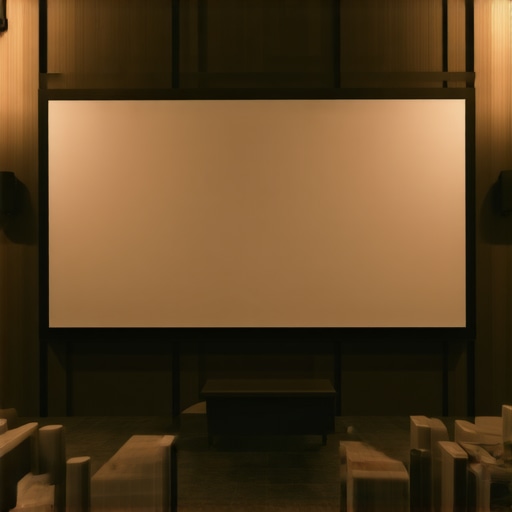
Choosing Between Fixed Frame and Pull-Down Screens
Decide on your setup style based on space and usage. Fixed frame screens provide a taut, flat surface ideal for permanent installations, ensuring precise image alignment. Pull-down screens are versatile, allowing you to retract when not in use, saving space. I personally favor fixed frames for critical viewing areas after reading these insights. For more guidance, see the detailed comparison here.
Optimize Your Setup for Maximum Brightness
Proper projector distance, keystone correction, and meticulous alignment dramatically affect image quality. I once spent hours troubleshooting a dim image until I realized my projector wasn’t aligned perfectly with the screen’s center, causing light spill and reduced brightness. Use a level and calibration tools to fine-tune the projector setup, and consider following this professional blueprint for precise calibration.
Lighting Control Goes Beyond Blackout Curtains
While blocking ambient light helps, supplement with directional lighting that doesn’t spill onto the screen. Use dimmable lamps and wall-mounted fixtures with shades. During my last project, installing adjustable wall sconces allowed me to tailor the lighting environment for different content, greatly improving contrast and clarity. Consider the best lighting strategies for your setup.
Experiment and Fine-Tune Your Settings
No setup is perfect at first. Fine-tuning projector brightness, contrast, and color settings can make a significant difference. I found that lowering the projector’s brightness slightly while increasing contrast sharpened the image and improved perceived contrast in my bright room. Use test patterns and calibration discs, and consult these proven strategies for best results. Remember, small adjustments can lead to big visual improvements.
When it comes to achieving the perfect home theater experience, many enthusiasts focus on high-gain screens or fancy projector specs. But there’s a common misconception that can sabotage your efforts: thinking all screens and technologies are created equal. Let’s dig deeper into what most people get wrong about screen gain, ALR screens, and the choice between fixed frame and pull-down setups, and how understanding these nuances can elevate your setup from average to extraordinary.
Many assume that increasing screen gain linearly results in brighter images, but this oversimplification misses a critical point: hotspots. Higher gain screens, especially those above 2.0, tend to produce uneven brightness, leading to a distorted image where the center shines while edges remain dull. This phenomenon—well documented in visual optics studies—can ruin the immersive experience you’re aiming for. Instead, aim for a balanced gain around 1.4 to 1.8, which offers a sweet spot between brightness and uniformity. For a thorough explanation, check out this detailed guide.
Is higher gain always better for bright rooms, or are there subtler factors at play?
The quick answer is no—focusing solely on gain ignores the importance of material composition and optical design. Modern ALR (Ambient Light Rejection) screens are engineered with micro-structured surfaces that deflect ambient light and focus projector light toward the viewer. The myth that ALR screens sacrifice image quality for brightness persists, but current innovations challenge that notion. In fact, latest breakthroughs demonstrate that high-quality ALR screens can deliver both high contrast and vibrant colors in daylight conditions. This is a game-changer for bright rooms.
However, not all ALR screens are equal. It’s easy to fall into the trap of choosing a cheaply priced model that promises night-and-day performance but underdelivers. Pay attention to aspect ratio compatibility, viewing angle, and reflectivity patterns. My personal mistake was opting for a wide-angle ALR screen without considering how its micro optics affected off-axis color accuracy. Remember, the right choice depends on your specific setup and environment. Before deciding, I recommend reviewing these expert tips.
Why are fixed frame screens often preferred over pull-down models in high-light environments?
Fixed frame screens provide a taut, flat surface that minimizes wrinkles and allows precision alignment—crucial when working with high-gain or ALR materials. They also tend to have better optical quality due to the stable tension, resulting in sharper images. On the other hand, pull-down screens are versatile and easier to install in limited spaces but may suffer from non-uniform tension, leading to slight warping or uneven surfaces that distort projected images. This is particularly problematic when using screens with micro-optic features designed for precise light diffusion, as any warping can ruin the optical patterns’ effectiveness. For more on this, see this comprehensive guide.
Finally, understanding these nuances—like the fact that a higher gain isn’t always better and that ALR screens have trade-offs—is essential for making informed decisions. Don’t just chase the latest specs; consider your environment, materials, and setup carefully. Have you ever fallen into this trap? Let me know in the comments. For tailored advice, reach out through our contact page.
Ensuring your projection setup continues to deliver stellar images over time requires more than just initial installation and choice of technology. Regular maintenance, using the right tools, and applying proven methodologies are key to sustaining quality and avoiding costly repairs or replacements. I’ll share some of my trusted equipment and techniques that keep my home theater performing at its best year after year.
Implementing Precise Calibration with Professional Tools
One of my indispensable tools is the X-Rite i1Display Pro. I rely on this color calibration device to fine-tune my projector’s output regularly. Accurate color and brightness calibration matter immensely, especially when using high-gain or ALR screens, which can subtly shift or degrade over time. I pair the device with
professional calibration techniques to maintain peak performance. Setting a schedule for calibration—say every six months—ensures consistent visual quality without guesswork.
Monitoring Room Conditions to Protect Equipment
Temperature and humidity fluctuations are silent enemies of optical equipment. I utilize a SensorPush Wireless Thermometer and Hygrometer, which provides real-time monitoring via a smartphone app. Keeping the environment stable prevents issues like screen warping, misalignment, or projector overheating. Maintaining optimal conditions extends the lifespan of projection screens, especially fixed frame types with delicate tension fabrics, and preserves image sharpness over the years.
Using Software to Manage the Setup Efficiently
For ongoing adjustments, I recommend software like DisplayCAL. This open-source calibration tool guides you through creating customized profiles for your projector, ensuring consistent visual accuracy. Additionally, tracking your setup via calibration reports helps identify drift over time and prompts necessary recalibrations.
Regular Physical Inspection and Cleaning
Dust, fingerprints, and smudges can significantly dull your image quality. I schedule quarterly inspections using a soft microfiber cloth and a gentle lens cleaner—avoiding harsh chemicals—to maintain screen surface integrity. For fixed frame screens, checking tension and frame alignment ensures the image remains flat and true. When cleaning, be gentle and avoid pressing too hard—micro-optic surfaces are sensitive to scratches.
Planning for Future Upgrades
Technology advances quickly, and I stay ahead by tracking industry trends, especially upcoming breakthroughs in ALR and high-gain screen innovations. Investing in adaptable mounting solutions or modular components (like adjustable mounts) allows for upgrades without extensive rework. This foresight can keep your setup current for many years, providing a clear long-term advantage.
How do I maintain projection systems over time?
The key is consistent calibration, environmental control, and routine inspections. I recommend integrating tools like colorimeters and environmental sensors into your maintenance routine. Also, scheduling regular professional checkups can detect potential issues before they affect your image quality. Doing so maximizes your investment and keeps your home theater glowing with brilliance long-term.
Feel inspired? Try re-calibrating your projector using a colorimeter like the X-Rite i1Display Pro. A simple step with a big payoff, especially if you’re using high-gain or ALR screens that demand precision. Maintaining your setup doesn’t have to be complicated—just consistent and informed. For more detailed strategies, explore these proven techniques.
Lessons That Took Me Off Guard in Bright Room Setup
- My biggest eye-opening moment was realizing that the traditional emphasis on screen gain alone can be misleading. I once assumed that going higher in gain would automatically brighten my image, but I overlooked hotspots and uneven brightness that ruined the immersive experience. Now, I understand the importance of balanced gain levels around 1.4 to 1.8, especially with advanced ALR screens that excel in deflecting ambient light.
- Another lesson was discovering that not all ALR screens are created equal. I bought a wide-view model without considering how micro-structured patterns could affect color accuracy off-axis. Choosing the right technology involves evaluating aspect ratios, reflectivity, and environmental compatibility, which I learned the hard way—don’t skimp on research; use resources like expert insights.
- Proper setup is everything. I spent hours troubleshooting brightness issues before realizing the projector wasn’t aligned correctly. Investing in calibration tools like X-Rite i1Display Pro and following a structured setup plan from these strategies saved me time and vastly improved my picture quality. Regular calibration keeps things fresh over time.
Tools That Made My Bright Room Revelation Possible
- Color calibration devices such as the X-Rite i1Display Pro are essential for achieving precise color and brightness levels, especially when using specialized screens like high-gain or ALR types. I trust this tool because it gives me quantifiable data, removing guesswork from calibration.
- Environmental monitoring gadgets like SensorPush Wireless Thermometers remind me that stable room conditions prevent image degradation and equipment wear. Keeping temperature and humidity in check directly impacts the longevity of fixed frame screens and projectors alike.
- Calibration software DisplayCAL has been a game-changer, enabling me to create detailed profiles that enhance contrast and color accuracy. Using software to track changes over time helps me stay ahead and fine-tune my setup effortlessly.
- Finally, thorough inspections and gentle cleaning routines—using microfiber cloths and proper cleaners—are indispensable for maintaining image quality, ensuring dust or fingerprints don’t dull the vibrant images I love.
Challenge Yourself: Elevate Your Bright Room Experience Now
“
Technology in projection screens and accessories keeps advancing rapidly—2024 is a promising year to refine your setup. Take the insights and tools shared here, and give your bright room a cinematic upgrade. Remember, enjoying vivid, dynamic images in daylight hours isn’t just about equipment; it’s about understanding your environment and making informed choices. Your home theater can shine brightly, even under the sun, if you leverage the right tech with confidence.
“`
Are you ready to challenge your assumptions about projection tech in bright rooms? What’s holding you back from turning your space into a daytime cinema? Drop your thoughts below—I’d love to hear your experiences and questions!
One Response
Reading this detailed breakdown really helped clarify some misconceptions I had about projection screens for bright rooms. I especially appreciated the emphasis on balancing screen gain—I’ve experimented with very high-gain screens before, only to notice hotspots and uneven brightness, which totally detracted from the viewing experience. The idea of a gain between 1.4 and 1.8 sounds like a sweet spot that I haven’t fully explored yet. Also, the section on ALR screens caught my eye; I’ve noticed that not all ALR screens are created equal. The micro-structured optics sound promising, but how do you recommend evaluating off-axis viewing angles and color fidelity when shopping around? I’m considering swapping my current setup for a fixed frame ALR screen but worry about installation space and aesthetics. It seems that consistent calibration plays a vital role, but I wonder if there are affordable tools for casual home users to maintain color accuracy over time? Thanks for such an insightful post—definitely a game-changer for anyone struggling with ambient light issues.