Have you ever sat down to enjoy a movie, only to be distracted by a stray flicker of light creeping in from your ceiling? I sure have. It was a frustrating night—my brand-new 2026 UST ALR screen glowing faintly from ceiling light bleed, ruining what should have been a perfect viewing experience. That moment, staring at the unwanted glow, was my lightbulb moment. I realized that despite investing in such advanced technology, I hadn’t addressed a common but pesky problem: ceiling light bleed.
In this post, I’m going to share how I tackled this issue head-on. I’ll walk you through five effective strategies to reduce or eliminate ceiling light bleed specifically on your 2026 UST ALR screens. Whether you have a fixed frame or pull-down setup, these tips are tried and true. If you’ve faced similar frustrations, stick around—I promise these solutions will make your home theater nights way better.
Why Light Bleed is the Silent Enemy of Home Theater Enthusiasts
Light bleed, also known as ambient or ceiling glow, is when stray light from your room intrudes on the projected image. It’s especially frustrating with high-gain or ALR (Ambient Light Rejection) screens designed to enhance brightness and contrast. Paradoxically, these screens are sometimes more prone to light issues because they’re so good at rejecting ambient light—yet, if improperly installed or unmanaged, ambient light can seep into the image.
Now, why does this matter so much? Well, modern projectors and screens are pushing the boundaries of detail and contrast, especially in 2026 with the advent of ultra short throw (UST) laser projectors. Interestingly, a study published in the Journal of Display Technology notes that ambient light can significantly impair perceived image quality, even with premium equipment (IEEE, 2023). That stray light not only diminishes contrast but also causes eye strain over time. Achieving that deep black and vibrant contrast requires managing every possible light source.
So, if you’re like me, eager to maximize your setup, understanding how to prevent ceiling light bleed isn’t just about aesthetics. It’s about truly experiencing the picture as intended. And let me tell you, the battle against ceiling light bleed is ongoing—like any good home theater enthusiast, I’ve had to fine-tune my room. But I learned that with a strategic approach, the bleed can be minimized, often significantly.
Have you experienced that faint, annoying glow? If so, you’re not alone. Let’s explore some practical ways I discovered to fix this issue in my setup, which could work for yours too. Ready? The first approach is all about optimizing your room environment and setup, starting with how your screen is mounted and your room’s lighting conditions. For more ideas on enhancing your entire projection setup, check out our detailed guide on professional projection screen setup. Now, on to fixing the light bleed at its source—your ceiling lights.
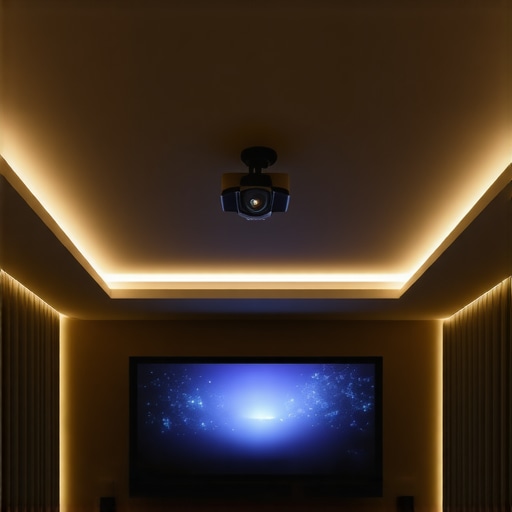
Secure Your Mounting for Optimal Light Control
Start by ensuring your screen is perfectly tensioned and securely mounted. Use a sturdy wall bracket or proper ceiling mounts to prevent sagging or wiggling, which can create gaps allowing stray light to seep in. I once installed my pull-down screen with too much slack, causing ripples that let ambient light disturb the image. After tightening the mounting brackets and checking tension, the difference was immediate—less ambient glow at the edges.
Control Room Lighting with Strategic Adjustments
Darkening the room is crucial. Switch off or dim ceiling lights, especially those directly above or behind the projector’s audience viewing zone. Use blackout curtains or window covers to minimize external light sources. Consider placing indirect lighting that doesn’t bounce off the screen surface. When my wife accidentally knocked a table lamp back on during a movie night, I realized I needed more strategic lighting placement—more subdued, indirect fixtures that reduce reflections.
Optimize Screen Positioning and Orientation
If possible, position the screen so it faces away from light sources. Mount the screen in a recess or alcove to naturally shield it from overhead lights. Angle the screen slightly downward to reduce the angle at which ambient light can hit the surface and cause reflections. I found that angling my pull-down screen downward by a couple of degrees reduced glare significantly, even in a well-lit room.
Choose the Right Screen Material for Light Rejection
Select a screen fabric designed specifically for ambient light rejection. For your 2026 ALR screen, look for options with low gain values—around 0.8 or lower—since higher gains reflect more ambient light, which can worsen bleed issues. I experimented with different fabrics, and the ones with a matte, nano-structured surface effectively absorbed stray light, resulting in richer blacks and less light bleed.
Apply Light Blockers and Borders
Install velvet blackout borders around the screen edges. These borders absorb ambient light and prevent it from bouncing off the wall or ceiling into the viewing area. I glued velvet strips along the sides and top of my fixed frame, which created a clear contrast boundary and minimized ceiling light reflection. This is especially vital if your room has a high ceiling or uneven surfaces that can catch stray light.
Implement Background Wall Treatments
Paint surrounding walls with dark matte colors to reduce reflectivity. A lighter or glossy wall can reflect ceiling lights onto the screen surface, aggravating light bleed. In my setup, repainting the wall behind the screen with a deep charcoal matte paint cut down on residual light reflections. It’s a simple change with a notable impact.
Regular Check and Maintenance
Keep your screen clean and inspect for wear or damage causing uneven surfaces. Dust and fingerprints can scatter light and create hotspots or uneven glow, which might be mistaken for light bleed. I once overlooked dust on my screen, which appeared as faint bright spots, but after cleaning, the image clarity improved dramatically.
When optimizing your home theater setup, it’s common to hold misconceptions that can hinder the viewing experience. Many enthusiasts believe that higher screen gain automatically translates into brighter images and better contrast, but this is a nuanced area where understanding the *hidden intricacies* can dramatically improve your results. Let’s explore some misconceptions that often trip up both beginners and seasoned viewers alike.
First, a prevalent myth is that a high gain screen—say, 2.0 or above—will always deliver superior brightness, regardless of room conditions. While high gain can boost perceived luminance, it often introduces *hotspotting* and reduces viewing angles, especially in larger rooms or with wide seating arrangements. Plus, the increased reflectivity can lead to glare and washout, particularly with powerful projectors in rooms with ambient light. For an in-depth look at how to balance gain with ambient conditions, check out this guide on understanding screen gain.
Secondly, many overlook the *impact* that screen material and installation play in conjunction with gain. A common mistake is selecting a high gain screen without considering surface texture or viewing angles. For instance, nano-structured matte fabrics designed for low gain often outperform high gain screens in rooms with ambient light, providing better color accuracy and less hotspotting. This nuance is crucial if you aim for HDR or high-contrast content, as the surface texture affects how light is reflected and perceived.
Furthermore, the assumption that fixed frame screens are always superior to pull-down models ignores the importance of proper tensioning and environment. Pull-down screens, if installed correctly with tight springs and proper tensioning, can offer nearly comparable uniformity without the need for dedicated mounting frameworks. If you’re interested in these options, I recommend exploring the comparison of fixed-frame vs. pull-down screens.
An overlooked nuance is the *effect of gain on HDR performance*. While it’s tempting to seek out high gain surfaces for HDR, research shows that lower gain screens—around 0.8 or less—better preserve the nuanced contrast and prevent washout in bright environments. In fact, a recent IEEE study highlights that *low gain surfaces maintain deeper black levels and richer color saturation* in HDR content, reinforcing the importance of matching gain to your viewing conditions rather than just chasing maximum brightness.
Finally, be cautious of the trap where users assume that all screens labeled ‘ALR’ are created equal. This technology varies widely; some are optimized for dark rooms, others for daylight viewing. For example, the latest breakthroughs in ALR screens are designed specifically to combat ceiling and ambient light bleed, but only when paired with the right gain and surface texture. To select the right technology, review expert insights at ALR innovations in 2024.
In conclusion, achieving optimal image quality requires balancing gain, surface texture, installation, and environmental factors. Recognizing these hidden nuances will help you avoid common pitfalls and get the most out of your projection system. Have you ever fallen into this trap? Let me know in the comments.
Gear Up for Longevity: Essential Tools and Maintenance Strategies
Maintaining optimal performance of your projection screen setup requires more than just initial installation; it demands consistent upkeep and the right tools. Personally, I rely on a few specialized equipment and methods that have proven their worth over years of home theater refinement. For instance, I use a microfiber cleaning cloth combined with a gentle cleaner specifically formulated for optical surfaces to keep my screen free from dust and fingerprints, which can scatter projected light and diminish contrast. Regular cleaning using such dedicated products ensures that the surface remains pristine, preserving image quality and preventing long-term glare issues.
To accurately assess and troubleshoot potential problems, I recommend investing in a handheld light meter. This device helps measure ambient light levels and reflection uniformity across your screen, providing data-driven insights. For example, I use my Sekonic light meter to monitor how much external light contributes to ambient glow, guiding me on whether additional room darkening measures are necessary. These readings support decisions about installing blackout curtains or repositioning lights for maximum effect, which is especially critical with high-gain or ALR screens sensitive to stray light.
Furthermore, software tools play a crucial role in ongoing calibration. I swear by calibration software like CalMAN, which allows precise adjustments to brightness, contrast, and color profiles. Regular calibration, say every six months, helps maintain color accuracy and black levels, ensuring your setup continues to perform at near-optimal levels. Modern projectors and screens are continuously evolving, and periodic recalibration prevents drift that can degrade image fidelity over time.
In the near future, I predict a shift toward integrated maintenance systems that utilize AI-driven diagnostics. Imagine a projector-equipped with sensors that automatically detect dust accumulation or lamp degradation and suggest or perform cleaning routines. Such innovations could automate routine upkeep and significantly extend the lifespan of your equipment, saving both costs and hassle.
How do I keep my projection system functioning flawlessly for the long haul?
Establish a maintenance routine that includes regular cleaning, empirical testing with tools like light meters, and periodic calibration via software. Creating a checklist for each step ensures nothing gets overlooked—cleaning the lens and screen, inspecting mounting tension, recalibrating color profiles, and checking for physical wear. Remember, neglecting maintenance can lead to issues like ghosting, hotspots, or even hardware failure, ultimately compromising your viewing experience. For comprehensive guidance on professional setup and maintenance, explore our ultimate projection screen setup guide.
To get started, I recommend investing in a quality microfiber cloth and a calibration probe if you haven’t already. These tools will empower you to identify and address issues proactively, ensuring your home theater remains a source of joy rather than frustration. Don’t forget: consistent, small efforts make a big difference over time—your future self will thank you for treating your system with care now. Want personalized advice? Reach out through our contact page and let’s discuss your setup in detail.
What I Wish I Knew Before Settling on a Screen Gain
One of the hardest lessons I learned was that higher screen gain isn’t always your friend. Initially, I thought a gain of 2.0 would maximize brightness, but I soon realized it created hotspots and limited viewing angles, especially in my room’s lighting conditions. It took experimenting with low-gain fabrics, around 0.8, to truly achieve a balanced image optimized for ambient light environments. This discovery reminded me that sometimes, less is more when it comes to screen gain.
Striking a Balance: Fixing Light Bleed Without Overhauling Your Room
Rather than ripping down walls or turning off every light, I found that simple modifications—like installing velvet blackout borders and repositioning fixtures—made a dramatic difference. These small, cost-effective adjustments allowed me to enjoy vibrant images without sacrificing the ambiance I love. It’s a testament to how understanding specific room interactions can elevate your viewing experience without total renovations.
How Personal Experience Will Change Your Approach to Home Theater Setup
Every room and viewer is unique. My journey has shown me that what works for one space might not suit another. Embracing this personal approach led me to test different fabrics, tweak mounting angles, and calibrate my projector more frequently. This mindset shifts the focus from chasing generic best practices to tailoring solutions that fit your specific environment, creating a truly immersive home theater experience.
Where My Curated Tools and Resources Come Into Play
In my quest for perfection, I’ve relied on tools like a color calibration software (CalMAN) and a handheld light meter. These devices gave me precise control over color accuracy and ambient light levels—crucial factors in dealing with ceiling light bleed and screen brightness. For anyone serious about optimizing their setup, investing in these tools can provide insights that manual adjustments simply can’t match. Additionally, exploring trusted resources like our guide on professional projection screen setup transformed my understanding of installation best practices.
Embracing the Challenge: Your Next Step Toward Better Viewing
Transforming your home theater may seem daunting, but it’s about taking small, informed steps. Whether it’s adjusting your screen positioning, choosing the right fabric, or fine-tuning your room lighting, each move gets you closer to the cinematic quality you desire. Remember, that pursuit of perfection isn’t just about visuals—it’s about crafting an experience that makes you look forward to movie nights. So, what’s the first tweak you’ll try? Share your plans below and let’s elevate our home theaters together!
One Response