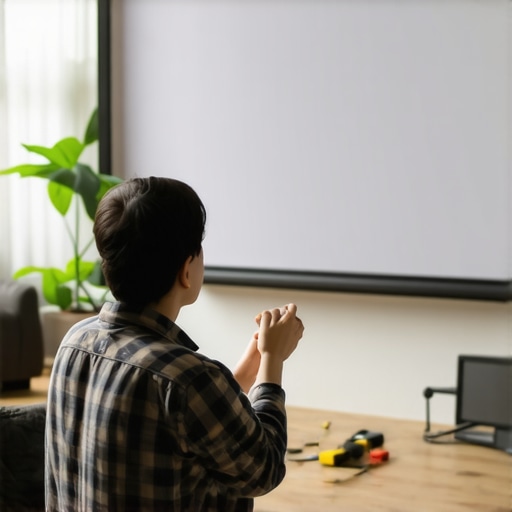
It was a quiet evening, and I reached out to lower my projector screen. Instead of gliding smoothly as it usually does, it jerked and hesitated, then stubbornly refused to retract. That moment of frustration hit close to home—I’ve faced the dreaded pull-down screen sticking countless times, and each incident reminded me how essential a functioning screen is for an optimal home theater experience.
If you’ve ever found yourself in a similar predicament—frustrated watching your screen struggle to hide away after a movie—you’re not alone. Pull down screens are a cornerstone of seamless home theater setups, but over time, wear and tear, dust buildup, or mechanical issues can cause retraction problems. Fortunately, there are practical solutions that can restore your screen’s smooth operation, and I want to guide you through them.
Why Your Pull Down Screen Might Be Sticking
Understanding the causes is the first step to fixing the problem. Typically, issues with retraction stem from mechanical tension problems, debris accumulation, or aging components. For example, improper tensioning of the spring mechanism can cause the screen to either sag or jam during retraction. Dust or dirt can also settle into the rolling mechanism or guide rails, impeding smooth movement. As with any mechanical system, neglecting maintenance accelerates wear, turning simple fixes into complex repairs.
In my early days messing with projection screens, I made a common mistake—using excessive force to pull the screen back up, which only worsened the tension issues. Recognizing that I needed to understand the specific mechanics of my particular screen model was a game-changer. For more insights on selecting the right projection screen setup, check out this comprehensive guide. It helped me see that proper tension and alignment are crucial for smooth operation and longevity.
Before diving into repairs, it’s worth noting that regular maintenance can prevent many retraction problems. Dusting guide rails, gently adjusting tension screws, and ensuring the spring mechanism isn’t overly stretched are simple steps that yield big results. Ascertaining the root cause helps avoid unnecessary replacements or costly repairs down the line, saving both time and money.
Are you tired of wrestling with your pull-down screen every time you want a movie night? If so, don’t worry—there’s hope, and several effective tactics await you. In the upcoming sections, I’ll share five proven strategies to fix and maintain your retractable screen, ensuring it glides effortlessly for years to come. Ready to restore that sleek, smooth operation? Let’s get started!
Assess the Spring Tension
Begin by gently pulling down the screen to observe its movement. If it struggles to retract or feels floppy, the tension spring may be overstretched or loose. To adjust, locate the tension screw or clasp—usually near the roller mechanism, and tighten it gradually using a screwdriver. Remember, applying too much force can damage the spring, so make small adjustments. I once adjusted my screen tension too aggressively and ended up with a snapped spring, which was a costly mistake—so proceed cautiously.
Clean and Lubricate Moving Parts
Dust and debris can cause the roller and guide rails to stick, hindering retraction. Disassemble the casing if possible, using a soft cloth and compressed air to remove dust. Apply a silicone-based lubricant to the tracks and roller bearings, avoiding oil-based lubricants that can attract more dirt. Once lubricated, manually operate the screen to distribute the lubricant evenly. During my cleanup, I found a layer of dust that, once removed, instantly improved the glide, confirming that dirt was the culprit.
Check and Replace the Spring Mechanism
If tension adjustment and cleaning don’t improve retraction, the spring might have lost its elasticity. Remove the roller end caps and carefully examine the spring coil. If it’s worn out or corroded, replacement is necessary. Purchase a compatible spring from the manufacturer, following the model specifications. Installing a new spring restored my screen’s smooth operation, making retraction effortless again. Remember, if you’re unsure, consulting the user manual or contacting a professional is advisable.
Realign the Roll and Guides
Misalignment of the roller or guide rails can cause binding. Loosen mounting brackets slightly and realign the roller so it spins freely and remains parallel to the guides. Tighten everything securely afterward. I once noticed my screen pulled slightly to the side; realigning the roller and guides fixed the crooked retraction and prevented further jams. Visual consistency ensures a seamless pull-down experience, enhancing your home theater’s appeal.
Adjust the Track and Mounting Surface
If your screen is mounted on uneven surfaces or the track is warped, retraction can be compromised. Use a level to verify the track’s alignment and make adjustments accordingly, tightening or re-securing mounting brackets. If the track is bent or damaged, consider replacing it. During a repair, I noticed that a warped track was causing erratic movement; replacing it with a straight, sturdy track made a significant difference. Proper mounting ensures smooth, consistent operation every time.
Regular Maintenance to Prevent Future Issues
Finally, establish a maintenance routine: dust the guide rails monthly, inspect tension periodically, and lubricate moving parts semi-annually. Consistent upkeep prevents dust buildup, tension loss, and misalignment. My experience shows that simple, regular checks extend your screen’s lifespan and keep retraction smooth. Think of it like tuning a musical instrument—small tweaks prevent big problems down the line.
When applying these steps, always handle components gently and consult your specific model’s manual if available. If the problem persists after trying these solutions, it might be time to consider a replacement or professional servicing. For insights on optimizing your projection setup further, explore this guide.
 When it comes to choosing the perfect projection screen for your home theater, many enthusiasts and even professionals often fall prey to common misconceptions that can hinder optimal performance. One widespread myth is the belief that higher screen gain always equates to better brightness and contrast. While it’s true that high-gain screens can amplify brightness, they often introduce undesirable hotspots and uneven images, especially in larger setups. Experts warn that excessive gain can lead to a focused brightness that worsens viewing angles, diminishing image uniformity and color accuracy. Instead, understanding the *nuance* of gain—specifically, aiming for a balanced 1.0 to 1.3 gain—is crucial for preserving image fidelity across the screen.
Many assume that ALR (Ambient Light Rejecting) screens are a magic bullet for bright rooms but overlook their nuanced limitations. For instance, not all ALR fabrics perform equally under ambient lighting; some can introduce color shifting or reduce contrast if they have poor angularity. It’s a common trap to purchase an ALR screen solely based on gain specs without considering the specific technology and room conditions. For advanced users, the *hidden nuance* is that the effectiveness of ALR fabrics hinges on their micro-structure, which determines how well they reject light from particular angles. Consulting detailed reviews and expert insights before investing can save you from costly mistakes.
Another misconception is that fixed frame screens always provide superior image quality compared to motorized pull-down options. While fixed frames are often praised for their stability and flatness, this overlooks advancements in tensioning mechanisms and materials that have significantly improved retractable screens. In fact, some high-end motorized pull-down screens now employ tensioning systems to combat edge curling and sagging, making them comparable or even superior in certain scenarios. The *advancement* here lies in the engineering behind tensioning and mounting techniques—an aspect often underestimated. For example, proper tensioning and alignment can mitigate the ‘wavy’ appearance many associate with pull-downs, especially in DIY setups.
Beware of oversimplifying the importance of screen color. Many users prefer white screens, but the *hidden nuance* is that grey or hybrid fabrics can provide better contrast in ambient-lit environments. Studies, such as those from the Society for Information Display, have shown that the choice of fabric color and texture significantly impacts black level reproduction and overall contrast. Selectors should consider their room lighting conditions and content type; a bright living room might benefit more from a grey fabric than a traditional white one, which can wash out details and reduce perceived contrast. This subtlety often escapes novices who focus solely on gain and material brand.
In conclusion, to truly optimize your projection experience, we must go beyond the surface and understand these *hidden nuances*. Whether it’s balancing gain to avoid hotspots, selecting the right fabric based on room lighting, or appreciating the engineering behind different screen types, there’s much more at play than meets the eye. Always question generalized advice, and revisit your assumptions—what you don’t know could be limiting your home theater’s potential. Let me know in the comments if you’ve ever fallen into these traps, and stay tuned for more professional insights on maximizing your projection setup!
Tools That Keep Your Screen in Top Shape
Ensuring your projection screen continues delivering crisp, bright images requires the right tools and a disciplined maintenance routine. I personally rely on a combination of microfiber cloths, compressed air, and silicone-based lubricants. Microfiber cloths are gentle yet effective for dust removal without scratching delicate surfaces. I use compressed air to clean guide rails and the roller mechanism, which prevents dust buildup that can cause uneven movement or hotspots. For moving parts like rollers and tension springs, applying a high-quality silicone lubricant helps maintain smooth operation and prevents squeaking or sticking. It’s crucial to use lubricants compatible with your screen fabric and components to avoid staining or damage.
Regular Checks for Consistent Results
Set a routine to inspect your screen at least once a month. Check the tension of pull-down or fixed frame screens; if you notice sagging or edge curling, it may be time to adjust the tension or reinforce mounting points. Re-align the roller or guides if you observe skewed movement or resistance. For ALR or high-gain screens, examine the surface for hotspots or uneven illumination, which can stem from dust or fabric degradation. As I experienced, lacking regular upkeep led my high-gain screen to develop uneven brightness—a problem that was remedied by meticulous cleaning and tension adjustments. For detailed guidance on fixing tension issues, you might review this comprehensive tensioning guide.
Long-Term Benefits of Consistent Care
Maintaining your projection setup isn’t just about preventing mechanical failures; it directly influences image quality and viewer experience over time. Regular cleaning and timely adjustments can extend your screen’s lifespan by years, maintaining optimal gain and uniformity. For instance, neglecting dust removal can lead to hotspots, reducing perceived contrast and color accuracy. Investing in the right tools and establishing a schedule minimizes downtime and costly repairs, making your home theater investment well worth it. The future of projection screens appears increasingly automated, with smart sensors detecting misalignments or wear and alerting owners—stay ahead by adopting simple maintenance routines now.
How do I keep my projection screen functioning reliably for years?
Adopt a simple yet effective maintenance routine: regularly clean the surface with a microfiber cloth, inspect and tighten mounting brackets, and apply silicone lubricant to moving parts. Additionally, keep guide rails free of dust with compressed air. For high-gain or ALR screens, pay extra attention to surface cleanliness to avoid hotspots. Over time, these proactive steps preserve image fidelity and prevent common issues like sagging or uneven brightness. Want to elevate your setup further? Try the advanced tensioning technique described here—it’s a game-changer for long-term reliability.
What I Wish I Knew Before Running Screws into My Screen
The most valuable lesson I learned was to always check the alignment carefully before mounting. Rushing this step led to crooked edges and uneven tension, which I didn’t realize impacted image quality until much later. Taking the time for precise measurements and leveling can save you frustration and costly adjustments down the line. Trust me, patience during installation pays off in a smoother retracting experience and sharper visuals.
Smart Tweaks That Turn a Good Screen into a Great One
Sometimes, small modifications have a big impact. For instance, experimenting with different tension adjustments or lubricants tailored for your specific model can improve retraction and longevity. I found that silicone-based lubricants, used sparingly, reduced squeaking and prevented sticking without attracting dust. These subtle tweaks mimic professional-grade tuning and can elevate your home theater quality significantly.
The Hidden Power of Routine Maintenance
It’s easy to overlook the little things, but establishing a regular upkeep routine has transformed my viewing experience. Dusting guide rails Monthly, inspecting tension every few months, and re-aligning the roller as needed prevents common issues like hotspots or edge curls. This proactive approach keeps your projection image crisp and ensures your pull-down screen remains a silent, reliable partner for years to come. Regular care isn’t just maintenance; it’s an investment in cinematic excellence.
Resources That Keep My Home Theater Sharp
Over the years, I’ve leaned on several trusted sources to refine my setup. The comprehensive guides and reviews on projection screen types provided me with a deeper understanding of materials and mechanics. Also, dedicated tools like a digital level and a can of compressed air have become part of my toolkit, ensuring precision and cleanliness. These resources empower you to troubleshoot confidently and choose solutions tailored to your space.
Your Turn to Take Control of Your Home Theater
Remember, mastering your projection setup is a journey, not a one-time fix. Every minor adjustment or routine check can bear fruit in image clarity and ease of use. Don’t hesitate to experiment, learn, and invest in your system—it’s your personal cinema. Feel free to share your own tips or questions below—your insights could inspire others to elevate their home theater game!
No Responses