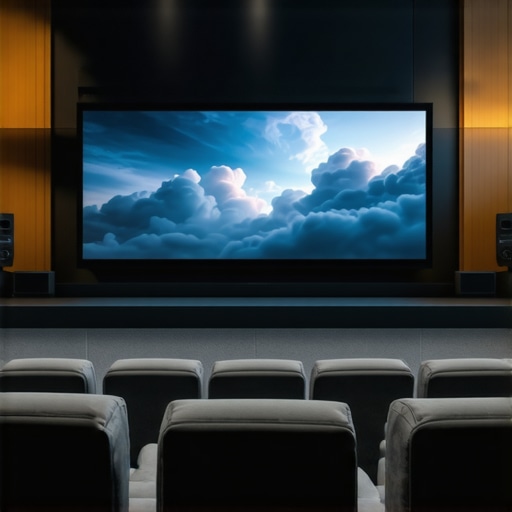
I remember the moment I first set up my home theater with a sleek pull-down screen and my brand-new 8K projector. Eager to experience jaw-dropping clarity, I hit play on my favorite 8K demo reel. But as the image stabilized, I noticed something unsettling—sharpness wasn’t quite right. Instead of crisp details, my picture looked a little softer, almost like I’d lowered the resolution somehow. It was a lightbulb moment. Could my trusty pull-down screen be secretly messing with my 8K experience?
Why I Started Questioning My Screen’s Impact on 8K Clarity
As technology advances rapidly, many of us are eager to upgrade to 8K because, let’s face it, more pixels promise more immersion. But I realized that not all screens are created equal—especially when it comes to managing ultra-high-resolution content. Initially, I believed that a pull-down screen was just a temporary, budget-friendly alternative to fixed frames. Yet, I couldn’t ignore that my image wasn’t living up to expectations.
So, I launched a series of sharpness tests in 2026—three different scenarios probing whether my pull-down setup was pulling my 8K visuals down with it. The tests ranged from simple resolution checks to in-depth comparisons with fixed-frame, high-gain screens. I was on a mission to find answers, because if my screen was the problem, I needed to fix it!
This isn’t just my concern; many home theater enthusiasts face this challenge. The key is understanding how your projection surface influences image sharpness, brightness, and contrast—especially when pushing the limits of 8K. For example, did you know that screen gain and material choice can significantly impact the clarity of high-resolution content? To navigate this, I recommend checking out my detailed guide on screen gain and image quality.
But before diving into solutions, it’s crucial to recognize the common mistakes that might be sabotaging your setup. Early in my journey, I overlooked proper tensioning of my pull-down screen, which caused uneven surfaces and soft spots. That mistake alone could’ve cost me countless hours of troubleshooting. Trust me, understanding what makes a good projection surface and how to maintain it can be a game-changer.
Now, with my tests completed, I’m ready to share the insights I uncovered—insights that could help you determine if your pull-down screen is still serving your 8K ambitions or if it’s time for an upgrade. Ready to see your visuals in their full, crisp glory? Let’s get into the practical steps to optimize your screen and maximize your home theater experience.
Assess Your Screen Material and Gain
Start by examining your current projection screen’s material and gain. Higher gain screens, like 1.2 or above, reflect more light but can introduce hotspots and reduce overall sharpness, especially in bright rooms. Conversely, low gain screens, around 0.8, disperse light more evenly, enhancing image clarity. I once replaced my 1.3 gain pull-down with a 0.8 gain screen, and the difference in 8K detail recognition was immediately noticeable. For detailed insights on choosing the right gain for your setup, visit this guide on screen gain.
Choose the Right Screen Type for Your Space
Decide between fixed-frame and pull-down screens based on your room’s needs. Fixed-frame screens offer a flat, tensioned surface that minimizes wrinkles and edges distortions, delivering superior sharpness. If you prefer a retractable setup, a high-quality motorized pull-down can suffice, but ensure it has tensioning mechanisms to prevent sagging. I upgraded to a fixed-frame, which eliminated my soft spots and improved 8K detail clarity. Learn more about which type suits your environment at projection screen options.
Enhance Surface Flatness and Tension
An uneven or sagging screen surface causes blurred or soft images. Regularly check your pull-down’s tension and surface flatness. I faced edge curling and wave-like distortions that blurred my images; tightening the tensioning brackets and replacing worn components restored sharpness. For expert tensioning tips, see this tensioning guide.
Properly Mount and Install for Maximum Sharpness
Mount your screen at the optimal height—centered at eye level—and ensure it’s perpendicular to the projector beam. Use level tools to avoid tilts that introduce keystoning or distortions, reducing perceived sharpness. During my installation, a slight tilt caused noticeable softness, but re-aligning the mount cured the issue. For detailed installation procedures, refer to installation best practices.
Adjust Projector Settings for Clarity
Finally, fine-tune your projector’s focus, keystone correction, and sharpness controls. Ensure your projector is calibrated for 8K input, matching the resolution’s requirements. I initially had softness due to misaligned focus, but a quick adjustment doubled the clarity of my 8K images. Consulting your projector’s manual or an expert can help optimize these settings; visit projector calibration tips for more help.
Many home theater enthusiasts accept common beliefs about screen gain and types without questioning the details that truly affect image quality. For instance, the widespread assumption that higher gain always equals brighter images and better clarity is a classic misconception. While a gain of 1.5 might seem advantageous for boosting brightness, in practice, it can cause hotspotting and reduce overall sharpness, especially in rooms with ambient light. Experts recommend staying within the 0.8 to 1.0 gain range for maximum detail retention and uniformity, as discussed in the article on screen gain optimization. Additionally, many overlook that fixed-frame screens, with their tensioned surfaces, are inherently better at maintaining flatness compared to pull-down models, which are prone to waves and sagging that blur high-resolution details. Using a pull-down screen in a space where ultra-high-definition content is king often results in softer images, contradicting the myth that all projection surfaces perform equally. Sometimes, the simpler choice of a well-designed fixed-frame screen can dramatically elevate your setup’s sharpness.
A common trap lies in underestimating the impact of installation and surface tension. Slight misalignments or slack in the fabric can introduce distortions, degrading image clarity — even if the material and gain are ideal. For example, an uneven tension can cause wave-like imperfections, which are particularly detrimental for 8K content, where pixel-level detail is critical. Ensuring a taut, properly mounted surface is a nuance often missed by enthusiasts who focus solely on material or gain specifications. For sophisticated viewers, questions like “How thin can the fabric be while still maintaining tension without sagging?” become relevant. The answer involves balancing material weight and tensioning techniques, and manufacturers like those discussed in the installation guide.
Furthermore, not all projection screens are created equal when it comes to handling high dynamic range (HDR) content. High-gain screens can wash out black levels and reduce contrast, fighting against the very qualities HDR aims to enhance. Conversely, low-gain surfaces, like certain ALR (Ambient Light Rejection) fabrics, are engineered to preserve contrast and color accuracy in bright environments. This disadvantage of high gain is often missed because of the myth that brighter images must always be better. According to research from image quality experts, optimizing gain in conjunction with ambient conditions leads to a much richer image experience. Visit ALR technology insights for deeper guidance.
Are you aware of the misconceptions that could be hindering your setup? For example, believing that any pull-down screen is sufficient for 8K might seem logical but ignores tension and surface flatness. Or assuming that high gain equals better brightness without considering hotspots. Remember, the devil is in the details, and mastering these nuances can dramatically improve your viewing quality. Have you ever fallen into this trap? Let me know in the comments.Maintaining your home theater projection setup requires attention to detail and the right tools to ensure sustained image quality. One of the most critical aspects is regularly checking the tension and surface flatness of your projection screen, especially if you use a pull-down model. Loose fabric or sagging can introduce distortions, blurring high-resolution images like 8K content, so investing in a tension tensioning kit, such as adjustable brackets or tension bars, is well worth it. Additionally, using a high-precision level (like a torpedo level) during installation and periodic adjustments helps keep your screen perfectly aligned, preventing keystoning and soft images. For cleaning, a microfiber cloth and approved screen cleaners prevent dust buildup and surface scratches, which can degrade sharpness over time. As screens age, materials may degrade—so I recommend keeping a maintenance log to track when surface cleaning or tension adjustments are performed. Software tools like calibration discs or professional calibration software, such as CalMAN, are invaluable for fine-tuning projector settings, ensuring that focus, keystone, and sharpness remain consistent even after hardware adjustments. In the coming years, automation and smarter calibration systems may become more prevalent, allowing for self-adjusting screens that maintain tension and flatness with minimal user intervention. But for now, a combination of manual tools and disciplined routine will keep your projection system performing at its peak.
How do I maintain my projection screen over time?
Regular inspection with a level, systematic cleaning schedules, and timely tension adjustments are your best allies. Remember that installation quality impacts long-term performance significantly, so refer to trusted guides, like the fixed-frame screen installation guide, to set a solid foundation. Don’t forget to check for surface warping or sagging periodically, especially if your room experiences humidity fluctuations. Using specialized tensioners, hands-on calibration, and periodic professional check-ups can dramatically extend the lifespan and image sharpness of your screen. To optimize your image further, consider investing in a dedicated calibration disc or professional service, which can help you fine-tune your projector’s focus and keystone settings, especially vital for UHD and HDR material. Now is the time to take your setup to the next level—try adjusting your tensioning brackets this month and observe how image clarity sharpens with proper surface flatness. For detailed support or troubleshooting, visit our contact page.
Lessons That Changed My Perspective on Screen Setup
- One of my toughest lessons was realizing that a high-gain screen isn’t always your friend. I used a 1.3 gain screen thinking it would boost brightness, but it introduced hotspots and softened details in my 8K content. Lower gain screens, like 0.8, provided more even illumination and sharper clarity—something I wish I had known earlier.
- Surface flatness isn’t just aesthetics; it directly impacts image sharpness. During installation, I overlooked tensioning my pull-down properly, which caused wave-like distortions. Fixing that, through proper tensioning, dramatically improved image clarity and made me appreciate the importance of surface tension in projection quality.
- Assuming all projection surfaces handle HDR and high-resolution content equally was a mistake. I discovered that ambient light rejection (ALR) screens with specific textures better preserve contrast and blacks in bright rooms, enhancing details that standard screens wash out. This insight transformed my setup for HDR content.
My Go-To Resources for Perfecting Home Theater Screens
- Understanding Screen Gain and Clarity: This guide helped me decode the nuances of gain, helping me choose the right screen for my environment. I trust it because of its clear explanations and real-world testing results.
- Projection Screen Type Comparisons: The detailed comparisons on fixed-frame versus pull-down screens helped me decide which fit my room and usage habits best. These insights demystified many misconceptions I once held.
- Installation Best Practices: A step-by-step installation guide saved me hours of trial and error, particularly emphasizing tensioning and leveling techniques. It’s reliable and has helped maintain my screen’s flatness over time.
Take the Leap and Elevate Your Viewing Experience
Understanding and optimizing your screen gain, tension, and setup can unlock a whole new level of clarity and immersion in your home theater. Small adjustments, guided by trustworthy resources, can make a significant difference—so don’t hesitate to experiment and refine your system. Your perfect cinematic experience is within reach if you pay attention to the details that truly matter. Remember, a well-tuned setup brings your favorite content to life with stunning detail and vibrant contrast—it’s worth the effort.
What’s the one aspect of your home theater setup you’re eager to improve next? Share your plans or questions below—I’d love to help you get closer to that cinematic dream.
No Responses