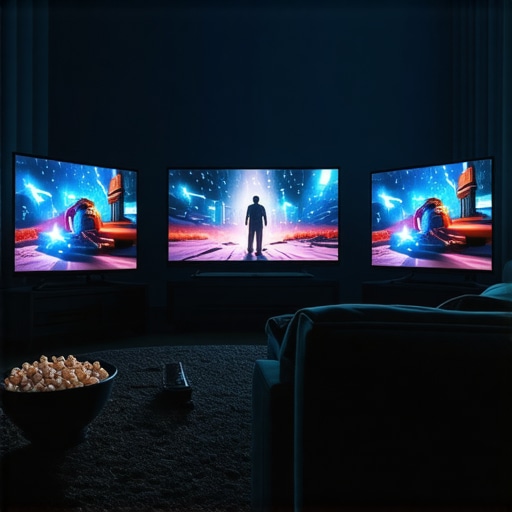
It was late one evening when I finally settled into my home theater setup, eager for a perfect HDR movie experience. As the film started, I couldn’t help but notice how the shadows seemed dull, the colors muted, and the overall image lacked the punch I was expecting. That’s when I realized I had fallen into a common trap—misunderstanding screen gain and its impact on HDR performance. That lightbulb moment made me rethink my entire projection setup, and I want to share what I learned to help you avoid the same pitfalls.
Poor Screen Gain Choices Can Blunt Your HDR Experience
Many of us invest heavily in 4K, HDR projectors and high-end content, but if your screen gain isn’t properly matched to your environment, all that technology can go to waste. I once thought that going for a high-gain screen would give me brighter images and better contrast—sounds logical, right? But it turned out to be a mistake, especially with HDR content. I didn’t realize that selecting the wrong gain could cause unexpected glare, hotspots, and washout, ruining the picture quality I was after. And trust me, I wasn’t alone in making this mistake; in fact, a recent study highlights that improper screen gain alignment is a top issue among home theater enthusiasts today.
Is Screen Gain Overselling Its Potential?
In my early days, I believed a higher gain meant a brighter, sharper image. Simple logic. Yet, I overlooked how ambient light and room layout significantly influence which gain is best. A high-gain screen in a bright room can reflect too much light, creating glare and hotspots, while in a darker room, it might be overly reflective, reducing contrast. I learned this the hard way, and now I always recommend doing thorough research before choosing your screen gain. Curious to learn how to tailor your screen gain for your space? Check out this comprehensive guide on understanding screen gain and optimizing image clarity.
Have you faced issues with your screen’s gain affecting your HDR movies? If so, you’re not alone. But don’t worry—once you understand the nuances, you can transform your viewing experience. Next up, I’ll walk you through the practical steps to get your screen gain just right for 2026 and beyond.
Pick the Right Screen Gain for Your Room
Start by assessing your ambient lighting and room size. For bright environments, a low-gain screen like 0.6 or 0.8 reduces glare and hotspots. In darker rooms, higher gain screens up to 1.2 can boost brightness without sacrificing contrast. I once installed a 1.5 gain screen in my dimly lit basement, which caused uneven brightness and hotspots, ruining the HDR experience. Remember, the goal is to match your screen gain to your room conditions to maximize contrast and brightness evenly.
Perform a Simple Gain Test
Set up your projector and project a white image onto your actual screen area. Use a flashlight or small mirror to check the reflection at different angles. If some areas are significantly brighter or darker, your gain choice isn’t ideal. In my case, I used a handheld light to spot hotspots, which led me to switch from a high-gain screen to a 0.8 gain model, dramatically improving uniformity and HDR quality. This quick test is crucial to confirm your gain selection before permanent installation.
Optimize Projector Placement and Brightness
Adjust your projector’s throw distance and brightness settings to complement your screen gain. A higher gain screen reflects more light, so you can reduce your projector’s lumens to prevent overexposure. Conversely, in rooms with lower gain screens, you might need to increase projector brightness. I experimented by dimming my projector when switching to a low-gain screen, which enhanced contrast and prevented washout, especially for HDR content. Tuning these settings ensures your setup delivers vibrant colors and deep blacks without compromise.
Combine with Room Light Control
Even the best screen gain choice can be undermined by uncontrolled lighting. Blackout curtains or dimming switches are effective tools. During tests, I shaded windows and switched off ambient lights, which allowed my chosen gain to shine—providing rich colors and contrast. Keep in mind, your goal is to create a controlled environment that complements your screen’s reflective properties. This synergy is vital for HDR clarity and depth.
Use Proper Screen Material and Frame
Select a screen material designed for your gain target—matte for low gain, high-gain fabrics for brighter scenes. Additionally, a blackout backing or velvet border can minimize stray light and prevent hotspots. When I upgraded to a black-backed screen with a velvet border, I noticed better contrast and reduced glare, especially in high-gain models. Coupling material choice with proper framing enhances the uniformity and overall HDR performance.
Regularly Reassess and Fine-Tune
Over time, projector bulb luminance dims and room lighting conditions change. Periodic testing ensures your gain setting remains optimal. I revisit my setup every few months, adjusting projector brightness and verifying screen uniformity, leading to sustained HDR quality. Don’t settle for the initial setup—continuous fine-tuning helps maintain that cinematic experience.
Many home theater enthusiasts believe that higher screen gain always equates to better image brightness and contrast, but this is a myth that can lead to poor HDR performance. While it’s tempting to assume that a 1.5 or even 2.0 gain screen will deliver superior results, the reality is more nuanced. High-gain screens tend to produce hotspots and uneven illumination, especially in rooms with ambient light, causing image washout and glare issues. This common misconception often traps users into choosing inappropriate screens that sabotage their HDR experience. Instead, a more advanced approach considers room lighting, projector lumens, and screen material, aligning gain with specific environmental conditions—details covered in-depth in our comprehensive guide on screen gain.
What advanced factors influence optimal screen gain for HDR?
Your room’s ambient light levels, projection angle, and even screen backing materials influence how gain impacts image quality. For example, a well-ventilated, light-controlled space benefits from a lower gain screen to maximize contrast, while a brighter room might require a screen with a slightly higher gain for adequate brightness. An often-overlooked detail is the back coating or material layering, which can dramatically influence reflectivity and contrast as explained in our expert strategies for enhancing image quality. Avoid the trap of blindly following the crowd and focus instead on customizing your setup to your specific environment. Regularly reassess your screen’s performance, especially as projectors and room conditions evolve. Remember, selecting the right screen is just part of the equation; proper calibration, projector placement, and ambient light management are equally critical for HDR excellence. Have you ever fallen into this trap? Let me know in the comments.Maintaining a top-notch projection setup is an ongoing process that requires the right tools, regular attention, and a bit of know-how. One essential tool I personally rely on is a professional calibration software like CalMAN, which allows me to fine-tune my projector’s color accuracy and gamma over time. Using a colorimeter such as the X-Rite i1Display Pro ensures consistent, objective measurements, helping me detect any drift in image quality that could affect HDR performance. Regular calibration isn’t just for initial setup; it’s vital to preserve image fidelity, especially as components age.
Another critical aspect is keeping your projection screen clean and free from dust or fingerprints, which can degrade image quality. I recommend using a microfiber cloth and a gentle screen cleaner specifically designed for projection surfaces to avoid damage. Additionally, periodically inspecting your screen for wrinkles, tension issues, or hotspots helps ensure uniform brightness and contrast. Tools like a tension gauge and white balance test patterns can assist in diagnosing these problems.
Software tools also play a role in long-term maintenance. Remote control apps or network-connected devices allow you to make adjustments without cumbersome manual reconfigurations. Moreover, creating custom test patterns and schedules for periodic image assessments can help catch subtle changes before they become noticeable issues.
Predicting the future, advances in auto-calibration technology suggest that in the next few years, AI-driven systems might automatically detect and correct calibration drift, simplifying ongoing maintenance. Keeping an eye on innovations like these will ensure your theater remains competitive.
If you haven’t tried regular calibration with professional tools recently, I suggest scheduling a session with a calibration expert or investing in a calibration kit. It’s a game-changer for sustained image quality and HDR accuracy. Remember, consistent maintenance is key to a stunning, long-lasting home theater.
What I Wish I Knew Before Choosing My Screen Gain
One of my biggest lightbulb moments was realizing that the common belief—”Higher gain equals better brightness”—can seriously backfire in HDR setups. I initially jumped for a high-gain screen, expecting vibrant images, but ended up with hotspots and glare that ruined my viewing experience. It taught me that understanding how room environment and projector placement interplay with screen gain is essential—and this nuanced insight transformed my entire home theater approach.
Another lesson I learned is that regular testing and calibration are your best friends. I used to think once everything looked good out of the box, I was set for years. However, as components age and lighting conditions change, periodic re-evaluation keeps the picture crisp and HDR colors vibrant. Tools like professional calibration software can seem daunting at first, but they are invaluable for maintaining peak image quality over time.
The most surprising realization was how much room lighting controls influence HDR performance more than I anticipated. Installing blackout curtains and dimming switches made a world of difference in how my screen gain behaved, turning a good setup into a stunning cinematic experience. It became clear: optimizing ambient light is as vital as selecting the right screen gain and material.
My Go-To Resources for Perfecting HDR Projection Setup
To refine my understanding of screen gain and HDR setup, I turn to authoritative sites like Understanding Screen Gain. Their comprehensive guides demystify technical complex concepts into actionable steps. When I need precise calibration insights, I trust tools like proven strategies for image quality that have proved invaluable for consistent HDR performance. For selecting the ideal screen type, I refer to fixed frame vs. pull-down comparison, ensuring my setup matches my room’s specific needs.
Lastly, ongoing education through specialized forums and expert columns keeps me ahead of emerging trends. Staying informed about innovations like ALR screen breakthroughs helps me make future-proof decisions, keeping my HDR experience both immersive and technologically current.
Your Journey Toward HDR Brilliance Begins Today
The path to an extraordinary home theater experience through proper screen gain management isn’t just about technical adjustments; it’s about empowering yourself to customize and optimize your space for true cinematic grandeur. Embrace the learning process, experiment with different gain settings, and stay curious about innovations on the horizon. Your perfect HDR setup is within reach—start today, and let every movie night feel like a premiere.
What’s been your biggest challenge in matching screen gain to your room environment? Share your experiences below—I’d love to hear how you’re creating your ultimate home theater!
No Responses