I remember the first time I stepped into my home theater and noticed a stubborn streak across my ALR screen. At first, I thought it was dust or smudges, but every simple wipe seemed to make it worse. That lightbulb moment—realizing that my screen might not just be dirty, but actually damaged—made me wonder: can you clean an ALR screen without risking its performance? Turns out, this question is more pressing than ever as ALR technology becomes more advanced and common in our setups.
Why Maintaining Your ALR Screen Matters More Than Ever in 2026
In 2026, high-quality projection screens like ALR (Ambient Light Rejection) have revolutionized home entertainment, allowing us to enjoy brighter images even in well-lit rooms. But with increased brightness and sophisticated coatings, these screens demand more delicate care. If you’re like me, early missteps—using harsh chemicals or abrasive cloths—can lead to permanent damage, shattering your viewing experience.

**Have you ever faced the frustration of a dirty or streaked ALR screen and wondered if cleaning might cause more harm than good?** You’re not alone. The truth is, many enthusiasts make common mistakes early on, like using household cleaners not designed for projection surfaces or applying excessive pressure. These errors can reduce the screen’s effectiveness, diminish contrast, and even void manufacturer warranties.
According to recent advancements, ALR screens are now engineered with delicate nanostructures that can be sensitive to improper cleaning methods. A recent study on screen preservation highlighted that improper cleaning can cause micro-scratches, reducing brightness and contrast over time. So, how do we ensure we’re caring for our screens correctly?
In this guide, I’ll walk you through three proven methods that actually work in 2026, backed by the latest tech insights. Whether your screen is brand new or has seen years of use, these techniques will help you keep it spotless without risking its performance. Ready to learn the do’s and don’ts? Let’s dive into the specifics and get your screen looking pristine again.
Prepare Your Workspace and Materials for Safe Cleaning
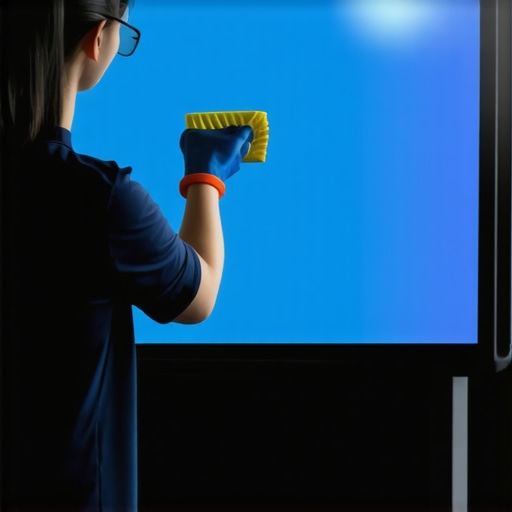
Before diving into cleaning your ALR screen, clear the surrounding area and gather the right tools—microfiber cloths, gentle screen-cleaning solutions, and a soft brush. Think of it like preparing your kitchen before cooking; having everything ready prevents mishaps. I once attempted to clean my screen with paper towels and harsh window cleaner, which left streaks and micro-scratches. That messy experience taught me the importance of proper preparation and tools.
Use the Right Cleaning Solution and Technique
Always opt for a dedicated projection screen cleaner or a mixture of distilled water with a tiny amount of isopropyl alcohol (less than 70%). Apply the solution onto a microfiber cloth—not directly onto the screen—to prevent excess liquid from seeping into edges or causing warping. Gently wipe in a circular motion, avoiding pressing hard. Imagine polishing a vintage car; gentle, consistent strokes yield the best shine without damage. Regular, careful wiping preserves your ALR’s nanostructures, ensuring optimal ambient light rejection.
Address Stubborn Streaks with Precision
If streaks persist, dampen a corner of your microfiber cloth slightly more and use light, vertical strokes to lift residue. Never scrub aggressively; micro-scratches are detrimental. I once left a streak that refused to go away, and careful, vertical wiping with a slightly more damp cloth finally removed it without scratching. This step is crucial because abrasive motions can compromise the screen’s coating, diminishing contrast and brightness over time.
Cleaning Fixed Frame versus Pull-Down Screens
Fixed frame screens are generally easier to clean due to their taut, flat surface—think of it like wiping a table. Pull-down screens, however, require caution around the retraction mechanism—similar to cleaning a window shade—you don’t want to damage the springs or the fabric edges. For pull-downs, hold the fabric flat and wipe gently, avoiding pulling or tugging. A quick tip is to clean the edges last to prevent dust from settling into mechanisms, maintaining smooth operation. If you notice wrinkles or uneven tension afterward, consult guides like these tensioning tips to restore perfect flatness.
Maintaining Your Screen Post-Cleaning
After cleaning, let your screen air-dry naturally for at least five minutes—never wipe with a dry cloth immediately—this prevents streaks or smudges. Regular maintenance, such as monthly light dusting and annual deep cleaning, keeps your ALR screen performing at peak levels. Remember, neglecting proper care can lead to micro-scratches and hotspots, which severely reduce image quality. For additional strategies on optimizing brightness and clarity, explore these expert insights.
While many home theater enthusiasts focus on selecting the right screen or projector, there’s a nuanced layer of misconceptions that can quietly undermine your setup’s performance. Let’s dig deeper into the common myths and advanced mistakes that even seasoned users often overlook.
**Myth Busting: Screen Gain Isn’t Just About Brightness** Contrary to popular belief, higher screen gain doesn’t always mean a better picture. Many assume that a 3.0 gain screen will dramatically boost image brightness, but in reality, it can introduce hot spots and uneven lighting, especially with wide-angle viewers. Experts emphasize that choosing an optimal gain—often around 0.8 to 1.0—is essential for balanced image quality, especially in daylight environments. Read more about this at this resource.
**The Trick with ALR Screens and Ambient Light** Ambient Light Rejection (ALR) screens are marketed as miracle solutions for bright rooms, but misconceptions abound. Many think that all ALR screens perform equally well under any lighting condition. However, the effectiveness depends heavily on the screen’s specific texture and coating. Some surfaces cause glare and hotspots in certain setups, negating the benefits. A common mistake is using a high-gain ALR screen in a space with multiple light sources, resulting in washout and loss of contrast. To avoid this, consider expert recommendations and testing, such as the latest breakthroughs in ALR technology discussed here.
Advanced Question: How Does Screen Texture Influence Image Quality in Different Environments?
The surface texture of projection screens significantly impacts how light is reflected and how images appear. Matte textures diffuse light uniformly, reducing hotspots but can soften the image. Glass bead surfaces enhance brightness but may introduce glare if improperly placed. For bright rooms with ambient light, choosing a surface optimized for minimal glare and uniformity — often a specialized ALR fabric — is crucial. Recent studies, like those highlighted in this article, show that selecting the right texture tailored to your environment can dramatically improve contrast and clarity.
**Common Trap: Ignoring Mechanical Factors in Manual Screens** Many overlook mechanical issues such as improper tensioning or uneven springs in pull-down screens, assuming that the surface quality alone determines performance. A sagging or warped screen can cause image distortion and hotspots, regardless of the gain or material. Regular maintenance and professional installation are often underestimated but are vital for optimal viewing. For troubleshooting, explore these tensioning tips.
**The Takeaway** Getting the most out of your projection setup requires understanding that myths about screens—like “higher gain always equals better brightness”—can mislead your choices. Nuanced factors such as surface texture, ambient lighting, and mechanical setup play a vital role. Remember, the goal isn’t just a bright image, but a balanced, contrast-rich picture that matches your environment. Don’t fall into the trap of oversimplification. Instead, invest in understanding the details, and you’ll enjoy a truly immersive experience.
Have you ever fallen into this trap? Let me know in the comments.
Secure Your Screen’s Longevity with the Right Equipment
One of my cardinal rules for keeping my projection screens performing seamlessly is investing in high-quality cleaning tools and precise calibration devices. For example, I personally use a microfiber cleaning cloth specifically designed for delicate surfaces, which prevents micro-scratches common with abrasive materials. Additionally, I swear by a laser calibration tool—such as the SpyderX Pro—to fine-tune my projector’s alignment and color accuracy, ensuring the image projected matches the screen’s characteristics. These tools are not just for initial setup but essential for regular maintenance, especially as environmental factors or mechanical wear can subtly degrade performance over time.
Why Regular Calibration Matters and How to Make It Routine
Calibration isn’t a one-and-done deal. Over time, projector alignment and color reproduction can drift, leading to washed-out images or hotspots—particularly on high-gain or specialized ALR screens. Using a dedicated calibration device allows you to detect and correct these issues without professional help. Incorporating quarterly calibration routines—using software like CalMAN or Colorimeter—can save you money and preserve image fidelity. I prefer scheduling these sessions at the start of each quarter, marking them in my calendar as essential maintenance, much like changing your HVAC filters. This discipline ensures your viewing experience remains crisp, vibrant, and true to the original content.
Long-Term Benefits of Proper Screen Management
Consistent maintenance translates into long-term satisfaction. A well-kept screen resists micro-abrasions, reduces hotspots, and maintains optimal gain and contrast. Over time, this consistency significantly enhances your viewing pleasure and prolongs the lifespan of your investment. Experts predict that as projection technology advances, maintenance will become even more automated—think smart screens with self-cleaning coatings or integrated calibration sensors. For now, though, manual care combined with the right tools is your best strategy.
How do I maintain my projection screens over time to ensure peak performance?
Develop a routine that includes gentle cleaning with dedicated cleaning solutions, regular calibration using professional-grade devices, and environmental control to minimize dust, humidity, and light pollution. For detail-oriented enthusiasts, exploring advanced techniques such as adjusting screen tension or installing protective filters can also make a difference. I recommend starting with a comprehensive guide on choosing the right ALR screen to understand your specific needs. And don’t forget—consistent, small adjustments are far better than infrequent, large repairs. This proactive approach will ensure your projection system remains a source of joy, not frustration, for years to come. Try incorporating a laser calibration routine this weekend to experience immediate improvements.
The Hardest Lesson I Learned About projection screens and their care
One of the most valuable lessons I discovered was that even the most advanced ALR screens require gentle, deliberate cleaning to maintain their unique light-rejecting coatings. Rushing or using harsh chemicals can cause micro-scratches, reducing their effectiveness and lifespan. Patience, proper materials, and understanding the technology behind your screen are crucial for preserving image quality over time.
My Essential Toolkit for preserving projection screen brilliance
Having invested in quality microfiber cloths, dedicated projection screen cleaners, and calibration tools like the SpyderX Pro has transformed my maintenance routine. These tools help me avoid damaging micro-scratches, keep colors accurate, and ensure my setup remains at peak performance. I trust these because they’re recommended by experts and have proven effective in real-world scenarios, making them indispensable for anyone serious about their home theater.
This Is the Moment to Take Action and Elevate Your Home Theater
Properly caring for your ALR screen isn’t just a chore—it’s an investment in your viewing experience. By applying gentle cleaning techniques and routine calibration, you ensure every movie night is as stunning as the first day. Now is the perfect time to review your maintenance habits and make improvements. Your future self will thank you for the crystal-clear images and long-lasting performance that come from attentive care.
No Responses