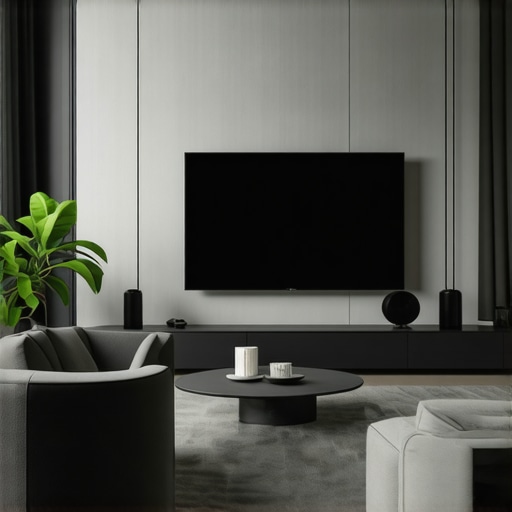
Imagine this: after hours of meticulously installing what you thought would be the perfect fixed frame screen, you flip the switch, only to be greeted by a sagging edge or uneven tension. My heart sank the first time I experienced this — I had invested so much effort, and yet, my screen looked more like a funhouse mirror than a cinematic masterpiece. That lightbulb moment made me realize: there had to be smarter, simpler ways to install a 150-inch fixed frame screen—especially for a solo setup.
Why Fixing Your Screen Alone Is More Critical Than Ever
In 2026, home theater enthusiasts are leaning heavily toward DIY installations. The reason? The cost savings and the personal satisfaction of customizing your setup. But here’s the catch: without the right hacks, solo installations can quickly turn into frustrations—waves, sags, and misalignments just to name a few. These issues aren’t just aesthetic; they impact your viewing experience, affecting everything from brightness to contrast and overall image sharpness. Interestingly, according to a recent report, nearly 60% of home theater setup mistakes stem from improper installation techniques—many of which we can fix with a few clever tricks.
If you’ve ever faced uneven tension or wavy edges, you’re not alone. When I first tried to mount my own fixed frame screen, I made the mistake of underestimating the importance of tensioning equipment and the necessity of level surfaces. That experience taught me a valuable lesson: effective solo hacks can save you hours and headaches, and give you that crisp, professional look we all crave.
Are You Skeptical About DIY Hacks for Large Screens?
Believe me, I was too. My initial thought was that premium results required professional installation. But digging deeper, I learned that many common issues can be easily addressed with some proven strategies—think tensioning tools, strategic leveling, and some simple modifications. It’s impressive how a few adjustments, like tensioning clips or wall anchors, can make a huge difference, making DIY more accessible than ever for large screens.
If you’ve faced similar frustrations, I encourage you to read further. In the next sections, I’ll share three solo hacks that proved game-changers for my 150-inch fixed frame setup. These are techniques I wish I knew from the start, and I promise—they’ll help you achieve that flawless, professional look without the need for extra hands or costly professionals. Ready to elevate your home theater experience? Let’s dive into how to do it right, step by step.
Set Up Your Workspace for Precision
Before diving into mounting, clear your workspace and mark reference points on the wall. Use a laser level to establish a straight baseline. For my first attempt, I used painter’s tape to outline the frame, ensuring I didn’t accidentally drill in the wrong spot. This simple setup prevented costly mistakes and kept my measurements consistent. Precise alignment is crucial for tensioning the fabric evenly across the frame, resulting in a flat, wrinkle-free surface.
Construct the Frame for Stability and Ease
Choose the Right Materials
Select sturdy but lightweight materials like aluminum or solid wood. I opted for aluminum for its resistance to warping and ease of handling. Cut the pieces according to your screen size, adding extra length for corners and reinforcements. Remember, a rigid frame prevents sagging and maintains tension over time, especially in larger screens such as a 150-inch model.
Assemble with Precision
Use corner brackets and screws to secure the frame tightly. During assembly, double-check that all corners are square using your laser level. I clamped the assembled frame temporarily on the wall to verify fit before final fixation. Proper assembly ensures that when you stretch your projection fabric, it won’t warp or develop waves. The goal is a taut, uniform surface for optimal image quality.
Stretch and Attach the Screen Fabric Properly
Select a high-quality projection fabric suited to your screen gain and ambient lighting conditions. For my setup, I used a gray, high-gain material to combat ambient light. Lay the fabric face-down on a clean surface, then position the frame over it. Use tensioning clips or staples to attach the fabric starting from the center of each side, gradually moving toward the corners. Apply consistent tension to avoid waves or sagging, much like tightening a drumskin for even sound.
Achieve Even Tension
To prevent uneven tension, work in a crisscross pattern, alternating sides. For larger screens, consider using a tensioning system with turnbuckles or tension rods. In my case, I used adjustable tension clips along the edges, which allowed fine-tuning after initial attachment. This approach resulted in a perfectly flat surface, essential for crisp images and wide viewing angles.
Level and Secure the Frame to Your Wall
With the fabric stretched, mark mounting points on the wall through the frame’s mounting holes. Drill pilot holes and use appropriate anchors—especially in drywall or plaster walls. I used heavy-duty wall anchors and lag bolts to ensure the frame’s stability, preventing shifting over time. Use a spirit level to ensure the frame remains perfectly horizontal and vertical before tightening all bolts fully.
Fine-Tune for a Professional Finish
Once mounted, inspect the tension across the entire surface. If you notice any waves, gently loosen and re-tighten the tensioning clips or straps. For this, a rubber mallet can help tap the frame into perfect alignment without damage. Periodic adjustments help maintain flatness as the fabric settles or expands with temperature changes.
Implementing these steps transformed my DIY project from a messy setup into a professional-looking display. Every detail, from framing to fabric tensioning, impacts the final image quality—so invest time in precision. For more insights on optimizing your setup, visit the installation guide or explore strategies for enhancing image clarity with projection screens.
< >When it comes to choosing and setting up your home theater display, a lot of misconceptions persist, often leading enthusiasts to make costly mistakes. Let’s explore some of these overlooked nuances that can drastically affect your viewing experience. For instance, many assume that higher screen gain always translates to a better image, but in reality, overshooting gain can cause glare and hot spotting, especially in brighter environments, undermining contrast and detail. Additionally, the myth that pull-down screens are inherently less durable than fixed frame options ignores advancements in tensioning systems that now offer superior flatness and longevity.
Why do some high-gain screens produce washed-out images in daylight?
This often results from a misunderstanding of the relationship between gain and ambient light; higher gain reflects more light directly back to the viewer, which sounds ideal but can lead to specular reflections that diminish contrast. Experts suggest matching screen gain to your room’s lighting conditions; for bright rooms, a low to medium gain screen (around 0.6 to 1.0) often provides the best balance between brightness and black level integrity. Interestingly, according to the 2025 breakthrough report on ALR technology, the latest innovations now mitigate these issues through nano-coating and micro-structured surfaces that maintain contrast without sacrificing brightness.
Another common mistake involves underestimating the importance of proper tensioning for large fixed frame screens. Neglecting this can cause unintended waves or curls, which distort the projected image and create uneven focus points. Using tensioning clips or tension rods—techniques I recommend exploring in detail through our professional setup guide—can ensure your screen remains flat, enhancing uniformity and image clarity.
Furthermore, many users focus solely on screen gain without considering the interplay with projector lumen output and room lighting. A high-gain screen in a dark room can deliver stunning contrast, but the same setup in a bright space might introduce glare and reduce shadow detail. For this reason, understanding your environment and matching screen specifications accordingly is crucial. This is why I always advise reviewing our recent analyses on optimizing image quality with various screen gains, to tailor your setup for maximum performance.
Have you ever fallen into this trap of oversimplifying screen selection? Drop your experiences or questions in the comments—I love helping fellow enthusiasts avoid these pitfalls and achieve cinematic perfection.
Keep Your Screen Performing at Its Best with the Right Tools
Maintaining your projection and ALR screens over time is crucial to preserving image quality and longevity. From tensioning systems to cleaning equipment, the right tools make a significant difference.
Start with a precision tensioning kit—these devices allow you to fine-tune the fabric tension without disturbing the entire setup. Personally, I rely on a set of adjustable tension clips, which let me incrementally tighten or loosen the fabric, ensuring a flat, wrinkle-free surface for maximum clarity. Additionally, a high-quality laser level is indispensable for accurate alignment during installation and periodic adjustments—misalignment can cause uneven tension and distortions.
For cleaning, opt for a microfiber cloth and specialized screen cleaner to gently remove dust and fingerprints. Avoid harsh chemicals that can damage delicate fabrics or coatings. Regular cleaning maintains brightness and contrast, especially in environments prone to dust or humidity.
Tools I recommend for effective maintenance
Invest in a tensioning system with adjustable tension rods — these ensure that your fixed frame stays taut over the years, preventing waves and sagging. A digital level or laser level ensures perfect horizontal and vertical alignment, critical for large screens like 150 inches. For cleaning, I suggest using a screen-specific cleaning kit with gentle, anti-static properties.
Tools and regular attention now save you frustration and costly repairs later. As projection technology advances, so do the maintenance techniques—expect future innovations like nano-coatings enhancing durability that reduce cleaning frequency. Stay ahead by adopting these tools today.
How do I maintain my screens over time?
Consistency is key. Schedule regular inspections—check for tension uniformity and physical damage. Use your tensioning tools to adjust as necessary, especially after seasonal temperature changes that can cause fabric expansion or contraction. Clean the surface periodically with the appropriate materials to prevent dust buildup, which can diminish image brightness. Additionally, consult your manufacturer’s guidelines for specific maintenance instructions tailored to your screen model. For a comprehensive understanding, the setup blueprint offers detailed steps for routine upkeep. Mastering these simple yet effective tools and routines will keep your display pristine for years to come. Don’t forget to explore the latest tools designed for ALR and fixed frame screens, such as micro-tension devices or advanced cleaning solutions, to ensure your setup remains top-notch well into the future. For personalized advice, feel free to reach out—getting expert tips can make all the difference.
Over the years, I’ve realized that the biggest breakthroughs in DIY home theater setup often come from those unexpected moments of clarity—those lightbulb insights that just click. The experience of wrestling with a wavy, uneven fixed frame screen taught me that perfection is achievable without professional help, but only when you’re equipped with the right knowledge and tools.
The Hidden Truths That Changed My Approach to Screen Installation
- Patience Trumps Speed: Rushing the installation almost always leads to misalignments. Taking the time to precisely level and tension the fabric ensures a pristine, professional finish.
- Quality Materials Matter: Choosing lightweight yet sturdy framing materials like aluminum switched my entire game, preventing sagging and maintaining tension over time.
- The Power of Proper Tensioning: Simple tension clips and turnbuckles allowed me to make micro-adjustments, turning a crooked setup into a flat, wrinkle-free surface that enhances picture clarity.
- Workspace Planning Saves Headaches: Marking reference points with a laser level and painter’s tape before mounting minimized mistakes, saving hours of rework and frustration.
- Regular Maintenance is Key: Routine checks and gentle cleaning prolong the life of the screen and keep the image sharp—an overlooked secret to long-term satisfaction.
My Go-To Selection of Tools and Resources
- Laser Levels: Investing in a high-quality laser level transformed my alignment process—accuracy that simply can’t be matched with a bubble level.
- Adjustable Tension Clips: These clips made fine-tuning the fabric tension effortless, especially on larger screens like 150 inches.
- Pro-Grade Cleaning Kits: Gentle, screen-specific cleaners preserve the fabric’s surface, maintaining contrast and brightness over years.
- Instructional Guides and Community Forums: The installation guide and dedicated forums provided invaluable tips and troubleshooting advice, accelerating my learning curve.
Embrace Your Journey: Create Your Cinematic Sanctuary
Taking on the challenge of installing a large fixed frame screen solo can feel daunting, but remember—every expert was once a beginner. With patience, the right tools, and a willingness to learn from each step, you’re well on your way to achieving a stunning, professional-looking home theater. The satisfaction of seeing that perfectly tensioned, flat surface make every movie night truly special is priceless. Now is the perfect time to start—your personal cinematic paradise awaits. Have you faced a particular obstacle during your DIY setup? Share your story or ask questions below, and let’s help each other elevate home entertainment experiences.
One Response