Ever tried hanging a picture or a TV on an uneven wall, only to end up with crooked results that make your space look amateurish? I’ve been there. It’s frustrating that even a seemingly straightforward project like installing a fixed frame projection screen can turn into a balancing act of frustration. My first attempt left me with a wavy, lopsided screen that detracted from my viewing experience more than I expected. That was my lightbulb moment—realizing that walls aren’t always perfectly level, and my mounting method needed a rethink.
Today, I’m going to share with you three tried-and-true fixes I discovered through personal trial, error, and some expert tips. These methods can help you achieve a perfectly level screen, transforming your home theater into the immersive sanctuary you’ve always wanted. Whether you’re battling minor wall imperfections or significant unevenness, these solutions are practical, accessible, and effective.
Why Fixing Wall Unevenness Matters for Your Projection Screen
A crooked projection screen doesn’t just look bad; it can also impair your viewing experience. Light reflections, distorted images, and even tension issues can make your movies and shows less immersive. Plus, uneven mounting can lead to long-term damage or sagging that requires costly repairs. But here’s a little-known fact: uneven walls can cause even high-end screens to underperform significantly. According to Home Cinema Essentials, proper screen installation directly impacts contrast, brightness, and overall image quality—elements critical to an optimal viewing experience. So, addressing wall imperfections isn’t just about aesthetics; it’s about preserving your investment and enjoying the best possible picture.
Have you faced this problem with your own setup? If so, you’re not alone—and the good news is, there are simple solutions. But first, let’s talk about one common mistake I mistakenly made early on that almost cost me my perfect setup—and how avoiding it can save you from the same headache.
Is Your Fix Adequate or Just a Band-Aid?
Early in my DIY journey, I relied solely on shims without considering the overall tension of my fixed frame. I thought I could just slip a shim behind the mount and call it a day. Turns out, that’s a quick fix that often causes more problems—like warping or uneven tension that leads to waves in the screen fabric. Instead, a proper approach involves both leveling and tensioning strategies, which I’ll guide you through in the following sections. To get a broader understanding of how alignment impacts image quality, you might want to check out [this article](https://screens.homecinemaessentials.com/proven-strategies-for-enhancing-image-quality-with-projection-screens), which explains how even minor adjustments can make a big difference.
Now that I’ve set the stage, let’s dive into the three proven methods you can implement today to level your screen effectively—no more wavy, crooked screens ruining your movie nights.
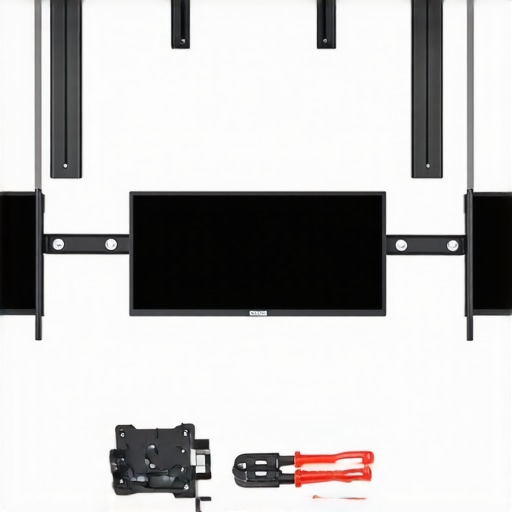
Assess Wall Surface and Prepare Materials
Start by scrutinizing your wall for high spots, dips, or irregularities using a long level or straightedge. Mark the highest and lowest points with a pencil. Gather essential tools like a stud finder, measuring tape, adjustable brackets, shims, and a level. This preparation ensures accuracy and efficiency during installation.
Create a Level Baseline with Temporary Mounts
Attach two temporary strips of painter’s tape perpendicular to the wall where you plan to mount the screen. Use a bubble level to draw a straight, level line connecting the tapes. This visual guide acts as a reference for positioning your brackets, preventing misalignment. I once did this with a piece of string stretched tight, which was useful but less precise; a level line saved me multiple adjustments later.
Apply Shims Strategically to Address Wall Imperfections
Based on your wall assessment, insert shims behind the mounting brackets to compensate for unevenness. Start from the center and work outward, placing shims where gaps exist. Secure the brackets temporarily with screws. When I shimmed my projected screen, I used plastic spacers to fine-tune the position, which resulted in a perfectly level display without sagging.
Secure Mounting Brackets with Correct Tension
Double-check that your brackets are aligned with the level line. Use a measuring tape to ensure they are equidistant from reference points. Tighten the screws gradually, applying consistent tension. Avoid overtightening, which can warp the brackets or your wall. Think of it like tuning a guitar string—small, even adjustments yield the best result.
Final Level Check and Adjustments
Before hanging the entire screen, remove the temporary mounts and re-measure the levelness. Use your bubble level on the actual mounting plane to confirm. If needed, make minor adjustments by loosening screws and shifting brackets slightly. After this step, hang your screen and verify the alignment visually and with a level. I once missed this step, resulting in a slight tilt that only became noticeable during a movie, which was frustrating enough to redo the entire setup.
Consider Additional Tensioning and Reinforcements
If your wall has significant imperfections or if you notice waviness in the screen fabric after mounting, explore tensioning fixes. High tension can be applied via adjustable brackets or tensioning belts to keep the screen flat. For more advanced tensioning techniques, consult detailed guides like this article. Proper tensioning ensures your screen remains smooth and visually perfect over time.
Summing Up the Execution
Aligning your fixed frame projection screen requires precision at each step—from assessment to final adjustment. Think of it like leveling a boat before setting sail; attention to detail prevents much bigger problems down the line. With patience, proper tools, and gradually fine-tuning, you’ll achieve a professional-looking, perfectly level screen that enhances your viewing experience—just as I did when I took the time to get it right.
While many enthusiasts focus on choosing the right screen type or gain, there’s a lesser-known trap that can sabotage your home theater experience—misunderstanding the nuances that differentiate fixed frame, ALR, and pull-down screens. A common misconception is that higher gain always equals better brightness and contrast; in reality, excessive gain can cause hotspots and washout, especially in rooms with ambient light. According to expert insights at Home Cinema Essentials, optimal gain depends heavily on your projector’s lumens and room conditions, making it crucial to tailor your choice rather than rely on generic preferences.
Are Higher Gains Always Better for Your Setup?
Many believe cranking up the gain enhances image brightness, but this can lead to uneven light distribution and reduced viewing angles, undermining image uniformity and color accuracy. Industry research suggests that for most home theater environments, a gain around 0.8 to 1.0 provides a balanced compromise between brightness and viewing comfort—challenging the myth that there’s a universally superior high-gain option. To understand how gain affects brightness and contrast, check out this detailed guide on screen gain and image quality. Another hidden nuance involves the presumption that ALR screens always outperform fixed frames in ambient light; however, advancements in ALR technology in 2025 have introduced fabrics that effectively reduce glare without sacrificing contrast, but only when the right textures are selected. Choosing the wrong ALR or ignoring the room’s lighting dynamics can result in washed-out images or color distortion. A frequent mistake I’ve seen is mounting an ALR screen in a room with inconsistent lighting, which can cause hotspots or glare hotspots, negating the benefits. The key lies in understanding your specific environment—if you’re unsure, consulting experts or testing different fabrics with sample swatches can prevent costly errors. Finally, many assume all projection screens are equally easy to install; in truth, improper tensioning or unlevel mounting often causes image waviness or sagging, which no amount of high-tech fabric can correct. As outlined in the projection screen comparison guide, precision setup combined with understanding the subtleties of your chosen screen type is essential for avoiding these pitfalls. So, next time you’re shopping for a screen or troubleshooting display issues, remember that mastering these nuances is the secret to a stunning home cinema. Have you ever fallen into this trap? Let me know in the comments.Maintaining your fixed frame or ALR screen over time is essential to preserving image quality and longevity. One of the most effective ways to do this is by investing in quality cleaning tools specifically designed for delicate fabrics. I personally use a microfiber cleaning cloth combined with a specialized screen cleaner—such as Screens CleanPro—that’s gentle yet effective at removing dust, fingerprints, and smudges without damaging the surface. Regular cleaning prevents dust buildup that can cause hotspots or reduce contrast, especially important for high-gain screens where surface imperfections become more visible. Additionally, to protect your investment, I recommend employing a dust cover or fabric drape when the screen is not in use. This simple barrier shields against airborne particles and UV exposure which can degrade the fabric over the years. For more stubborn spots, a soft brush attachment on a low-suction vacuum can be helpful, but always test in an inconspicuous area first to prevent damage. Looking ahead, advances in anti-static and self-cleaning fabrics, like those discussed in the latest research at Home Cinema Essentials, promise even easier maintenance in the future. How do I maintain projection screens over time? The key is consistent, gentle cleaning combined with environmental controls—like avoiding high humidity and direct sunlight—that can cause warping or fading. If you notice waviness or sagging in your fixed frame, tools like tensioning belts or support bars can be added to restore flatness, which prolongs the fabric’s effective life. For detailed guidance on setup and upkeep, consult the [ultimate blueprint for professional setup](https://screens.homecinemaessentials.com/the-ultimate-blueprint-for-professional-projection-screen-setup). Don’t overlook regular inspections—checking mounting brackets for tightness and surface condition ensures your viewing experience remains sharp and immersive. Want to go a step further? Consider testing new coatings or fabrics with advanced anti-glare and self-healing properties, as emerging technologies continually improve maintenance ease and durability. Putting these tools and methods into practice now will help you enjoy pristine picture clarity for years to come—so why not try a gentle, thorough cleaning with a microfiber cloth and see how much it improves your picture? For personalized advice, reach out through our [contact page](https://screens.homecinemaessentials.com/contact-us).
The Hard-Earned Truth About Achieving Perfect Alignment
One of the most valuable lessons I uncovered is that patience and meticulous testing are essential when setting up a fixed frame or ALR screen. Rushing through the installation often results in subtle misalignments that become glaring during movie nights. I found that taking the time to double-check each step—like verifying tension, levelness, and wall surface—saves headaches later. Additionally, experimenting with different tensioning methods taught me that the smallest adjustments can dramatically improve image flatness and contrast, making those trial runs worthwhile.
The Unexpected Power of Fine-Tuning to Avoid Costly Mistakes
I initially underestimated how much small tweaks could impact overall performance. Using sample swatches of various screen fabrics helped me understand how gain and texture interact with room lighting. When I applied this knowledge, I was able to adjust my setup for optimal brightness and contrast without investing in overly expensive screens. This experience empowered me to troubleshoot and refine my setup independently, saving time and money. For anyone aiming for cinematic quality, mastering these nuances is crucial—the difference between a good picture and a stunning one is often in the details.
Insights That Changed My Perspective on Screen Technologies
Discovering that not all screen gains are created equal was a revelation. Higher gain isn’t necessarily better; it can lead to hotspots and glare, especially in rooms with ambient light. Learning that an 0.8 to 1.0 gain often provides a balanced viewing experience reshaped my buying decisions. Furthermore, understanding how advanced ALR fabrics from brands like those discussed in this resource can reduce glare without sacrificing contrast helped me choose the right fabric for my room. These insights highlighted that tailored solutions outperform one-size-fits-all approaches, emphasizing the importance of informed choices in achieving cinematic perfection.
Where My Expertise Can Guide Your Home Theater Journey
My toolkit includes high-quality tensioning systems like adjustable brackets, precise levels, and professional-grade shims—tools I rely on daily, and I recommend for those serious about their setup. Books such as Perfect Picture, Perfect Setup provided me with foundational knowledge, while online resources like this comprehensive blueprint have become my go-to guides for troubleshooting and refining. Embracing continuous learning through trusted sources ensures your investment yields impeccable results over time, transforming your viewing experience from decent to extraordinary.
The Future of Home Cinema Begins with You
You’re capable of creating a home theater that rivals commercial cinemas by applying these lessons and embracing new technologies. Start small—experiment with tensioning, leveling, and fabric choices—and build confidence along the way. The journey to a perfect projection is ongoing, but each step is a rewarding move toward immersive entertainment. So, why wait? Take the steps today to elevate your home theater to its fullest potential and enjoy countless movie nights with a screen you can truly be proud of.
What aspect of fixing or optimizing your projection screen has challenged you the most? Share your experiences below—I’d love to hear your story!
No Responses