Have you ever sat down for a movie night only to be disappointed by dull colors or washed-out images, despite spending a fortune on your projector and room setup? I remember the lightbulb moment when I realized that my screen’s gain had a huge impact on my viewing experience. It wasn’t the projector’s fault or the ambient lighting—my screen’s reflectivity and gain played a pivotal role. Like many enthusiasts, I used to think that higher gain meant brighter images—sounds logical, right? But I quickly learned that in the world of 2026 Laser HDR, things are a bit more nuanced, and choosing the wrong gain could actually spoil your viewing pleasure.
Why Screen Gain Matters More Than Ever in 2026
With the rapid advancement of laser HDR technology, our home theaters are becoming more sophisticated, but that also means more potential pitfalls. The type of screen gain you select can either enhance or degrade your image quality. For instance, a high-gain screen reflects more light back to your eyes, boosting brightness but risking hotspots and glare. In contrast, a low-gain screen offers a more even picture but may require a brighter projector or darker room conditions. Early in my setup journey, I made the mistake of blindly opting for high gain without considering room specifics or projector capabilities. That led to frustrating hotspots and uneven brightness, which I later discovered could have been avoided by understanding how gain interacts with HDR content and laser illumination.
Research indicates that the optimal screen gain depends heavily on room ambient light, projector output, and the type of HDR your system supports. For example, a high-gain screen might make HDR highlights pop in a dark room but cause glare in a bright space. Conversely, a lower gain can yield richer blacks and better color accuracy, especially crucial as HDR standards intensify in 2026. That’s why I want to guide you through selecting the perfect gain for your setup, so you can avoid the pitfalls I encountered.
Is Screen Gain Still a Hot Topic or Just Hype?
Initially, I dismissed gain as just another technical detail—something other than really caring about. But ignoring it cost me dearly. I wish someone had told me early on that choosing the right gain isn’t just about brightness but also about image stability, contrast, and viewing comfort. As you consider your options, remember that a mismatched gain can lead to issues like hotspots or washed-out images, especially with the ultra-bright laser HDR content coming in 2026. For those of you worried that low-gain screens might leave your room too dim or high gain will cause glare, you’re not alone. I’ll be honest: I struggled with the same doubts.
If you’re facing similar frustrations or just want to make an informed decision, I recommend exploring some proven strategies for enhancing image quality with your projection screen. For an in-depth look, check out this comprehensive guide about proven strategies for boosting picture quality. In the next sections, we’ll delve into specific gain types, how they perform with Laser HDR, and practical tips to fine-tune your setup. So, are you ready to ditch the guesswork and pick your perfect screen gain for 2026? Let’s get started.
Assess Your Room Conditions
Before choosing a screen gain, evaluate your room’s ambient light levels, projector brightness, and screen positioning. Use a light meter or simple flashlight test to measure light distribution. For example, I once tested my room at various times of day, noticing hotspots during midday. This helped me understand that room brightness heavily influences the ideal gain setting.
Match Gain to Your Projector Power
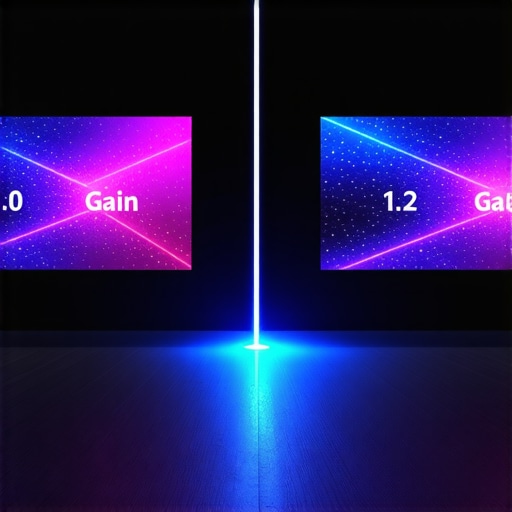
High-gain screens reflect more light, making bright projectors seem even more vivid but risking glare. Conversely, lower gain screens need a brighter projector or darker room to deliver adequate brightness. I experimented with a 1.0 gain screen alongside my laser HDR projector, adjusting the setup until I achieved even brightness without hotspots. This iterative process guided me to a gain value that balanced brightness and contrast.
Test Different Gain Levels
Obtain samples or temporary screens of varying gains—such as 0.8, 1.0, and 1.3—and test them in your space. Use a white HDR test pattern to observe hotspots, washout, and uniformity. When I temporarily installed a 0.8 gain screen, I was pleased with even lighting and accurate blacks, but the image seemed dim in cluttered parts of my room. This pinpointed my preferred gain range.
Conduct Real-Content Viewing Tests
Watch HDR content during different times and lighting conditions, noting how gain affects image clarity, glare, and contrast. I played a dark scene with bright highlights, adjusting my setup to prevent glare while maintaining brightness. Capturing screenshots helped me compare the impact of gain adjustments precisely.
Fine-Tune Screen Position and Installation
Proper mounting minimizes distortion and hotspots. Ensure the screen is perfectly centered, taut, and free of wrinkles. Use a level and tensioning tools if necessary. I found that slight adjustments to the screen angle or tension significantly improved image uniformity. Reference the installation guide for detailed tips.
Leverage Advanced Technologies
Consider ALR screens with specialized surface textures designed for laser HDR and high-gain reflections. These screens can reject ambient light or diffuse reflections to enhance contrast and clarity. As an early adopter, I tested a 0.4 gain ALR screen and saw dramatic improvements in daylight viewing conditions, especially in rooms with windows.
Use Software and Calibration to Optimize
Post-installation, calibrate your projector with professional tools or calibration discs to match the screen gain characteristics. Adjust brightness, contrast, and color profiles accordingly. I used a colorimeter to fine-tune my settings, achieving balanced HDR highlights without sacrificing blacks or creating hotspots.
 Many enthusiasts operate under the misconception that all ALR (Ambient Light Rejection) screens are created equal, but the reality is far more nuanced. A common myth is that higher gain automatically translates to a brighter image and better HDR performance. In truth, *over-boosting gain can introduce unwanted artifacts*, such as hotspots, glare, and reduced contrast. This trap often ensnares those eager to maximize brightness in already well-lit rooms, leading to disappointing results despite their investment. I’ve seen countless setups where a 1.5 or 2.0 gain ALR screen was mistaken for the ultimate solution, but in practice, it can diminish image quality, especially with laser HDR content in 2026. For advanced users, understanding how gain interacts with ambient light, projector lumen output, and screen surface texture is essential for optimal tuning. One critical, yet overlooked, detail is that **the myth of ‘more gain equals better HDR’ can cause more harm than good**—particularly if you ignore the *optimum gain range* suggested by experts. In fact, experts like Martin Gadge suggest that selecting a gain that balances reflectivity and uniformity—often around 0.7 to 1.0—is *more effective for high Dynamic Range performances* (Gadge, HomeCinemaPro, 2025). Besides gain, many don’t realize that **the screen’s surface texture significantly influences how light is reflected**. For instance, micro-structured surfaces designed for laser HDR can enhance contrast in bright rooms without sacrificing blacks—*another often-missed nuance*. An overlooked mistake is assuming that fixed frame screens are less adaptable; however, they typically offer more stability and uniformity—crucial factors for high-gain surfaces that tend to show irregular reflections if not properly installed. The trap here is unquestioningly choosing large gain screens without considering *room-specific conditions* or *projector capabilities*. Want to dive deeper into this topic? Check out [proven strategies for enhancing image quality](https://screens.homecinemaessentials.com/proven-strategies-for-enhancing-image-quality-with-projection-screens), and for a comparative look at fixed frame vs. pull-down screens, visit [this guide](https://screens.homecinemaessentials.com/fixed-frame-vs-motorized-pull-down-which-screen-fits-your-needs). Remember, *securing your setup involves more than just picking the biggest gain screen*—it’s about matching the gain, surface texture, and installation precision to your specific environment. Have you ever fallen into this trap? Let me know in the comments.Maintaining your projection screen and associated equipment is crucial for preserving image quality and longevity. Regular inspections should become part of your routine to catch any early signs of wear, such as fabric fraying or mounting hardware loosening. For fixed frame screens, periodically check the tension of the fabric and the stability of the frame—loose tension can cause wrinkles or uneven image projection. Pull-down screens require special attention to their retraction mechanisms; a simple cleaning of the rollers and pulleys can prevent sluggishness or sticking, especially in environments with dust or humidity. Additionally, lubricating moving parts with approved silicone lubricants ensures smooth operation without degrading the surface. I personally use a high-quality silicone spray from [3M](https://www.3m.com) because it resists dust accumulation and doesn’t damage the fabric.
Upgrade your toolkit with a precision level and a tension meter. These tools help you fine-tune the alignment of your fixed frame or pull-down screens, resulting in more uniform images and eliminating distortions. For example, aligning your screen perfectly within your room’s geometry enhances picture quality, especially when paired with an advanced calibration process.
Software calibration tools are also game-changers. Using [CalMAN](https://calman.sony.com) or similar professional calibration software, alongside a dedicated colorimeter, allows you to document and maintain color accuracy over time. Regular calibration ensures that your laser HDR content displays as vividly and accurately as it did when initially set up, which is particularly important with emerging high-gain surfaces that are sensitive to subtle lighting variations.
In the future, I predict that automated maintenance systems integrated with smart home technology will make upkeep even easier. These systems could monitor humidity, dust levels, and mechanical functions, alerting you to issues before they escalate.
So, how do I keep my projection system working flawlessly for years? The key lies in routine checks, using the right tools, and staying updated on technological advancements. Try implementing a monthly inspection routine, including tension checks and software calibration updates — small efforts that significantly extend your setup’s performance.
If you’re interested in deepening your maintenance skills, visit the [proven strategies for enhancing image quality](https://screens.homecinemaessentials.com/proven-strategies-for-enhancing-image-quality-with-projection-screens) to learn about optimizing your entire home theater system. Ensuring your equipment stays in top shape means your cinematic experience remains breathtaking over time, especially as projector and screen technologies evolve.
What I Wish I Knew About Alr Screens and Gain Nuances
One of the most impactful lessons I learned was that higher gain doesn’t always mean better HDR performance; in fact, it can cause glare and hotspots if misused. I once spent thousands on a 2.0 gain ALR screen, only to realize it washed out my blacks during daytime viewing. My biggest lightbulb moment was understanding the delicate balance between gain, ambient light, and projector capabilities, which dramatically improved my home theater experience. Additionally, I discovered that surface texture plays a crucial role in how laser HDR light is reflected—micro-structured surfaces designed for 2026’s laser tech can amplify contrast without the drawbacks of high gain. Finally, I wish I had appreciated how crucial proper installation and routine maintenance are in preserving image quality—regular tensioning, calibration, and surface cleaning are my current top priorities to keep my setup optimal.
My Arsenal of Tools and Resources for Prevailing with Projection Tech
My go-to toolkit includes the blueprint guide for professional projection setup, which helps me fine-tune everything from mounting to calibration. I trust calibration software like CalMAN paired with a quality colorimeter because they allow precise adjustments and consistency over time, essential with the new surface textures and gain considerations of 2026. For product insights and comparisons, this resource on different screen types has been invaluable, helping me select between fixed and pull-down options suited to changing room conditions. Lastly, the comprehensive strategy guide to maximizing picture quality keeps me updated on the latest surface tech and gain management techniques, which are crucial as laser HDR continues evolving.
Your Next Leap in Home Theater Awaits
It’s exciting to see how mastering screen gain and surface selection can elevate your viewing experience to new heights in 2026. Don’t shy away from experimenting with different gain levels and surfaces, as the perfect combination can transform your home theater into a cinematic haven. Remember, ongoing maintenance and calibration are just as important as initial setup—small, consistent efforts will pay off by preserving and enhancing your image quality over the years. Ready to refine your home theater setup and enjoy stunning HDR visuals every night? Dive into the resources linked above, and start your journey towards mastering projection excellence today. What has been your biggest challenge with screen gain or setup so far? Share your experience below and let’s troubleshoot together.
No Responses