Ever sat down for a movie night only to be disappointed by washed-out colors or poor contrast, despite investing in high-end equipment? I remember the moment I realized my home theater wasn’t delivering the cinematic experience I craved. It was frustrating—especially when I had done everything “right” but still couldn’t get that crisp, vibrant image I dreamed of. That lightbulb moment led me down a rabbit hole into projection screens and ALR technology, transforming my setup from mediocre to stunning.
The Struggle for Brightness and Clarity in Home Theaters
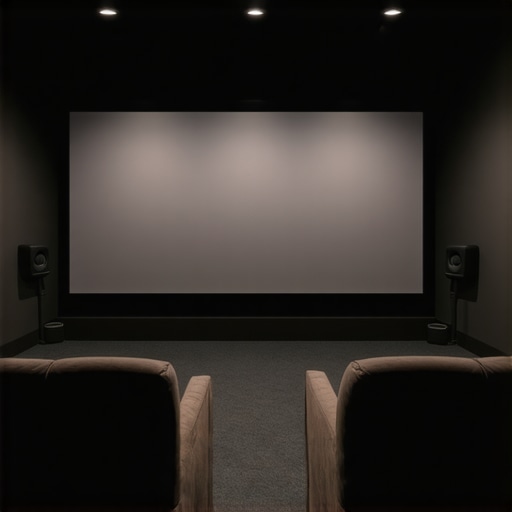
Position Your Screen for Optimal Brightness
Start by placing your projection screen away from direct light sources to prevent glare and washout. Use window treatments or blackout curtains in bright rooms. A well-positioned screen ensures ambient light doesn’t dim your image, making your setup more vibrant and immersive.
Choose the Right Screen Material and Gain
Select a projection screen with an appropriate gain for your environment. High-gain screens (above 1.0) reflect more light, boosting brightness, but can introduce hot spots if misaligned. Low-gain screens (around 0.8) offer wider viewing angles but may require a brighter projector. For bright rooms, consider ALR screens with high gain to enhance contrast and clarity.
Install Your Screen at the Correct Height and Angle
Mount your screen at eye level when seated, and ensure it’s perfectly perpendicular to the projector’s beam. An angled or misaligned screen causes image distortion. Use a level and measure carefully during installation. For detailed guidance, consult the installation guide.
Optimize Your Projector Settings
Adjust contrast, brightness, and color settings to match your screen’s specifications. Enable any eco or light sensor features if available, and disable auto-iris if it causes flickering. Consider calibrating your projector periodically for consistent image quality, especially if you upgrade your screen or room lighting.
Utilize Screen Gain and Technology Settings Effectively
Leverage the benefits of screen gain by positioning your projector at the optimal distance—closer for higher gain screens, further for lower gain. Use screen gain insights to fine-tune your setup, ensuring maximum brightness without hot spots. For bright rooms, high-gain ALR technology can significantly improve luminous output and contrast.
Manage Ambient Light with Accessories and Environment Control
In addition to screen choice, control ambient light with curtains, blinds, or even lighting zones. Use light-only when necessary and consider indirect lighting to reduce reflections. Managing light intelligently enhances picture clarity and color vibrancy, especially during daytime viewing.
Ensure Proper Ventilation and Maintenance
Keep your screen and projector vents clean and unobstructed to prevent overheating, which can degrade image quality. Regularly check for dust or fingerprints on the screen surface and clean with appropriate materials to preserve clarity. Proper maintenance ensures your setup consistently delivers sharp, bright images without distortion.
While many home theater enthusiasts focus on the basics of selecting an ALR screen or understanding screen gain, there are nuanced misconceptions that can sabotage your viewing experience. For example, a common myth is that higher gain screens always result in brighter images—and while this holds true in controlled environments, it can backfire in real-world rooms with ambient light. Overestimating gain’s benefits without considering viewing angles or hot spots often leads to subpar images. Additionally, many assume that fixed frame screens are universally superior to pull-down or motorized options; however, this is an oversimplification. Fixed frame screens excel in dedicated spaces with minimal light interference, but pull-down screens offer flexibility and easier installation for multi-purpose rooms. An advanced mistake lies in neglecting the impact of room lighting and screen placement on the actual performance of high-gain or ALR screens. Research indicates that improper positioning significantly diminishes their effectiveness, leading to uneven brightness or color washout. Understanding the fine print of ALR technologies reveals that some claim to achieve high contrast in bright rooms, yet actual performance varies based on ambient conditions and installation precision. The key is to recognize that no single solution is perfect across all scenarios; instead, tailor your choices considering room size, lighting, seating arrangement, and desired image quality. For instance, consulting expert insights from projection screen type comparisons can prevent costly mistakes, ensuring your investment delivers on its promise. Remember, even the most advanced screen is only as good as its setup and environment. As technology evolves rapidly—with innovations like enhanced ALR coatings and better gain profiles—staying informed is crucial. Don’t fall for illusions that a high gain or ALR screen alone guarantees greatness; consider the entire system, including projector pairing and room optimization. Want to dive deeper into selecting the perfect projection screen? Check out our comprehensive guides, or reach out via our contact page for personalized advice. Have you ever fallen into this trap? Let me know in the comments.
Once you’ve set up an optimal projection screen—be it fixed frame, pull-down, or an ALR surface—maintaining its performance over time is crucial for consistent, high-quality viewing. I’ve found that investing in the right tools and following precise methods can significantly extend your screen’s lifespan and preserve image clarity. For example, regularly cleaning the surface with a microfiber cloth and specialized screen cleaner prevents dust and fingerprints from dulling colors. Using a dedicated cleaning kit designed for projection surfaces ensures no damage occurs during maintenance. Additionally, keeping the room humidity stable and avoiding exposure to direct sunlight protects the material from warping or discoloration. To safeguard sensitive components, I recommend monitoring ambient conditions with a digital hygrometer and dehumidifier if needed, especially in humid climates. For more detailed maintenance routines, consult the guide on different screen types. As technology advances, newer coatings and materials—like those in high-gain ALR screens—offer better resistance to deterioration, and staying informed about these breakthroughs can help you make informed upgrades.
How do I maintain my projection screen over time?
Consistent upkeep starts with gentle cleaning, regular inspection for wear or damage, and adapting your environment to protect the screen’s surface. Using quality tools and materials, such as microfiber cloths and specialized cleaners, prevents scratches and buildup that can compromise image quality. Also, controlling room conditions—temperature and humidity—is vital. Investing in a digital hygrometer helps monitor ambient moisture, and a dehumidifier can prevent mold or warping, especially in humid areas. Periodic calibration of the projector settings, aligned with your screen’s gain and material properties, ensures the image remains sharp and vibrant for years. For advanced maintenance insights, I recommend exploring our detailed strategies to enhance image quality. Don’t underestimate the impact of environment on your screen’s longevity—small adjustments can lead to big benefits over time. Consider integrating these practices into your regular maintenance routine and enjoy consistently stunning projection quality.
Over the years, I realized that the real magic in home theater setups isn’t just in picking the fanciest equipment but in understanding the nuanced lessons that define true cinematic quality. One pivotal insight was recognizing that no single technology solves all lighting challenges—adaptability and environment-specific tweaks matter more. I discovered that aligning your screen’s gain profile perfectly with your projector’s lumen output dramatically transforms brightness and contrast, especially in challenging light conditions. Moreover, I learned that investing time in customizing your ambient lighting—not just installing blackout curtains—can unlock a new level of image vibrancy. The hardest lesson was grasping that what works brilliantly in one room might fall flat in another; hence, ongoing calibration and environment management are essential to sustain peak performance.
I completely relate to the feeling of wanting that perfect cinematic experience at home. When I upgraded to an ALR screen with a high gain profile, the difference was night and day, especially during daytime viewing. One thing I learned the hard way was how critical proper placement and room lighting control are. Even the best screen can fall flat if not positioned correctly or if ambient light isn’t managed well. I’ve found that investing in blackout curtains and experimenting with screen height for optimal viewing angles really paid off. I’m curious if others have found specific tips for balancing ambient light without sacrificing natural lighting, as I find this to be a balancing act. Also, what’s your go-to approach for calibration to ensure the best image quality with different screens and projectors? Would love to hear everyone’s experiences and tips for getting that consistent, vibrant image every time.
This post hits home for anyone who’s struggled to get that perfect picture in their home theater. I completely agree that proper placement, screen gain, and ambient light control are crucial, yet those details often get overlooked in favor of just upgrading equipment. I recently replaced my fixed frame ALR screen with a high-gain surface, but I learned that placement became even more critical—especially since high-gain screens are more prone to hot spots. I found that mounting the screen at the correct height and ensuring it’s perpendicular to the projector beam made a big difference. Also, experimenting with blackout curtains helped reduce ambient light without making the room feel dark and uninviting. For calibration, I use a light meter app to adjust my projector settings, which seems to yield more consistent colors and brightness. How do others balance maintaining natural light in their spaces while optimizing picture quality? Do you recommend specific lighting zones or smart lighting solutions to make this easier? Would love to hear everyone’s tried-and-true methods for a vibrant, evenly lit home theater.
2 Responses
I completely relate to the feeling of wanting that perfect cinematic experience at home. When I upgraded to an ALR screen with a high gain profile, the difference was night and day, especially during daytime viewing. One thing I learned the hard way was how critical proper placement and room lighting control are. Even the best screen can fall flat if not positioned correctly or if ambient light isn’t managed well. I’ve found that investing in blackout curtains and experimenting with screen height for optimal viewing angles really paid off. I’m curious if others have found specific tips for balancing ambient light without sacrificing natural lighting, as I find this to be a balancing act. Also, what’s your go-to approach for calibration to ensure the best image quality with different screens and projectors? Would love to hear everyone’s experiences and tips for getting that consistent, vibrant image every time.
This post hits home for anyone who’s struggled to get that perfect picture in their home theater. I completely agree that proper placement, screen gain, and ambient light control are crucial, yet those details often get overlooked in favor of just upgrading equipment. I recently replaced my fixed frame ALR screen with a high-gain surface, but I learned that placement became even more critical—especially since high-gain screens are more prone to hot spots. I found that mounting the screen at the correct height and ensuring it’s perpendicular to the projector beam made a big difference. Also, experimenting with blackout curtains helped reduce ambient light without making the room feel dark and uninviting. For calibration, I use a light meter app to adjust my projector settings, which seems to yield more consistent colors and brightness. How do others balance maintaining natural light in their spaces while optimizing picture quality? Do you recommend specific lighting zones or smart lighting solutions to make this easier? Would love to hear everyone’s tried-and-true methods for a vibrant, evenly lit home theater.