I remember the exact moment I realized my home theater setup was failing me. It was a bright Saturday afternoon, sunlight pouring through the windows, and I was eager to catch the latest blockbuster. But all I got was a washed-out, dim image that made me want to throw the remote across the room. Frustration hit me hard. Why was my screen struggling so much in a bright environment?
Why Bright Rooms Are a Challenge for Home Theater Fans
Bright rooms have always been a thorn in the side of home theater enthusiasts. They seem to demand the impossible: a clear, vibrant picture without darkening the entire space. Traditional screens just can’t cut it in these conditions. That’s where the latest advancements like ambient light rejecting (ALR) screens and fixed frame designs come into play. They promise to turn any room into a cinematic paradise, even with sunlight streaming in.
Is the Hype About ALR and Fixed Frame Screens Just Noise?
Early on, I made a mistake that many beginners do: I bought a cheap, generic screen, hoping it would magically improve my viewing experience. Spoiler: it didn’t. It was a classic case of underestimating the importance of screen technology. If you’re serious about enjoying a bright room, you need to understand what makes a screen truly effective. For example, high-gain screens can reflect more light towards your eyes, making images pop even in bright settings. Want to learn more? Check out this guide on screen gain.
So, are these high-tech screens worth the investment? Absolutely, but only if you pick the right one. That’s what I’ll help you with today. We’ll explore the best options for bright rooms in 2024, so you can finally enjoy your movies without squinting or feeling disappointed.
Choose a High-Gain Screen for Bright Rooms
My first step was to identify the importance of screen gain. High-gain screens reflect more light, making images appear brighter and more vivid despite ambient light. I started by reviewing options like those discussed in this guide on screen gain. It was eye-opening to see how a simple increase in gain could drastically improve my viewing in daylight conditions.
Prioritize Ambient Light Rejection Technology
I then focused on ALR screens. These are engineered with special surfaces that reflect projected light toward the viewer while absorbing or rejecting ambient light. I watched demo videos and read reviews, realizing that the right ALR screen could make my projector’s output pop in the brightest rooms. For a detailed comparison, I checked this comparison of top ALR screens for 2024.
Test Different Screen Types and Setups
Next, I experimented with various fixed frame screens. These provide a stable, flat surface, essential for sharp images. I installed one myself using this step-by-step installation guide. During setup, I calibrated the screen’s gain and angle, ensuring maximum reflectivity without hot spots. The result? Significantly improved brightness and color accuracy, even during daytime.

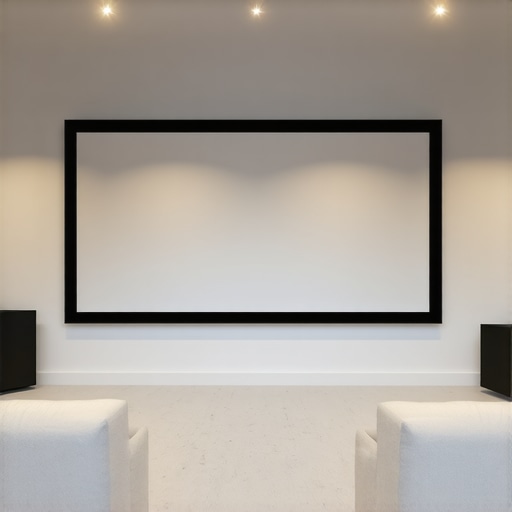
Image prompt: A professional home theater setup with a high-gain ALR fixed frame screen in a bright room, showing vivid image quality and ambient light rejection features.
Optimize Your Setup for Peak Performance
Finally, I fine-tuned my projector’s positioning and settings. I used tips from this guide on image enhancement to ensure clarity and contrast. Adjusting the projector’s keystone, brightness, and contrast settings was crucial. I also rearranged furniture to minimize reflections and glare, creating a controlled environment that complements my high-gain, ALR screen.
Many enthusiasts believe that simply choosing a high-gain or ALR screen guarantees perfect daytime viewing. However, this oversimplification can lead to costly mistakes. For instance, some assume that high gain always translates to better brightness, but in reality, too high a gain can cause hot spots and uneven images, especially on larger screens. This is a nuanced issue that often trips up even experienced users who neglect to consider the screen’s viewing angle and placement. According to experts in projection technology, optimal gain depends heavily on room size and projector placement, not just on the number on the box. So, don’t fall into the trap of assuming higher gain is always better; instead, focus on matching your screen’s characteristics with your specific setup. For advanced users, understanding the interplay between gain, ambient light rejection, and your projector’s lumen output is crucial. For example, a study by the Imaging Science Foundation highlights that proper calibration and tailored screen selection are vital for achieving true color accuracy and brightness in bright environments.
One common myth I’ve encountered is that all ALR screens are created equal. The truth is, the technology varies significantly, with some screens using micro-structured surfaces and others relying on optical coatings. This difference can drastically affect image clarity and contrast, especially in rooms with variable ambient light conditions. For instance, some screens are designed with specific light rejection angles, making them more suitable for certain room layouts. If you choose a generic ALR screen without considering these nuances, you might end up with a subpar experience. To avoid this, I recommend consulting detailed reviews and expert insights, like those found at this resource, which emphasizes matching your room’s lighting profile with the right technology.
A hidden nuance often overlooked is the impact of screen material and texture on ambient light performance. Many assume that a matte surface is always best for daytime viewing, but certain textured surfaces can actually enhance contrast and reduce glare more effectively. For instance, some high-end ALR screens employ nano-structured surfaces that reflect projected light efficiently while absorbing ambient light at specific angles. This sophisticated design can make a noticeable difference in image quality during daylight hours. Understanding these subtleties is essential for those who want to push their home theater to the next level. As detailed in latest breakthroughs, emerging technologies continue to refine what’s possible with ambient light rejection and screen materials.
Have you ever fallen into this trap? Let me know in the comments and share your experiences with optimizing your high-gain or ALR screens. Remember, real progress comes from understanding the complexities behind these seemingly simple choices, so don’t settle for surface-level solutions. Instead, dig deeper and tailor your setup for maximum daytime enjoyment!
Keeping your home theater equipment in top shape requires more than just initial setup; it demands consistent maintenance and the right tools. Over time, dust accumulation, misalignments, and software glitches can degrade performance, but with a few expert strategies, you can ensure your system remains pristine. I personally rely on specialized calibration tools like the CalMAN calibration software, which offers precise color and brightness adjustments that are vital for high-gain, ALR screens. This software allows me to fine-tune my projector settings, ensuring optimal image quality even after months of use. Additionally, using a high-quality microfiber cloth and compressed air helps me clean lenses, filters, and vents without risking damage. Regularly updating firmware on your projector and AV receiver is another crucial step; manufacturers often release patches that fix bugs and enhance compatibility, ensuring your system operates smoothly. Looking ahead, the trend is moving toward integrated maintenance dashboards built into AV equipment, simplifying ongoing care and troubleshooting. To keep your setup performing at its best, I recommend scheduling quarterly checkups—test your calibration, clean your equipment, and verify connections. Don’t forget to document your calibration settings, so you can quickly restore optimal performance if adjustments drift over time. Want to get serious about long-term performance? Try automating some maintenance tasks using smart home hubs or dedicated AV control systems, which can remind you when updates are due or when to perform cleaning. For detailed guidance on calibration, check out this calibration guide. Regular maintenance extends the lifespan of your equipment and ensures your viewing experience remains stunning, so make it part of your routine. Ready to elevate your home theater’s longevity? Start by scheduling a calibration session with the right tools and document your settings to keep everything consistent over time.
The Hardest Lesson I Learned About Bright Room Projection
One of the most valuable lessons I discovered was that not all screens are created equal, especially when dealing with ambient light. I used to think high-gain screens were the answer, but I soon realized that selecting the right technology involves understanding room layout, projector specs, and material nuances. It’s a delicate balance that can make or break your viewing experience in daylight.
3 Myths About Bright Room Screens That Held Me Back
There’s a lot of misinformation around ambient light rejection and high-gain screens. I believed that a higher gain always meant a brighter image, but I learned that too much gain causes uneven hotspots and color shifts. Additionally, some assume ALR screens block all ambient light, which is false; they only optimize reflection angles. Lastly, I thought bigger was better, but larger screens require more precise calibration to avoid hot spots and glare.
What Experts Won’t Tell You About Bright Room Home Theaters
Surprisingly, expert insights emphasize that room control—like curtains and lighting—is just as important as the screen technology. Proper projector placement and calibration are crucial. I also discovered that emerging nano-structured surfaces and optical coatings are revolutionizing ambient light rejection, making it possible to achieve cinema-like quality even in the sunniest rooms. To truly optimize, combine technology with environment management, and don’t overlook fine-tuning your setup regularly.
My Essential Toolkit for Bright Room Projection
I trust tools like this guide on screen gain for understanding how to match gain with room size and projector lumen output. Additionally, expert reviews on ALR screens help me select surfaces engineered with micro-structured coatings. For calibration, I rely on these proven strategies to fine-tune color and brightness, ensuring top performance over time.
Your Turn to Try
Getting a vivid home theater experience in a bright room is absolutely achievable with the right combination of technology and setup. Remember, the key is understanding your space and matching it with advanced screens designed for ambient light rejection. Once you find your perfect setup, you’ll wonder how you ever watched movies any other way.
What’s been your biggest challenge with bright room projection? Share your experience below—I’d love to hear your stories and tips!
One Response
Reading through this detailed overview really resonated with my journey in optimizing a bright room home theater. I used to rely solely on standard screens, which left me disappointed during daylight hours. It wasn’t until I invested in an ALR screen with micro-structured surfaces that I started seeing real improvements. The key for me was understanding the importance of proper calibration and projector placement to avoid hotspots and uneven brightness. I found that room setup plays such a critical role—simple adjustments like blackout curtains or repositioning the projector can make a remarkable difference. Has anyone experimented with different mounting angles or wall colors to enhance ambient light rejection? I’d love to hear tips on optimizing room conditions alongside high-gain or ALR screens for the best daytime viewing experience.