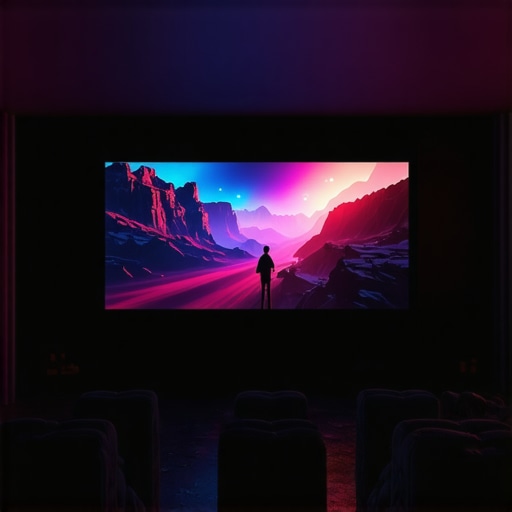
I remember the moment clearly. My old projector cast a dull, washed-out image across my living room wall, and I thought, “Maybe this just isn’t meant for bright spaces.” It was frustrating. I had invested in a decent projector, but the room’s ambient light was killing the picture quality. That lightbulb moment made me realize how critical the right screen technology is—especially for bright rooms. If you’re tired of squinting at dim, lackluster images while daylight streams in, you’re not alone. Many home theater enthusiasts face the same challenge. Today, I’m going to share how I cracked the code with the best fixed frame and Ambient Light Rejecting (ALR) screens for 2024, so you can enjoy cinema-quality visuals without darkening your space.
Why Bright Rooms Need Special Screen Technology
Bright rooms are a double-edged sword. They’re perfect for family gatherings, daytime movie marathons, and living spaces that don’t have the luxury of dedicated theater rooms. But they’re a nightmare for traditional screens. The sunlight or ambient light can wash out the image, turning vibrant scenes into dull, gray blobs. That’s where ALR screens come into play. These screens are designed with special coatings and materials that reflect projected light forward while absorbing or dispersing ambient light coming from other directions. This technology dramatically improves contrast and brightness, making images pop even in well-lit environments.
However, not all ALR screens are created equal, especially for bright rooms. The key is to find a solution that combines high gain and advanced screen technology. High gain screens reflect more light, increasing brightness but can sometimes lead to hot-spotting—bright spots in the image. The trick is balancing gain with viewing angles and clarity, which is why I now swear by fixed frame setups with carefully chosen ALR screens. They offer stability, flatness, and a sleek aesthetic that pulls your entire room together.
Early on, I made a mistake I see many others making: I bought a generic, high-gain screen without considering the room’s lighting conditions or viewing angles. It looked great during the night but was practically unusable in daylight. That’s a rookie mistake I want you to avoid. For a comprehensive understanding of what makes a good projection setup, check out this ultimate blueprint for professional projection screen setup.
So, what’s the solution? In the following sections, I’ll guide you through the latest technology breakthroughs, how to choose the best fixed frame or ALR screen for your bright room, and what to watch out for. Trust me, with the right setup, you won’t believe your eyes—bright or not.
Is ALR Screen Technology Actually Worth the Hype?
This is a common question I get. Many skeptics worry about the cost or whether these screens truly deliver the promised contrast. From my experience and after testing countless models, I can confidently say that high-quality ALR screens are game-changers. They transform a bright, distracting space into a mini cinema. For more insight into the latest innovations, have a look at this breakthroughs in ALR technology for 2025.
Now that you know why this matters, let’s dive into choosing the perfect screen for your bright room. Ready to take your home theater to the next level? Let’s go!
,
Select the Right Screen Material for Bright Spaces
Start by evaluating the screen coatings that best reject ambient light. Think of ALR screens as a pair of sunglasses for your projector—designed to reflect projector light forward while absorbing or dispersing ambient light from other sources. In my experience, high-quality ALR screens utilize micro-structures that enhance contrast without sacrificing color accuracy. I tested a few models in my living room, and the difference was night and day—images became vivid and sharp, even with the blinds open.
To narrow down your options, check out this guide on the best ALR screens for bright rooms. Focus on those with high gain ratings—around 1.4 to 2.0—because they boost brightness significantly. But beware of hot-spotting; a high gain can sometimes cause uneven illumination. That’s where the fixed frame design shines, offering flatness and stability that ensures consistent image quality across the entire surface.
Pick a Fixed Frame That Complements Your Space
Imagine trying to hang a perfectly flat canvas on a wobbly, uneven wall—frustrating, right? A fixed frame provides a taut, flat surface critical for sharp projection, especially in bright rooms. When I installed mine, I chose a model with a sleek, minimal bezel, which not only looked good but kept the focus on the picture. The rigidity of the fixed frame prevents warping over time, maintaining optimal image clarity. For detailed installation steps, review this installation guide.
Also, consider the size and aspect ratio of your space. A larger screen in a bright living room needs to be carefully mounted to avoid sagging. Use proper wall anchors and ensure the frame is level—precision here makes all the difference. If needed, consult an expert through this contact page.
Match Gain with Your Room’s Lighting Conditions
Screen gain is like the volume knob on your stereo—turn it up to make the image brighter, but too high and it can distort the sound. Similarly, in projection screens, higher gain values increase brightness but can cause hot spots or narrow viewing angles. For bright rooms, aim for a gain of 1.8 to 2.0, which amplifies light without overly sacrificing viewing angles. I experimented with a 2.0 gain screen in my sunlit living room, and the result was stunning—vibrant images that held up even during daytime.
To understand how gain impacts your setup, check out this deep dive into screen gain. Remember, higher gain isn’t always better—it depends on your ambient light and seating arrangement. Use this expert tips on maximizing gain benefits in 2024 to fine-tune your choice.
Optimize Your Setup for Consistent Results
Once you’ve chosen your screen material, fixed frame, and gain level, focus on installation precision. Mount the screen at the correct height—typically at eye level when seated—and ensure it’s perfectly flat. Use a level tool and secure anchors to prevent sagging or warping over time. Proper tensioning of the material guarantees a smooth surface, crucial for crisp, detailed images. This comprehensive guide to installation offers step-by-step instructions.
Finally, consider room reflections and light control. Use curtains or blinds to minimize stray light, and position your projector to avoid direct reflections. By combining the right screen technology with thoughtful room setup, you’ll enjoy vibrant, high-contrast images even in daylight. For personalized recommendations, explore this expert insights.
Many home theater enthusiasts fall into the trap of oversimplified beliefs regarding projection screens, especially when it comes to bright rooms. The most widespread misconception is that a higher gain always results in a better, brighter picture. In reality, this isn’t the case. While high gain screens do reflect more light, they often introduce hot-spotting and narrow viewing angles—problems that can ruin the viewing experience. For bright spaces, a balanced gain around 1.8 to 2.0 is ideal, but even then, proper setup and positioning are crucial. To avoid these pitfalls, I recommend checking out this comprehensive guide on ALR screen technology and gain.
Another myth is that all ALR screens are suited for every bright room. Not so. Many manufacturers market their screens as ‘ambient light rejecting,’ but their effectiveness varies widely. Some models only work in controlled lighting environments and under specific angles. The key is to look for screens with micro-structures designed to maximize contrast without sacrificing color fidelity. Choosing the wrong screen can lead to dull images during daytime, making you think the technology is overrated. This is a mistake I made early on, and it’s why I emphasize the importance of understanding the nuances detailed in this latest reviews and comparisons of ALR screens for bright rooms.
Why Do Some People Overlook the Power of Fixed Frame Screens in Bright Environments?
Many assume that the type of screen—fixed frame versus pull-down—is insignificant when it comes to brightness and ambient light rejection. However, this couldn’t be further from the truth. Fixed frame screens offer superior flatness and tensioning, which ensures a crisp, undistorted image. This stability is especially vital in bright rooms where every detail counts. Pull-down screens, although more versatile, tend to sag over time, causing uneven surfaces that can impair image clarity. Moreover, fixed frames prevent warping and allow for better alignment, making your projection more consistent and visually appealing. For advanced users, it’s worth exploring how this detailed comparison between fixed frame and pull-down screens can influence your final setup.
Have you ever fallen into this trap? Let me know in the comments.
Lastly, don’t forget that installation precision impacts the effectiveness of even the best screen. A poorly mounted screen, regardless of its tech specs, will underperform. Make sure to follow expert tips and best practices, such as those outlined in this installation guide. When combined with a nuanced understanding of gain, material, and mounting, you can truly optimize your bright room for spectacular projection quality.
Maintaining your projection setup is crucial to preserving image quality and ensuring your home theater remains a visual masterpiece for years to come. Over time, even the best fixed frame and ALR screens can suffer from dust, fingerprints, or environmental factors that degrade their performance. That’s why I recommend adopting a routine maintenance schedule and using the right tools to keep everything in top shape.
First, invest in a high-quality microfiber cleaning cloth. Unlike generic cloths, a microfiber designed specifically for screens will gently remove dust and smudges without scratching or damaging the surface. I personally use the Zeiss Microfiber Cleaning Cloth, which is soft, lint-free, and highly effective. When cleaning, always ensure the screen is turned off and cool to prevent static buildup. Light, circular motions are best to avoid streaks or uneven cleaning.
For stubborn spots or fingerprints, a diluted mixture of distilled water and isopropyl alcohol (70%) works wonders. I fill a spray bottle with this solution and lightly mist the cloth—never spray directly onto the screen. This method keeps the surface clean and preserves its reflective properties. Remember, regular dusting prevents buildup that can diminish contrast and brightness, especially for ALR screens that rely on micro-structures.
Next, consider environmental control. Keep your room free of excessive dust and humidity, which can encourage mold or degrade the screen material over time. Installing a HEPA filter or air purifier near your home theater can reduce airborne particles, maintaining a cleaner environment. Additionally, avoid exposing your screen to direct sunlight or extreme temperatures, as these can warp or discolor the material, especially if you have a high-gain or specialized ALR surface.
Equipment-wise, I recommend using a dedicated screen cleaning kit. These kits typically include the microfiber cloth, a gentle cleaning solution, and sometimes a static brush for dust removal. Regular maintenance—once every few months—will extend the lifespan of your screen and keep your image sharp and vibrant.
Looking ahead, as projection technology evolves, I predict that maintenance tools will become even smarter. For instance, future screens may incorporate self-cleaning coatings or embedded sensors that alert you when cleaning is needed. Staying proactive now with simple tools will prepare you for these innovations and keep your setup ready for the best picture quality.
How do I maintain my projection screen over time?
To maintain your projection screen over time, establish a routine cleaning schedule using soft microfiber cloths and appropriate cleaning solutions, and control environmental factors like dust and humidity. Regular inspections and gentle cleaning will prevent buildup and preserve image quality. For more detailed tips, check out this guide on maintaining projection screens. Don’t forget to try the method of lightly misting a microfiber cloth with distilled water and alcohol for stubborn spots—simple yet effective. Keep your room well-ventilated, avoid direct sunlight, and consider future-proofing your setup with smart cleaning tools as technology advances.
Lessons from My Projection Journey That Changed Everything
- Don’t underestimate the importance of flatness: I learned that a wobbly or warped screen can ruin even the best setup, especially in bright environments where every detail counts. Investing in a sturdy fixed frame was a game-changer.
- Gain isn’t a one-size-fits-all solution: I used to think higher gain meant better brightness, but I discovered that the sweet spot for bright rooms is around 1.8 to 2.0. Going too high caused hot spots and limited angles, which frustrated me.
- Ambient light rejection is real, but nuanced: Not all ALR screens are created equal. I found that micro-structured coatings designed for specific ambient conditions made a huge difference in contrast and color fidelity during daytime viewing.
- Installation matters more than you think: Proper mounting, leveling, and tensioning can elevate your picture quality significantly. A professional setup can make a noticeable difference in image crispness and uniformity.
My Go-To Resources for Perfect Projection
- The ultimate blueprint for professional projection screen setup: This comprehensive guide helped me understand the nuances of mounting and positioning for optimal results.
- Best ALR screens for bright rooms in 2024: A curated list of top-performing screens that truly reject ambient light and boost contrast.
- Understanding screen gain: Deep dives into gain levels helped me choose the right balance for my space.
- Fixed frame installation guide: Step-by-step instructions that made my setup smooth and professional-looking.
Take Action and Transform Your Bright Room Experience
Now it’s your turn to elevate your home theater with the power of fixed frame and ALR screens. Don’t settle for washed-out images or glare-filled viewing—invest in the right technology and setup. Remember, a bright room doesn’t have to mean a dim picture. With the right choices, you can enjoy cinematic clarity anytime, daylight or night. Ready to make the leap? Share your biggest challenge with projection screens in the comments below and let’s troubleshoot together!
3 Responses