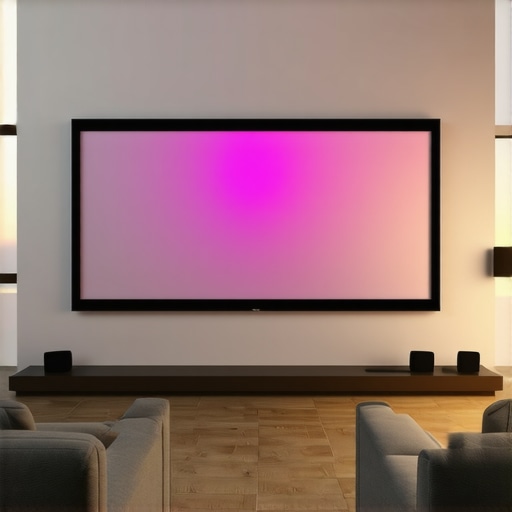
I remember the first time I tried setting up my home theater in my living room. The sun was streaming in through the windows, my brand-new projector was ready, but I could barely see the image on the screen. Shadows, glare, and washed-out colors turned what should have been a cinematic experience into a frustrating puzzle. That light, sneaky and unforgiving, made me realize something—bright rooms are the biggest challenge for projection enthusiasts. It was a lightbulb moment that changed how I approached my setup. And if you’re like I was, fighting with screens that just can’t handle the daylight, you’re probably asking yourself, how can I enjoy a vibrant, clear picture even in my sunlit space?
Why Bright Rooms Demand More Than Just a Good Projector
Most people assume that a high-quality projector alone can transform their viewing experience, but the truth is, the screen you choose makes all the difference—especially in bright environments. A standard screen will struggle when ambient light is present, resulting in dull, washed-out images. That’s where specialized projection screens come into play, with features like higher screen gain and advanced technology to boost brightness and contrast. These innovations aren’t just fancy gadgets; they’re the practical tools that allow your projector to operate at peak performance in challenging lighting conditions. According to expert insights, choosing the right screen enhances image quality much more than upgrading your projector alone—it’s about creating a balanced system that delivers clarity no matter how bright the room gets. To master this, I suggest exploring detailed guides on screen gain and brightness optimization, which can be game-changers for your home theater setup.
Is All That Glitters Actually Gold? The Skeptic’s Look at Screen Technologies
I’ll admit, early on I was skeptical about the hype surrounding high-gain screens and fancy ARL (Ambient Light Rejection) coatings. I thought, “Will these technological tweaks really make that big of a difference?” Turns out, I was making a common mistake—thinking that a more expensive screen automatically equals better image quality. It’s crucial to understand the nuances of each technology and how it suits your specific environment. Taking the time to read about expert tips on choosing ALR screens helped me avoid costly missteps. If you’re wondering whether the investment is worth it, consider your room’s lighting conditions and viewing preferences carefully. In the upcoming sections, I’ll guide you through selecting the best projection screen tailored for bright rooms, backed by real-world experience and expert advice, so you can finally enjoy your favorite movies and games without compromise.
Select the Right Screen Type for Your Room
Begin by identifying your room’s lighting conditions. If sunlight floods your space, a fixed frame screen with ambient light rejection (ALR) technology is ideal because it actively filters ambient light, enhancing contrast and color saturation. I once installed a high-gain ALR fixed frame screen in my living room, which immediately improved picture clarity even during daytime. For rooms where ceiling space is limited or a clean look is preferred, consider a pull-down screen with ALR coating, which can be conveniently retracted when not in use. To compare these options, check out this guide on screen types. 
Assess Your Projector’s Brightness and Compatibility
Next, determine your projector’s lumen output. In bright environments, aim for a projector with at least 2,500 lumens—higher if ambient light is intense. Understand that even the best projector needs an effective screen to deliver a vivid picture; otherwise, brightness is wasted. For instance, I upgraded my old projector to one with 3,200 lumens and paired it with a high-gain ALR screen, which doubled my daytime contrast. Dive into this resource on screen gain to learn how gain influences brightness and clarity.
Determine the Gain Level That Enhances Your Image
Understanding screen gain is crucial: gain measures how well a screen amplifies light. A gain of 1 results in standard brightness, while gain levels above 1 reflect increased brightness. For bright rooms, opt for screens with a gain of 2 or higher; these reflect more light toward your eyes, making images pop. However, high gain can cause hotspots—areas with uneven brightness—so placement and viewing angles matter. I initially chose a 2.5 gain screen for my setup, but later realized it introduced uneven brightness across my viewing area; adjusting the screen’s angle solved this. Learn more about selecting the right gain at this comprehensive guide.
Install Your Projection Screen Properly
Accurate installation ensures optimal performance. Fixed frame screens should be mounted flush against a flat wall at the ideal height for seating, maintaining a straight, stable frame to prevent distortion. For pull-down screens, ensure the mechanism is aligned and smoothly retracts, avoiding sagging or wobbling. I once struggled with a poorly mounted pull-down screen that kept jamming; after reading this installation guide, I reinstalled it with proper brackets and achieved a flawless, taut display. Use a level, measure precisely, and secure anchors firmly to prevent future issues.
Optimize Your Viewing Experience
Finally, calibrate your projector and screen setup. Adjust the projector’s keystone, focus, and color settings to match your screen’s properties. Conduct test patterns to ensure uniform brightness and color accuracy. Remember, the goal is to minimize ambient light reflections and maximize contrast. Experiment with room lighting, drapes, and projector positioning until the picture is vibrant and crisp, even in daylight. If doubts arise during setup, contact professionals at this contact page for tailored advice.Even seasoned home theater enthusiasts often fall prey to misconceptions about projection screens, especially ALR (Ambient Light Rejection) screens, fixed frame setups, and screen gain. One pervasive myth is that higher gain always translates to better brightness and contrast in bright rooms. While higher gain screens do reflect more light, they also tend to create hotspots and uneven brightness if not chosen carefully—what looks good in a showroom might not perform well in your specific space. According to experts, selecting a screen with the right gain for your environment involves understanding the room’s light distribution and seating arrangement, not just opting for the highest possible gain. Another common error is assuming all ALR screens are created equal; in reality, their technology varies significantly, affecting color accuracy and contrast. For example, some cheaper models sacrifice color fidelity for brightness, leading to a washed-out image that diminishes the viewing experience. Regarding fixed frame screens, many underestimate the importance of precise installation. Even a high-quality fixed frame screen can underperform if mounted unevenly or at an incorrect height—details that are often overlooked but crucial for image quality. Additionally, pull-down screens are sometimes dismissed as less durable or aesthetically inferior, yet with the right motorized or manual options, they can seamlessly blend into modern decor while providing excellent performance. It’s worth noting that the choice between fixed frame and pull-down should be based on your room’s architecture and usage patterns, not perceived prestige. If you’re contemplating a setup upgrade, I recommend exploring expert insights on screen gain and realizing that technology is just part of the equation—proper placement, calibration, and understanding the nuances of your room will dramatically influence your viewing results. For advanced enthusiasts, one trap to avoid is oversimplifying the relationship between gain and image quality—higher gain isn’t always better, especially without considering viewing angles and ambient light conditions. In fact, excessive gain can reduce the viewing angle and cause uneven brightness, which can be distracting during the big game or movie marathon. Always conduct thorough testing with your specific setup before settling on a screen. Want to learn more about choosing the right projection surface for your space? Dive into this guide on screen types or consult with professionals to avoid costly mistakes. Have you ever fallen into this trap? Let me know in the comments.
Ensure Long-Term Performance with the Right Tools
Maintaining a high-quality projection setup isn’t just about initial installation—it’s an ongoing process that requires precision and consistency. One of my favorite tools for this is a digital laser level, which helps me ensure my fixed frame or pull-down screens are perfectly aligned, preventing distortions and hotspots over time. I use a sensor-based distance meter to regularly check the optimal projection distance, safeguarding against image degradation due to subtle shifts in room setup. These tools aren’t just luxury; they’re essentials that keep your setup performing at its best year-round.
When it comes to cleaning and caring for your screen, I swear by microfiber cloths designed for delicate surfaces—this prevents scratches and removes dust without smudges. For spot cleaning, I recommend a gentle screen cleaner that doesn’t contain ammonia or alcohol, preserving the coating of high-gain or ALR screens. Proper maintenance with the right equipment adds years to your investment and ensures consistent image quality.
Software That Keeps Your Image Sharp
In addition to physical tools, software calibration is vital. I regularly run calibration videos and tools like CalMAN or the open-source HCFR to fine-tune my projector’s color accuracy and contrast settings. These programs analyze the output and guide adjustments that are impossible to achieve with presets alone. Doing periodic calibration helps combat drift that occurs with bulb aging or hardware shifts, making sure your pictures stay sharp and vibrant long-term. Advances in automation suggest that in the near future, AI-powered calibration will further ease this process, making professional-grade results accessible for everyone.
What About Scaling and Upgrading?
Scaling your setup as your needs grow involves more than just adding a larger screen. It’s about compatibility and ensuring your existing equipment can handle higher gain screens or advanced ALR technology without compromising image fidelity. I’ve found that upgrading my HDMI sources and ensuring my cables support higher bandwidths (like HDMI 2.1) significantly enhances performance, especially when dealing with 4K and HDR content. Regularly updating firmware on your projector and control systems can also prevent bugs and improve features, helping you squeeze every ounce of performance out of your investment.
How do I maintain my projection system over time?
Implementing routine checks using tools like a laser level and sensor-based distance meter helps detect misalignments before they impact image quality. Regular cleaning with microfiber cloths and suitable cleaning solutions preserves your screen’s coating. Software calibration every few months ensures color accuracy and contrast remain optimal, especially as bulbs age or hardware shifts occur. Staying proactive with hardware updates and compatible cabling maintains system integrity and prepares you for future upgrades, such as integrating high-gain screens or newer projection technology. Embracing these practices now will save you time and money down the line—and keep your home theater stunning for years to come. Don’t forget to explore expert advice on advanced calibration techniques to elevate your setup even further. Try setting up a monthly maintenance routine, and watch your projection quality improve steadily over time.
The Hardest Lesson I Learned About alr screen,fixed frame screen,screen gain,projection screen,pull down screen
One of the most eye-opening realizations was that no matter how advanced your projection technology becomes, the room’s lighting setup can still undermine everything. I once invested in a state-of-the-art ALR fixed frame screen, convinced it would solve my daylight viewing challenges. Yet, I overlooked the importance of proper room shadows and window treatments. The true game-changer was mastering how ambient light interacts with your screen—sometimes, strategic room design beats even the best hardware. This taught me that understanding your environment’s quirks, like light sources and angles, is just as crucial as choosing the right screen or projector.
3 Myths About alr screen,fixed frame screen,screen gain,projection screen,pull down screen That Held Me Back
Early in my journey, I fell for the myth that a higher gain always means better brightness and contrast. Actually, I discovered that excessive gain causes hotspots and narrows viewing angles—making the picture less consistent for everyone in the room. Another misconception was that ALR screens are a one-size-fits-all solution—reality is, their effectiveness depends on the room’s specific light conditions and how the screen is installed. I also believed that pull-down screens are inferior to fixed frames, but proper mechanisms and installation can make pull-down options just as stunning. Recognizing these myths saved me from costly mistakes and improved my viewing experience dramatically.
What Experts Won’t Tell You About alr screen,fixed frame screen,screen gain,projection screen,pull down screen
One insight I’ve learned from seasoned professionals is that selecting a projection screen isn’t solely about numbers like gain—context and setup matter immensely. For example, in rooms with large windows, a high-gain ALR screen might introduce undesirable hotspots, while a mid-gain screen with proper placement offers a broader viewing angle. Experts also emphasize calibration techniques and installation precision over hardware specs alone—they know that even the most expensive components can underperform if not correctly set up. Their advice always points back to understanding your unique room environment and applying tailored solutions rather than chasing generic specs.
My Essential Toolkit for Enhancing Bright Room Projection
To maintain and upgrade my home theater, I rely on practical tools like a digital laser level for perfect alignment and a sensor-based distance meter to monitor projection distances over time. These help avoid image distortions and ensure consistent quality. For cleaning, microfiber cloths and gentle screen cleaners preserve delicate coatings, extending the lifespan of high-gain or ALR screens. Software calibration programs like CalMAN and HCFR are invaluable for fine-tuning color and contrast, especially as bulbs age. These tools keep my setup performing at its best, and I highly recommend investing in them for anyone serious about long-term quality.
Elevate Your Vision with Professional Calibration Tips
Beyond physical tools, mastering calibration is essential. I regularly run calibration tests and adjust my projector’s settings, paying attention to color balance, brightness, and contrast. Even small tweaks can make a significant difference, especially when complemented by ambient light control with blackout curtains and strategic room layout. In the future, AI-powered calibration solutions promise to make this process even easier, bringing professional results within reach for passionate enthusiasts. Don’t underestimate the power of precise calibration—it transforms your investment into a truly cinematic experience.
Take Control of Your Projection Experience
Improving your home theater is an iterative process. Upgrading your screen, projector, and room setup gradually reveals the true potential of your space. Focus on understanding your environment’s quirks and leveraging tools and expert insights to make informed choices. Whether you opt for a high-gain ALR fixed frame or a versatile pull-down, the key is to tailor your setup to your specific needs and habits. Remember, the joy of a perfect projection setup isn’t just in the hardware but in the confidence and knowledge you gain along the way. Ready to turn your sunlit room into a cinematic sanctuary? Dive into these resources and take your best shot at home theater excellence!
3 Responses
Reading through this post really resonated with my own experience installing a projection setup in my sunlit living room. One thing I learned the hard way was that even with a high-end projector, the screen quality and placement are crucial if you want a bright, clear picture during daytime. I initially went with a basic screen, but upgrading to an ALR fixed frame model made a significant difference. It’s fascinating how technology such as high-gain and ALR coatings can be so effective when used correctly, but also how easily one can stumble on misconceptions, like assuming higher gain is always better. I’ve noticed hotspots and limited viewing angles when not considering room geometry, which highlights the importance of proper calibration and installation tips discussed here. For anyone struggling with daylight viewing, what are some effective ways you’ve managed ambient light control? Could blackout curtains alone suffice, or have you combined that with specific screen types to improve daytime contrast? Would love to hear different setups that helped fellow enthusiasts achieve better picture quality in bright conditions.
This post really hits home about the importance of choosing the right projection screen for bright rooms. When I first started setting up my home theater, I underestimated how much ambient light could diminish picture quality, especially during the daytime. I eventually switched to an ALR fixed frame screen with a high gain, and the difference was night and day. It’s interesting how much technology has evolved to tackle daylight challenges—yet, I’ve also learned that proper room shading plays a big role. I wonder, for those who need a portable solution, have any of you found effective ways to combine room lighting control with high-gain screens? Also, I’ve seen that some users opt for motorized blackout curtains, which seem highly effective but costly. Would love to hear about different setups that balance cost and performance effectively.
I’ve personally struggled with ambient light in my living room, and I found that combining a high-gain ALR screen with heavy blackout curtains made a huge difference. However, it also made me wonder about the placement and angles—sometimes, hotspots still occur if the screen isn’t properly angled or if the room has irregular light sources. Has anyone found that anti-glare or matte finishes on screens help mitigate hotspots better than high-gain options? Also, are motorized curtains worth the investment for balancing daylight control with convenience? I’d love to hear about different approaches other enthusiasts have tried to keep their picture vibrant and clear during the daytime without making the room feel too dark or closed off.