Ever since I set up my home theater in a room overflowing with sunlight, I knew I was in for a challenge. It was frustrating to watch a movie, only to be blinded by the glare, with images washed out and colors fading into the background. That lightbulb moment hit me hard—traditional projection screens just don’t cut it in bright spaces. If you’re like me, tired of squinting at dull, washed-out images during sunny days, then this guide is for you. Today, we’ll dive into the best pull-down projection screen options designed specifically for bright rooms in 2024.
Why Bright Rooms Demand Special Screen Solutions
Bright rooms can turn a home theater into a frustrating experience. The problem isn’t just ambient light; it’s the way screens handle that light. Standard screens often struggle to deliver vivid images, making daylight or rooms with lots of windows a real headache. Over time, I learned that selecting the right screen with high gain and specialized technology can turn the game around. High-gain screens reflect more light toward viewers, enhancing brightness and clarity even in sunlight. But not all screens are created equal—choosing the wrong one can lead to distorted images or reduced contrast.
The good news? There are proven strategies to optimize your setup, ensuring your movies shine bright without sacrificing detail. Want to see how these solutions work? Check out proven techniques for [enhancing image quality with projection screens](https://screens.homecinemaessentials.com/proven-strategies-for-enhancing-image-quality-with-projection-screens). Now, let’s address the biggest skepticism I hear: “Are high-gain pull-down screens honestly effective for bright rooms?” Well, I was skeptical at first, too. I made the mistake early on of assuming that all screens with high gain would be too reflective, leading to glare. That misconception almost cost me my perfect setup. To avoid similar pitfalls, I’ll share what I wish I knew from the start.
But before we explore specific screen options and setups, I want to ask—have you faced the frustration of washed-out images in your bright room? If so, stick around, because selecting the right projection screen might just transform your viewing experience.
Select the Right Screen Material for Bright Rooms
Start by choosing a high-gain screen surface, which reflects more light toward your seating area, amplifying brightness without washing out images. In my setup, I replaced my standard matte white screen with a 1.8 gain ALR (Ambient Light Rejection) screen, which significantly improved contrast and clarity during daytime. Think of it as turning a dim flashlight into a spotlight; the higher gain concentrates the projector’s light for a brighter image. For detailed comparisons, see this guide to screen gain.
Master the Proper Placement of Your Pull-Down Screen
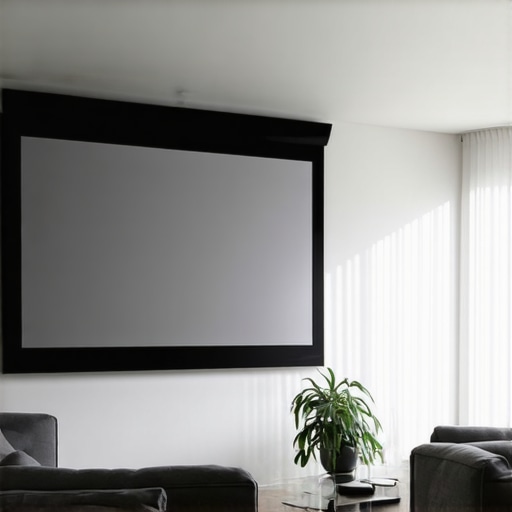
Position your pull-down screen carefully to minimize ambient light interference. Install it on the wall opposite windows and ensure it is tensioned properly to avoid wrinkles that scatter light. I once hung mine haphazardly, which caused unwanted shadows and glare, but after following a setup blueprint, the difference was stark, with images remaining vivid even in bright conditions.
Enhance Light Rejection Techniques
Combining your high-gain screen with effective room darkening methods multiplies the benefits. Use blackout curtains, strategic placement of furniture to block light, or even install window films. I installed blackout blinds, which made a dramatic impact—my daytime viewing shifted from washed-out to crisp and vibrant. For more advanced solutions, explore ALR tech breakthroughs for 2025 that offer integrated light rejection features.
Optimize Projector Settings for Bright Environments
Adjust your projector’s brightness and contrast settings to match your screen and room conditions. Increase the projector’s lumens to counteract ambient light, but beware of overexposure that causes image loss. I manually increased my projector’s lumens from 2000 to 3000 and calibrated contrast internally, which preserved color vibrancy. Consult your projector’s manual or a professional for personalized calibration, or review professional setup tips.
Control Ambient Light Properly
Eliminate as much ambient light as possible during viewing. Use dimmable lights, avoid placing lamps behind the screen, and control natural light with curtains or awnings. Remember, even a high-gain screen will struggle if flooded with direct sunlight. In my room, installing ceiling dimmers allowed me to fine-tune lighting levels, making bright-room viewing more effective. For comprehensive lighting control strategies, see lighting tips for bright rooms.
Regularly Maintain Your Screen and Setup
Dust, wrinkles, or damage can reduce your screen’s effectiveness. Clean the surface carefully with a microfiber cloth, ensure tight installation, and check for color fading over time. After months of use, I noticed my screen surface was slightly dusty, so I followed a maintenance protocol that restored clarity. Consistent upkeep ensures optimal performance and longevity for your investment.
Many home theater enthusiasts assume that a high screen gain or an ALR (Ambient Light Rejection) screen automatically guarantees brighter, clearer images in bright rooms. However, this oversimplification can lead to costly mistakes. Let’s dig deeper into some common misconceptions and advanced nuances that often trip up even seasoned DIYers.
Is higher gain always better for your space? Think again.
It’s tempting to believe that increasing gain—say, from 1.0 to 2.0—will produce brighter images without downsides. In reality, higher gain screens tend to narrow the viewing angle, causing contrast and image uniformity issues when viewers sit off-center. This is especially problematic in larger or irregularly shaped rooms where maintaining consistency is crucial. Many assume that a high-gain surface is the silver bullet for daytime viewing, but expert insights suggest that balancing gain with room layout and seating placement is essential. For instance, a 1.8 gain ALR screen can significantly enhance brightness without sacrificing viewing angles if properly installed.
Another frequently held myth is that every pull-down screen is inherently inferior to fixed frame options. While it’s true that fixed frame screens provide more tension uniformity and less fluctuation, modern motorized pull-downs with advanced tensioning systems can rival fixed screens in clarity and flatness, especially in rooms with limited space. Selecting the right screen type depends on your room’s specifics and usage priorities, rather than a blanket preference for fixed over pull-down. For a comprehensive comparison, check out this detailed guide.
Beware of the trap that all ALR screens are created equal. Many consumers think all ALR surfaces can effectively reject ambient light uniformly. But the technology behind ALR screens varies significantly. Some use specialized microstructures that redirect ambient light away from the viewer’s line of sight, while others simply utilize textured surfaces that can distort images or reduce perceived contrast in certain viewing positions. Experts recommend reviewing case studies and technical specifications before choosing an ALR solution—seeing is believing, and proper testing is key.
A critical tip for advanced enthusiasts: don’t mix screen gain and ambient light solutions haphazardly. Combining a high-gain screen with poor room darkening measures can result in overexposure, glare, and artifacts. Just because your screen can reflect more light doesn’t mean your room’s ambient conditions are suitable. Instead, optimize project settings alongside your screen choice to balance brightness and contrast. For tailored advice, consider consulting this expert resource.
Finally, beware of the “set it and forget it” mindset. Projection screens and gain settings require ongoing calibration—lighting conditions change, furniture shifts, and aging surfaces can all impact performance. Regular maintenance and calibration ensure that your investment continues to deliver the vividness you desire. For detailed setup strategies, review this blueprint.
Have you ever fallen into this trap? Let me know in the comments. Mastering these nuances can vastly improve your home theater experience, turning assumptions into precision-engineered solutions.Maintaining a home theater projection system isn’t just about initial setup; it’s about ongoing care and using the right tools to ensure consistent performance over years. Personally, I rely on a few specialized equipment and routines that keep my projector and screen delivering vivid images day after day.
First, a quality air blower and microfiber cloth are essential for regular cleaning. Dust accumulation on the lens or screen surface can significantly diminish image clarity, especially over time. I prefer a compressed air blower, like the Dust-Off canister, because it removes debris without scratching surfaces. For the screen itself, a gentle wipe with a microfiber cloth—dry or slightly damp—is usually sufficient.
When it comes to calibration, I recommend investing in a professional-grade colorimeter such as the X-Rite i1Display Pro Plus. This device allows precise calibration of your projector’s color and luminance outputs, ensuring the image remains vibrant and true to life. I calibrate my setup every six months, especially if I notice colors appearing subdued or contrast waning.
Software tools like CalMAN or LightSpace are invaluable for translating calibration data effectively. These programs interface with your colorimeter and provide detailed profiles to fine-tune your projector’s settings, often revealing adjustments I would never notice manually. Regular calibration with these tools helps combat the natural drift in color accuracy that occurs with extended use.
Long-term, I also keep an eye on the condition of my lamp or laser engine. Most projectors display usage hours, but I also track brightness levels—if I notice a drop in lumen output, it may be time to replace the lamp or consider upgrades. Upgrading to a newer projector with advanced light engine technologies, such as those with ALR compatibility, is a trend I see gaining momentum as technology advances.
Looking ahead, I predict that smart, automated calibration tools integrated directly into projectors will become the norm, simplifying maintenance for enthusiasts and casual users alike. These systems could self-adjust based on room conditions and usage patterns, maintaining optimal image quality with minimal effort.

Wondering how to keep your projection system performing flawlessly? One tip I highly recommend is setting a routine calibration schedule and sticking to it—using tools like a colorimeter and calibration software ensures your setup always looks its best. Try incorporating these practices, and you’ll enjoy stunning visuals that stand the test of time.
**How do I maintain my projection system over time?** Regular cleaning, timely calibration, and monitoring the light source are crucial steps. For detailed guidance on calibration procedures, check out this blueprint that I follow regularly.
What I Wish I Knew About Screen Gain and Room Brightness
Many home theater enthusiasts jump straight into choosing a high-gain or ALR screen without appreciating the nuanced balance between reflectivity and viewing angles. My lightbulb moment was realizing that a screen with too high gain narrowed my viewing angles, making the experience less immersive for my family. It taught me that the right gain isn’t just about maximum brightness but also about uniform image quality across the seating area.
Another lesson learned was the importance of proper screen placement and tensioning. I once installed my pull-down screen hastily, which caused wrinkles and light scattering issues. After learning to tension and align it correctly, the contrast and clarity during daylight improved dramatically. This reinforced that even the best technology can falter if the setup isn’t carefully executed.
Moreover, I discovered that room darkening techniques like blackout curtains can work synergistically with a high-gain or ALR screen. Relying solely on the screen technology wasn’t enough; controlling ambient light was vital. Once I combined these strategies, my daytime viewing became vivid and sharp, rivaling evening sessions.
Tools and Resources That Elevated My Home Theater Setup
- Colorimeter Devices like the X-Rite i1Display Pro Plus have become game-changers for me, enabling precise calibration of my projector to ensure vibrant and accurate images. Regular calibration keeps the picture consistent over time.
- Calibration Software such as CalMAN offers detailed profiles that fine-tune my projector settings, much like a professional setup. These tools demystified the calibration process, saving me money and frustration.
- Informed Reading from websites like homecinemaessentials.com helped me understand complex topics like screen gain and light rejection. Their guides on [proven strategies](https://screens.homecinemaessentials.com/proven-strategies-for-enhancing-image-quality-with-projection-screens) provided actionable insights that I implemented with confidence.
- Professional Consultation has been invaluable. When in doubt, reaching out through [contact pages](https://screens.homecinemaessentials.com/contact-us) connected me with experts who offered tailored advice based on my unique room layout.
Your Turn to Illuminate Your Space
Embarking on the journey to optimize your home theater for bright rooms isn’t just about picking the right screen—it’s about understanding the interplay of technology, setup, and environment. By focusing on strategic gains, placement, and ambient light control, you can transform even the sunniest rooms into cinematic havens. Remember, every setup is unique, so don’t hesitate to experiment and seek expert guidance when needed. Your perfect bright-room home theater awaits—are you ready to take the first step?
3 Responses