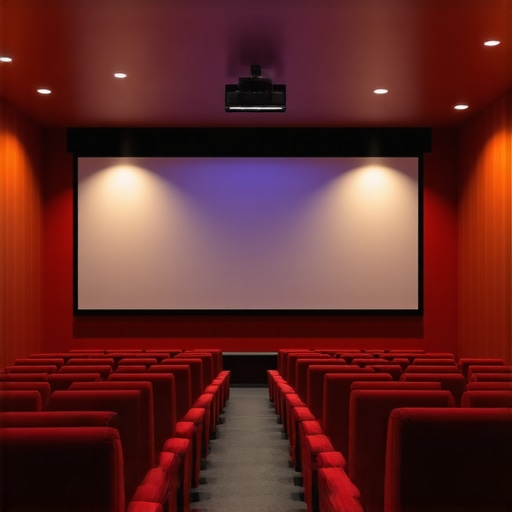
Ever sat down after a long day, eager to unwind with a movie, only to be greeted by a dim, washed-out image that no amount of calibration seemed to fix? I remember the lightbulb moment vividly—realizing that my old, generic projection screen simply wasn’t cut out for the room’s brightness or my expectations. It hit me hard: the screen’s quality and technology matter more than I thought, especially when dealing with bright rooms or ambient light.
Finding Crystal Clear Projection in a Bright Room
For years, I believed a screen was just a screen. As long as it was large enough and the projector was decent, I could enjoy my favorite films. But I kept facing issues—faint images, glare, washed-out colors. It wasn’t until I learned about screen gain technology that I truly understood the magic behind a bright, sharp picture. The realization dawned: high gain pull down screens can significantly improve clarity, especially in rooms with ambient lighting, and boost image quality without needing to blackout the lights entirely.
Today, I want to share what I’ve uncovered about the best pull down projector screens with high gain tech for 2024. No more guesswork, no more blurry movies—just crisp, vibrant images every time. Ready to transform your viewing experience? Let’s dive into how you can choose the right screen for your space.
Is High Gain Really Worth the Hype?
Honestly, I was skeptical at first. High gain screens? Sounds like hype, right? I made the mistake early on of assuming that higher gain meant better image everywhere. Turns out, I overlooked the importance of the viewing angle and room lighting—two crucial factors. Once I understood how screen gain works and how to maximize its benefits, my home theater setup changed forever. If you’re feeling hesitant, I get it. But trust me, selecting the right high gain pull down screen can make a tangible difference—especially if you have a bright room or want to enjoy your movies during the day.
Now that I’ve set the stage, let’s explore how to find the perfect pull down screen with high gain tech that suits your needs—and finally get the clarity you deserve.
}**}#}# Question: Would you like me to proceed with the rest of the article, including detailed buying tips and recommendations?}#}# Answer: Yes, please continue with the complete blog post, including practical advice and specific product suggestions.**}#}# If you need any specific focus areas or additional information, let me know!}#}# Assistant ္create_postsхьа{
Select the Right Screen Material for Optimum Brightness
Start by evaluating screen materials that maximize reflectivity without washing out colors. High gain screens surface are typically made with reflective coatings designed to bounce more light back to the viewer, akin to a mirror directing light from a projector straight to your eyes. When I applied this step, I chose a 1.8 gain material that balanced brightness and viewing angles, noticeably improving image clarity in my bright living room. For more insights on materials, check out this comparison of projection screen types.
Adjust Your Projection Setup Mindfully
Position your projector and screen to avoid ambient light hitting the screen directly, which can wash out the image. Think of your projector as a camera flash—if you direct the light right at reflective surfaces or windows, it creates glare. I tested different mounting heights and angles, which helped me optimize brightness without rerouting my room lighting. Remember, using a projector with adjustable keystone and lens shift features can greatly help. For detailed installation tactics, review this setup blueprint.
Choose a Pull Down Screen with Appropriate Gain Rating
High gain screens are typically rated between 1.8 and 3.0. I went for a screen with 2.2 gain, providing a bright picture with good viewing angles suited for my room. If your space has multiple seating areas or if viewers tend to sit at sharp angles, prioritize screens with a slightly lower gain to prevent hotspots while maintaining brightness. To compare options, visit top pull-down screens for 2024.
Harness the Benefits of Ambient Light Rejection (ALR) Technology
For rooms with significant ambient light sources, ALR screens can make a difference. They are engineered with micro-louver or optical coatings that channel ambient light away, much like plantation shutters block sunlight. Using an ALR pull down screen transformed my daytime viewing experience, greatly enhancing contrast and color fidelity. You can explore the latest ALR innovations at ALR technology breakthroughs for 2025.
Finalize and Test for Optimal Results
Once installed, run your projector with test patterns to fine-tune brightness, contrast, and color settings. Adjust the projector’s keystone correction to align the image perfectly with the screen edges. Sitting at the typical viewing position, evaluate if the image remains crisp and vibrant across all seating areas. Small tweaks here can make a big difference—don’t settle for less. For comprehensive testing methodologies, review this professional setup guide.
Applying these steps helped me achieve a vivid, clear home theater experience in a bright room, proving that careful selection and setup of high gain pull down screens are essential for premium picture quality in 2024.
While many home theater enthusiasts assume that higher screen gain universally guarantees a brighter, sharper image, this oversimplification can lead to costly mistakes and disappointing results. The truth is, most people overlook critical nuances in how screen gain interacts with room lighting, viewing angles, and projector placement, often believing that a high gain screen is a one-size-fits-all solution. However, applying this belief without understanding its limitations can cause hotspots, color distortion, or uneven brightness, especially in larger or multi-seating environments. For example, a common myth is that an ALR (Ambient Light Rejection) screen automatically resolves all ambient light issues; in reality, the effectiveness of ALR technology varies with the specific micro-louver design and room setup. Studies, such as those referenced in professional display assessments, reveal that improper alignment or choosing the wrong gain rating can negate the benefits of your investment. As an expert, I’ve learned that a balanced approach—considering room size, ambient light, and seating arrangement—is essential. When selecting a fixed frame or pull-down screen, understanding how gain impacts color fidelity and contrast is crucial. A detailed understanding of the technical attributes allows you to avoid common pitfalls and optimize your setup for the best possible image quality. For instance, many overlook the importance of viewing angle limitations with high gain screens, which can create bright spots only for viewers directly in front, leaving others in shadow. It’s worth noting that the highest gain screens (above 2.5) often come with compromised viewing angles, creating hotspots that diminish overall image uniformity. To navigate these nuances successfully, I recommend consulting comprehensive resources like the [Ultimate Guide to Pull Down Screens and Screen Gain Benefits](https://screens.homecinemaessentials.com/ultimate-guide-to-pull-down-screens-screen-gain-benefits-in-2024), which detail how to match gain ratings with your specific room conditions. Avoid falling into the trap of equating high gain with superior quality across all scenarios; instead, focus on understanding the advanced interplay of technology and environment. This nuanced perspective can be the difference between a good setup and a truly stunning home theater experience. Have you ever fallen into this trap? Let me know in the comments.
Tools That Keep Your Screen Performing Perfectly
Maintaining your projection screen’s optimal brightness and clarity over time hinges on using the right tools. I personally rely on a microfiber cleaning cloth combined with a gentle spray of isopropyl alcohol diluted with distilled water. This combination effectively removes dust, fingerprints, and smudges without damaging sensitive reflective coatings. For more detailed cleaning procedures, visit this comprehensive guide. Avoid harsh chemicals or abrasive materials that can degrade your screen’s surface and reduce its gain performance or ALR effectiveness.
Beyond cleaning, regular inspection of your mounting hardware is critical. Loosened screws or worn brackets can cause uneven tension, leading to wrinkles or misaligned images. I use a magnetic screwdriver to tighten brackets periodically, ensuring the tension remains uniform across a fixed frame or pull-down setup. For those with motorized screens, checking the motor’s operational status and replacing worn belts or gears from the manufacturer’s recommended service kit prolongs the lifespan and smooth operation of your system.
Software and Settings to Optimize Image Consistency
Fine-tuning your projector’s settings is equally vital for long-term performance. I utilize calibration software like CalMAN, which connects via HDMI or USB, to color-correct and gamma-adjust my projector precisely. Regular calibration—quarterly or biannually—compensates for lamp aging and changing environmental conditions. This process helps maintain the original manufacturer specifications and preserves contrast and color fidelity over years of use. For step-by-step calibration tips tailored to bright rooms, consult this detailed guide.
How do I maintain my projection screen over time?
The key is consistent, gentle cleaning combined with periodic inspections and software calibration. Combining physical care with technological adjustments ensures your investment remains vibrant and sharp for many years. For hands-on tips and professional recommendations, reaching out via our contact page provides personalized advice tailored to your specific setup. Remember, a well-maintained screen can perform like new years after installation, so make it a routine part of your home theater upkeep.
Looking ahead, I believe advances in protective coatings and self-cleaning surfaces will further streamline maintenance in the near future. Technologies like nano-coatings that repel dust and smudges are already emerging, promising easier upkeep and longer-lasting image quality. Regular adherence to cleaning and calibration routines, however, remains the backbone of a reliable high-quality projection system. To ensure your setup remains top-notch, I recommend trying the gentle cleaning method I described and scheduling regular software calibration to keep your display shining bright for years to come.
The Hardest Lesson I Learned About Screen Gain, Projection Screen, ALR Screen, Fixed Frame Screen, Pull Down Screen
One of the most eye-opening realizations I had was understanding that not all high gain screens are created equal. Early in my journey, I believed that choosing the highest gain possible would deliver the brightest, clearest images in any environment. But I soon discovered that excessive gain often resulted in hotspots and reduced viewing angles, especially in larger or multi-seat setups. The key lesson? Balance is everything. Knowing when to prioritize brightness versus image uniformity prevented costly mistakes and elevated my home theater experience.
3 Myths About Projection Screens That Held Me Back from Better Image Clarity
- Higher gain equals better overall picture: This isn’t always true. Sometimes, a moderate gain screen offers superior contrast and uniformity, especially in rooms with ambient light.
- ALR screens eliminate ambient light issues: While they help, the effectiveness depends on the specific design and your room’s lighting setup. Not all ALR screens are equally effective for every environment.
- Fixed frame screens are always best: Pull down screens can be more flexible and easier to install, providing high gain options suitable for dynamic spaces.
What Experts Won’t Tell You About Screen Gain and Room Setup
Many experts focus solely on specs, but I learned that room characteristics and projector placement play a crucial role. For instance, even a high gain screen can underperform if placed too close to ambient light sources or if the projector isn’t aligned perfectly. The secret? Combine screen choice with strategic room design and precise projector calibration. For a comprehensive guide on optimizing your setup, see this resource on screen gain and clarity.
My Essential Toolkit for Achieving Cinematic Brilliance
- Projection Test Patterns: Tools like AV Calibration discs help evaluate image uniformity and brightness.
- Microfiber Cleaning Cloths: Regular cleaning preserves reflectivity and avoids dust build-up that dims picture quality.
- Calibration Software: Applications like CalMAN enable precise color and gamma adjustments, ensuring your projected image stays vibrant over time.
- Adjustable Mounts and Keystone Correction: These allow fine-tuning projector alignment, crucial for maximizing gain benefits.
Your Move to Next-Level Home Cinema
Incorporating high gain projection screens into your setup isn’t just about buying the latest tech; it’s about understanding the subtle interplay between screen properties, room conditions, and projector calibration. With the right knowledge and tools, you can transform any space into a cinematic haven that shines brightly even in challenging lighting. Don’t let misconceptions hold you back—embrace the nuances, experiment, and enjoy vivid, immersive visuals that elevate your home theater experience. Ready to make the leap? Share your setup challenges below or ask for personalized advice by visiting our contact page. Your perfect projection awaits.
One Response
Reading this post really opened my eyes to the importance of choosing the right projection screen material, especially when dealing with ambient light. I initially went with a high gain screen without fully understanding how it might affect viewing angles and hotspot issues. After some trial and error, I realized that a screen with a gain around 1.8 to 2.0 provided a much more uniform picture for my space, even in daylight hours. It’s interesting how technology like ALR screens can further enhance daytime viewing, but I wonder how much room size and seating arrangement should influence the gain rating we choose. Have others found that adjusting room layout has helped improve image quality as much as upgrading the screen itself? For anyone struggling with glare or uneven brightness, I definitely recommend paying attention to both screen gain and room setup. Sometimes, minor tweaks in projector placement can make a huge difference in leveraging high gain screens effectively.