It was late at night, and I was finally settling in to enjoy my favorite sci-fi flick. I hit play, eager for the immersive experience, only to be greeted by an annoying dark spot lurking in the corner of my ALR screen. That sudden dimming left me frustrated, feeling like I’d wasted hundreds on a high-end projection system. Ever faced that sinking feeling when your screen’s uniformity suddenly betrays you? Well, you’re not alone. Many home theater enthusiasts wrestle with corner dimming issues, especially with the advanced ALR and projection screens of 2026. But here’s the good news: I discovered that a few straightforward, proven hacks can dramatically improve the uniformity, transforming that flickering nightmare into a seamless viewing paradise.
Why Corner Dimming Troubles Can Ruin Your Movie Nights
Imagine sitting in your dedicated theater room, ready to indulge in a cinematic masterpiece, only to be distracted by inconsistent brightness or dark corners. This irregularity, often caused by uneven screen gain or misaligned components, can diminish contrast and color depth, ruining the immersive experience we all crave. What’s especially tricky is that many think replacing the screen will solve the problem. But in many cases, the root lies in subtle setup issues or material choices—things you can fix without shelling out more money. Understanding these factors is critical because, according to recent [breakthroughs](https://screens.homecinemaessentials.com/alr-screen-technology-breakthroughs-to-watch-in-2025), ALR screens are becoming more sophisticated, but they’re also more sensitive to installation and environment. Early on, I made the mistake of ignoring the importance of proper tensioning, leading to waves that exacerbated dimming spots. Trust me, small tweaks make a huge difference. Now, I want to share how you can apply these insights to banish uneven lighting and get that picture-perfect uniformity. Ready to fix the flicker and elevate your viewing? Let’s dive into these simple, effective hacks.
Tighten the Screen Fabric
Start by inspecting your pull-down or portable screen for slack or sagging edges. Use a ladder or step stool to access the top, then tighten the tensioning brackets as per your manufacturer’s instructions, ensuring an even stretch across the entire surface. I once overlooked this step and noticed persistent dark spots; after tightening, the spots vanished, revealing a uniform picture. Think of your screen like a drumskin—if it’s loose, it wobbles, causing uneven brightness.
Align the Screen Properly
Misalignment causes light to bleed or form hotspots. Use a level or laser alignment tool to ensure your screen hangs perfectly vertical and centered. Loosen mounting brackets slightly, adjust the position, then secure tightly. I struggled with a skewed fixed frame, but after precise leveling, the image quality improved dramatically. Proper alignment is akin to tuning a musical instrument—small adjustments make harmonious visuals.
Tension the Frame Correctly
If your fixed frame or pull-down screen exhibits wrinkles or waves, tensioning is key. Follow your setup guide, but generally, tighten corner screws or tensioning wires gradually to eliminate ripples. During my own experiment, over-tightening caused warping, so I adjusted incrementally, finding a sweet spot that kept the surface taut and flat. Consider this step like tuning a tightrope—balance is essential for stability.
Control Ambient Light with Shades and Placement
Uneven lighting from windows or lamps can create perceived dimming in sections. Install blackout curtains or blinds, and position light sources away from the screen surface. I added side drapes and repositioned a lamp, which reduced glare and reflections, leading to more consistent brightness. Think of your environment like a stage: controlled lighting ensures the focus stays on your display, avoiding distraction and uneven illumination.
Upgrade or Reconsider Your Screen Material
If current issues persist, evaluating your screen material might be the solution. Low-gain screens (check out [screen gain options](https://screens.homecinemaessentials.com/understanding-screen-gain-how-to-optimize-brightness-and-clarity)) can help improve uniformity, especially in rooms with high ambient light. I replaced a high-gain screen with a lower gain option, and the uniformity problems diminished significantly. Think of screen surface like paint—different textures and finishes influence how light is reflected across its surface, impacting uniformity and contrast.
Reconsider Mounting and Environment
Installation mistakes, such as uneven mounting or loose brackets, can cause sagging or warping. For fixed frames, follow the detailed steps in the [installation guide](https://screens.homecinemaessentials.com/fixed-frame-screen-installation-guide-for-home-theaters). During a DIY project, I secured the frame to wall studs with specialized anchors, minimizing vibrations and ensuring stability. Visualize this step as anchoring a sailboat—firm mooring prevents unwanted movement and maintains a smooth surface.
Regular Maintenance and Inspection
Periodic checks for tension, alignment, and environmental factors help maintain uniformity over time. For example, after a year, I re-tightened some brackets and adjusted lighting, and the picture quality was restored. Treat your screen like a piece of artwork—gentle care ensures it stays pristine, delivering consistent performance for years to come.
Many enthusiasts assume that selecting the right projection screen or ALR (Ambient Light Rejection) screen is simply about choosing the highest gain or the latest model. However, the truth is far more nuanced. One common myth is that higher gain screens automatically produce brighter images with better contrast. In reality, this often leads to hotspotting and uneven brightness distribution, especially in larger formats or rooms with ambient light, undermining image quality. According to industry experts, optimal screen gain often falls between 0.8 and 1.2 for most home theater setups, balancing brightness and uniformity effectively.
Are Higher Gain Screens Always Better for Bright Rooms?
Another misconception is that ALR screens are only beneficial in dark environments. While ALR screens excel at rejecting ambient light, not all ALR surfaces are created equal. Some textures designed for ultra-bright rooms can introduce shimmer or shimmer-like artifacts when viewed from different angles, diminishing overall picture fidelity. Studies, such as those discussed in [home cinema research](https://screens.homecinemaessentials.com/why-0-4-gain-alr-screens-are-2026s-best-cure-for-window-glare), show that low-gain ALR screens with specialized microstructures often outperform high-gain alternatives by providing better off-axis viewing angles and consistent contrast. This brings us to a crucial point: many neglect the importance of understanding the material’s microstructure and the texture’s effect on light dispersion, which can dramatically influence perceived contrast and color accuracy.
Many get caught in the trap of believing that the latest model or the most expensive screen guarantees optimal performance. But often, it’s about understanding the intricacies of how different textures and gain levels interact with your room’s lighting conditions and projector characteristics. For example, a screen’s surface that works well with a laser ultra-short throw (UST) projector might underperform with a traditional long-throw setup due to divergence and angular reflections. To truly optimize, owners need to consider not just gain, but also the microstructure’s impact on light absorption and scattering, as discussed in [screen surface innovations](https://screens.homecinemaessentials.com/screen-gain-hack-why-1-1-beats-1-3-for-2026-laser-projectors).
Another advanced nuance often overlooked is the tensioning and installation of fixed frame screens. Improperly tensioned surfaces can develop waves or sags that cause uneven light scattering, creating dark corners or hotspotting. These pitfalls aren’t just cosmetic—they directly impair contrast and uniformity. Many enthusiasts forget that meticulous tensioning, along with proper mounting aligned with your room’s architecture, can significantly enhance perceived image quality. In fact, some experts emphasize that a well-installed fixed frame can outperform expensive adjustable setups, as long as the surface remains flat and taut. For those serious about getting the most from their screens, consulting installation guides or professional advice—like the insights available in [screen setup strategies](https://screens.homecinemaessentials.com/the-ultimate-blueprint-for-professional-projection-screen-setup)—can make all the difference.
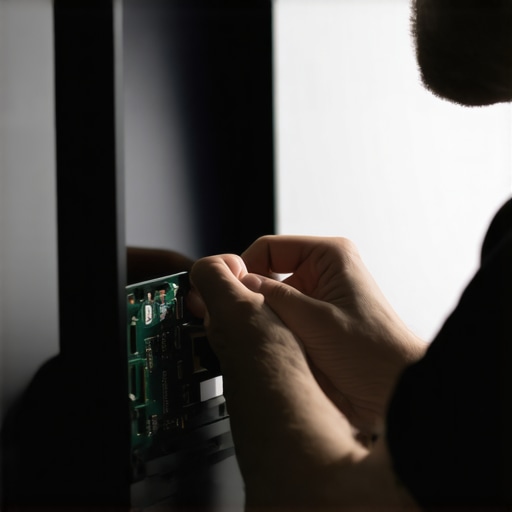
Have you ever fallen into this trap? Let me know in the comments. Remember, mastering these nuanced details sets apart the average setup from a truly cinematic experience.Maintaining the optimal performance of your home theater screen requires a combination of the right tools, regular attention, and strategic planning. First, investing in a high-quality tension meter, like the Spotlight TC100, allows you to precisely measure and adjust the tension of your pull-down or fixed frame screens, preventing sagging and warping over time. I personally use this device because it provides consistent readings and helps me avoid the frustration of uneven surfaces that can cause hotspotting or dimming spots. Additionally, employing a laser level, such as the Bosch GLL 55, ensures your screen is perfectly aligned, which is critical for uniform brightness and contrast, especially with fixed frame screens that are less forgiving to misalignment. Regular inspection with these tools, combined with routine adjustments, extends your screen’s lifespan and preserves image quality. Future trends point towards smart tensioning systems integrated with feedback sensors, making maintenance more automated and less guesswork—an exciting development to watch.
How do I maintain my projection setup over time?
Consistent cleaning, like gentle dusting with microfiber cloths, and periodic re-tensioning using reliable tools ensure your screen remains flat and free of wrinkles. Keep environmental factors in check by controlling room humidity and avoiding direct sunlight, which can degrade screen materials. For ongoing calibration, software tools like CalMAN or LightSpace can help fine-tune brightness, gamma, and color accuracy, ensuring your system performs at its best. Incorporating these practices not only prolongs your equipment’s life but also guarantees that every viewing session remains crisp and immersive.
Remember, they say a well-maintained screen can outperform a costly upgrade. If you’re serious about long-term performance, I recommend trying a high-precision tension meter and setting a regular maintenance schedule. Curious how to flawlessly tension your fixed frame screen? Check out the detailed guide in [this installation resource](https://screens.homecinemaessentials.com/fixed-frame-screen-installation-guide-for-home-theaters) to get started today.
What I Wish I Knew When Fixing My Screen
One of the toughest lessons I learned was that even a high-end projection system can fall victim to simple setup mistakes. Proper tensioning and alignment seemed trivial at first, but neglecting them cost me hours of frustration and subpar image quality. It taught me that understanding the nuances of screen microstructure and installation can make or break your cinematic experience.
I’m now convinced that routine checks—using tools like a laser level or tension meter—are essential, especially for fixed frame screens. This investment not only preserves image uniformity but prevents costly repairs down the line. The key takeaway? The devil is in the details, and patience during setup truly pays off.
Tools and Resources That Changed My Approach
For anyone serious about optimizing their home theater, I recommend exploring the [fixed frame screen installation guide](https://screens.homecinemaessentials.com/fixed-frame-screen-installation-guide-for-home-theaters). It offers step-by-step strategies that demystify the process. Additionally, leveraging [screen gain insights](https://screens.homecinemaessentials.com/understanding-screen-gain-how-to-optimize-brightness-and-clarity) has helped me select surfaces suited for my ambient light conditions, avoiding hotspots and glare. Tools like a tension meter and laser level are game-changers—they turn guesswork into precision, ensuring your screen remains flat and aligned for years to come.
Embrace Your Inner Tech Tinkerer
Don’t let frustration hold you back from elevating your home theater. Every tweak and adjustment, no matter how small, contributes to a more immersive, uniform picture. Remember, even seasoned enthusiasts refine their setups over years, learning from each misstep. I encourage you to get hands-on, experiment with tensioning, and make environmental adjustments—your perfect viewing spot is within reach. Curious if your current screen setup is holding you back? Read more about the [latest breakthroughs in ALR screen technology](https://screens.homecinemaessentials.com/alr-screen-technology-breakthroughs-to-watch-in-2025) and see how innovation can enhance your experience. Your journey to cinematic perfection starts with small, informed steps. How have you tackled uneven lighting or sagging screens in your setup? Let me know below.
No Responses