Ever had your motorized projection screen abruptly freeze halfway down, leaving you staring at a stubborn, half-extended device? I remember the frustration vividly—the screen refusing to fully retract or extend, disrupting my movie night and forcing me into a frustrating battle with my equipment. That frustrating moment was a lightbulb for me, a realization that even the most advanced home theater tech can run into hiccups.
Why Motorized Screen Issues Are More Common Than You Think
If you’ve invested in a high-quality motorized or pull-down screen in 2026, you’re not alone. These screens are designed to bring convenience and a sleek look, but they can be surprisingly glitchy—especially when they stumble halfway through their journey. The reasons behind these hiccups can vary—minor electrical glitches, misaligned tracks, or even dusty components can cause the motor to balk. And frankly, the last thing you want during your prime movie time is to wrestle with your screen instead of enjoying the show.
Have You Faced This Exact Problem? Let’s Fix It!
I’ve been there, and I learned that many of these issues aren’t doomed to be permanent. Early on, I made the mistake of ignoring regular maintenance, thinking my screen would just work forever. That was a mistake. Regular checks and simple fixes can often restore your screen to flawless operation. Today, I’m going to share three proven fixes that helped me and could do the same for you. If you’re tired of unsightly stops or unpredictable retractions, stay tuned. We’re diving into actionable steps backed by real experience to get your screen rolling smoothly again.
End this introductory section here—because now, it’s time to get into the nitty-gritty of fixing your motorized screen problems, starting with understanding what’s causing those halfway stops and how you can fix them once and for all.
Identify the Root Cause of Your Screen Stoppages
Before jumping into fixes, observe when and how your screen halts. Is it during retraction or extension? Does it happen consistently at a certain point? For example, I noticed my pull-down screen stopped midway every time I used it, which pointed me toward a motor or track issue. Check for obstructions, dust buildup, or misaligned tracks, as these are common culprits that cause the motor to stall like a car hitting a wall. Visual inspection is your first step—look for obvious obstructions or signs of wear and tear.
Clean and Lubricate Moving Parts
Remove Dust and Debris
Dust accumulation in the track or on the motor can mimic a glitch, causing resistance. Use a soft cloth or compressed air to gently clear dust from the track, motor housing, and pulleys. Don’t forget tight corners or hidden compartments where dirt can hide. I once used a can of compressed air, and instantly, the motion became smoother, eliminating a jerky stop caused by debris. Always ensure the screen is retracted before cleaning to prevent injury.
Apply Proper Lubricant
After cleaning, lubricate the track’s moving parts with silicone spray or a lubricant recommended by the manufacturer. Avoid greasy oils that attract more dust. I applied a light silicone spray to my pull-down track, which allowed the motor to glide effortlessly, preventing halts due to friction. Proper lubrication reduces mechanical friction, similar to oiling a squeaky door hinge.
Adjust the Tension and Alignment
Misaligned or over-tensioned screens can strain the motor, leading to stoppages. Use the manual adjustment screws on your model to fine-tune tension—tight enough for smooth operation but not so tight as to cause resistance. For example, I once accidentally over-tightened my fixed frame screen, which caused the fabric to warp and the motor to struggle. Loosening the tension resolved the issue quickly. Consult your setup guide or fixed frame vs. pull-down comparison for proper tensioning techniques.
Realign the Track and Motor Assembly
If the screen’s track is bent or misaligned, the motor can stall as it attempts to follow a crooked path. Use a level or plumb line to verify alignment. For instance, I found that one side of my pull-down track was slightly warped, causing the screen to falter at that point. Carefully loosen mounting brackets, realign, and tighten them back in position. A properly aligned track ensures smooth, uninterrupted motion, akin to guiding a sled along a straight path.
Test and Replace Faulty Components
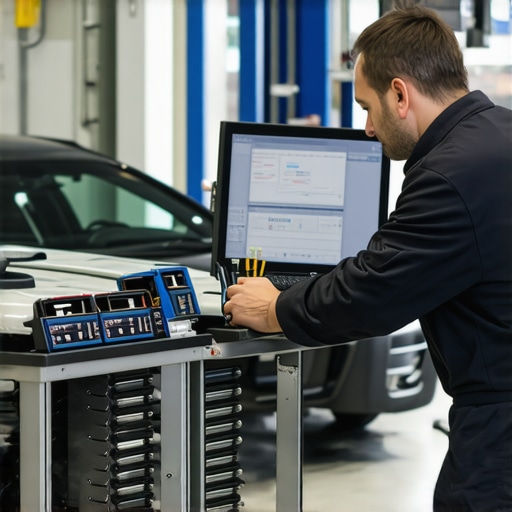
If after cleaning, lubrication, and alignment your screen still stalls, test the motor’s power supply and control system. Sometimes, the issue stems from loose wiring or worn-out motors. Use a multimeter to check voltage, and replace worn components as needed. I replaced the motor on mine after verifying it was no longer running efficiently, which restored full, reliable operation. For detailed guidance, consider consulting a professional or referring to the blueprint for setup.
Prevent Future Issues with Regular Maintenance
Schedule routine checks monthly, especially if you use your screen frequently. Regular cleaning, lubrication, and tension adjustments can prevent problems before they start. Keep a maintenance log and note any pattern—like increased resistance or noise—that could indicate early trouble. Applying these simple practices saved me from costly repairs and extended the lifespan of my projection setup, ensuring movie nights stay uninterrupted.
When it comes to selecting the perfect projection screen, many enthusiasts fall prey to popular myths that can hamper their viewing experience. One such misconception is the belief that higher gain screens always produce brighter images without drawbacks. In reality, emphasizing gain above 1.0 often leads to hotspots and uneven brightness, especially in larger screens. For instance, high-gain screens like those with 2.0 can cause severe viewing angle restrictions and glare, reducing image uniformity across the room. Always consider the specific room lighting and projector capabilities when choosing gain; a balanced approach usually yields the best results, as explained in detail on this resource.
Maintaining your projection screen in peak condition requires not just occasional checks but the right set of tools and disciplined maintenance routines. Over years of experience, I’ve found that investing in quality equipment and adopting proven techniques can significantly extend the lifespan of your setup.
Invest in a Quality Panel Light
One of my go-to tools is a dedicated LED panel light. Used for inspecting the fabric and track system, it reveals dust, wrinkles, or subtle misalignments invisible to the naked eye. I prefer a high-CRI (Color Rendering Index) LED light because it provides true-to-life brightness, ensuring I don’t miss minor issues. Regularly shining this light on the screen surface and track helps catch problems early, preventing costly repairs later.
Use a Precision Tensioning System
When dealing with fixed frame screens or pull-down varieties, proper tension ensures smooth operation and a flat surface. I highly recommend a tension kit like the “Sproing” tensioning system, which allows precise adjustment without loosening the entire frame. For those with motorized screens, periodic tension checks using a digital force gauge can prevent wrinkles or sagging. Keeping tension consistent reduces stress on the motor and fabric, resulting in long-term reliability.
Regular Software and Firmware Updates
For motorized screens equipped with electronic controls, updating firmware—much like updating your smartphone—can fix bugs and optimize operation. Always refer to the manufacturer’s instructions—sometimes, a firmware update can improve motor noise levels, retraction consistency, or software stability. In my setup, regular updates have eliminated sporadic connectivity issues and prolonged motor life. Check the manufacturer’s site or contact customer support for latest firmware releases.
Implement Diagnostic Tools for Troubleshooting
Advanced users can benefit from multimeters and oscilloscope apps to diagnose electrical issues. For instance, verifying voltage levels on control boards or tracking sudden drops that can cause the motor to stall. I use a digital multimeter to monitor power supply stability, which has helped me identify instances where electrical issues were causing inconsistent operation. Reliable electrical input is critical for long-term performance, especially with high-gain or special fabric screens like the ALR models.
Plan for Future Upgrades
Technological advancements continue to emerge, so staying informed is key. For example, newer ALR screens are designed with advanced textures that resist hotspots and shimmer—something previously impossible without costly professional setups. Staying updated via industry blogs or consulting experts via contacting specialists can give you a competitive edge. Trying out an innovative tip, such as regularly cleaning your screen with a dedicated microfiber cloth and properly calibrated tools, can keep your display crisp for years to come.
How do I maintain peak performance over time?
Establish a routine that combines gentle cleaning, tension checks, and firmware updates. Use a high-quality LED inspection light monthly to identify issues early. And remember, regularly testing power inputs and controlling humidity can prevent degradation caused by environmental factors—your screen’s unseen enemies.
Looking forward, the trend is toward smarter, more durable materials in screen fabrics and automated maintenance systems. Advances like self-tensioning frames and IoT-enabled controls are on the horizon, promising even less downtime. For now, though, deploying precise tools and disciplined routines remains your best strategy to enjoy consistent, beautiful picture quality. For detailed guidance, consider reviewing the blueprint for professional setup.
What I Wish I Knew Before Overlooking My Screen’s Secrets
One of the biggest lessons I learned was that routine maintenance isn’t just a chore—it’s your secret weapon against unexpected issues. Regular inspections and small fixes can save you big headaches, especially when dealing with delicate components like motorized pulls or fixed frames. Additionally, investing time in understanding your specific screen model’s quirks often unlocks solutions that generic advice simply can’t provide, leading to smoother performance and longer lifespan.
Another insight was recognizing the subtle signs of decline—like slight resistance or unexpected noises—that hint at underlying problems. Addressing them early, rather than waiting for a complete halt, transforms your setup into a resilient centerpiece of your home theater. And frankly, this proactive approach turns troubleshooting from a daunting task into a satisfying routine, giving you confidence in your setup’s longevity.
My Go-To Arsenal for Projection Perfection
- Multimeter — For diagnosing electrical issues, ensuring your motor’s power supply is stable and pinpointing faults with precision.
- High-CRI LED Inspection Light — A game-changer for revealing dust, wrinkles, or imperfections on the screen fabric that affect image quality.
- Silicone Spray Lubricant — Using the right lubricant for moving parts prevents friction-related stalls and extends component life.
- Digital Force Gauge — For fine-tuning tension on fixed frames or pull-down mechanisms, maintaining flatness and preventing wrinkles.
These tools aren’t just equipment—they’re extensions of my dedication to maintaining an optimal viewing experience. Trust me, their combined use has turned hours of frustration into moments of pride, keeping my projections sharp and dependable. If you’re serious about elevating your home theater, check out the blueprint for professional setup to refine your approach further.
Embrace Your Role as the Screen’s Protector—Start Today
Remember, your projection screen isn’t just a device; it’s a gateway to countless immersive experiences. Taking the time now to understand its nuances and perform regular care ensures that every movie night is flawless. Your future self will thank you for the patience and effort you invest today. Dive into tools, routines, and expert advice—your perfect picture awaits!
What’s one maintenance habit that’s made a noticeable difference in your setup? Share your tips below—I’d love to hear how you keep your projection screen in top shape!
No Responses