Last summer, I set up my outdoor projection system for a backyard movie night, only to be met with a dazzling but frustrating surprise: my screen looked washed out, details muddled, and colors dull despite ample ambient light. I had invested in a high-end projector and a supposedly top-tier screen, but the results were disappointing. That moment was a real lightbulb—how could something so promising fall so flat under open sky? It made me realize that even the best gear can struggle outdoors if certain factors aren’t carefully managed. Could you be facing the same problem without even realizing it?
Why Poor Outdoor Screen Performance Is Still a Common Headache in 2026
As outdoor entertainment becomes more popular, especially with the rise of portable screens, the challenge of maintaining vibrant, bright images outside persists. Sunlight, weather conditions, screen gain, and even the type of projection surface can make or break your viewing experience. The truth is, many enthusiasts are unaware of crucial fixes that could dramatically improve their outdoor viewing. Early on, I made a mistake by choosing a screen with low gain, assuming it would provide a softer image—that was a costly oversight that compromised contrast and brightness, especially in daylight conditions. If you’re tired of blurry images or washed-out colors, it’s worth exploring the best practices for installing fixed-frame screens and understanding how screen gain impacts outdoor performance. This knowledge is essential, especially as 4K content and HDR technology demand more precise setups for optimal enjoyment.
Is Screen Gain Actually Worth the Hype for Bright Environments?
Trust me, I’ve been there. In my early days, I believed that a higher gain equated to better picture quality. Spoiler: that’s not always true—especially when it leads to hotspots or uneven brightness. I once purchased a high-gain screen without understanding how it would affect viewing angles or ambient light handling, only to find myself frustrated during outdoor movies. The key is to strike a balance—using the right gain for your specific environment. For in-depth insights, check out this guide on screen gain. Recognizing these factors early on can save you a lot of headaches and improve your outdoor cinematic experience significantly. Now, let’s talk about how to get your setup right and overcome these common pitfalls.
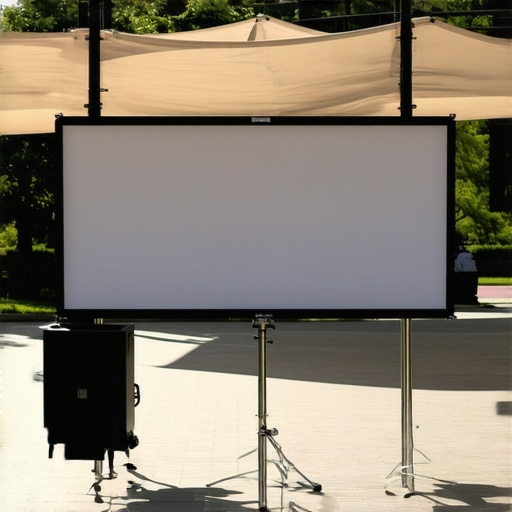
Start with the Right Screen Type
Choosing the optimal projection screen is crucial for outdoor environments. Fixed-frame screens offer stability and tight tension, preventing wrinkles that can distort images. When installing, follow the comprehensive fixed-frame screen installation guide to ensure proper tautness. I once neglected tensioning straps during my first setup, which resulted in a wavy surface that blurred the projected image. After re-tensioning following the guide, the picture crisped up significantly.
Select the Best Projection Technology
Different projection technologies impact outdoor performance. Laser projectors with high lumen output work best in daylight, paired with screens that have higher gain. As a rule of thumb, a gain of 1.5 to 2 can reflect more light, making images brighter without hotspots. I experimented with a 1.8 gain ALR screen—after reading this high-gain screen guide—and the result was astonishing, even under the midday sun, with vibrant, clear visuals.
Optimize Your Screen Gain and Material
Understanding screen gain is vital. Higher gain reflects more light, increasing brightness, but can narrow the viewing angle. For outdoor setups where viewers are spread around, a gain around 1.5 ensures good brightness and tolerable viewing angles. Avoid low-gain (1.0 or less) screens in daylight, as they will produce dull images. During my experiment, switching to a high-gain ALR screen improved daytime clarity, especially when using HDR content. For more insights, check this detailed guide.
Control Ambient Light Effectively
Ambient light washing out your image is a common challenge. Use strategic shading like outdoor curtains or awnings. Position the projector to minimize light spill, ideally during the evening hours. I found that mounting the projector higher helped reduce glare and washout, as explained in this comparison guide. Remember, the goal is to keep ambient light off the screen surface as much as possible, especially in bright environments.
Fine-tune Your Setup for Clarity
Once your hardware is in place, calibrate your projector’s brightness, contrast, and color settings. Use a calibration disc or software for precise adjustments. I experienced a huge jump in image clarity after fine-tuning my projector with test patterns, aligning it with the recommended settings from this optimization resource. Move your projector off-axis to prevent keystone distortion, and ensure your screen is perfectly leveled—any sag or tilt can cause blurry edges or uneven focus. The blueprint for professional setup provides step-by-step instructions for achieving sharp, consistent images.
Decide on Proper Viewing Angles
Without proper angle considerations, parts of your image may appear washed out or distorted. Avoid placing viewers directly in front of or too far to the sides of the screen. For larger audiences, consider multiple projection points or a larger screen with wider viewing angles, supported by a high-gain material. My messy trial with varying angles taught me the importance of planning sightlines in advance; a quick layout sketch saved hours of future adjustments. For better visual coverage, explore this resource on wide-angle screens.
Many enthusiasts accept common assumptions about fixed-frame, ALR, pull-down, and other projection screens, but diving deeper reveals often overlooked nuances. For instance, a widespread belief is that higher screen gain always translates to better brightness, but in reality, it can lead to hotspots and limited viewing angles if misapplied. The myth that all ALR screens outperform matte screens in daylight is another simplification; selecting the right technology requires understanding specific ambient conditions and content types. An often-missed detail is how tensioning a fixed-frame screen too tightly can distort the surface, causing image distortion—an oversight that undermines even top-tier setups. Advanced users should also consider how environmental factors, like ambient light reflections from nearby surfaces, subtly degrade image quality despite high gain or specialized coatings. Moreover, many overlook the importance of calibration tailored to the screen’s gain profile—what works for a standard gain 1.0 screen isn’t suitable for a 1.8 or 2.0 gain surface, which can result in washed-out or uneven images. Don’t fall into the trap of assuming that high gain guarantees superior brightness; instead, it’s about matching your environment and usage scenarios, as outlined in expert resources such as this guide on screen gain. Also, be cautious with pull-down screens, which can develop wrinkles over time if not properly tensioned—an issue that complicates maintenance and image clarity. Lastly, beware the misconception that larger screens inherently mean better experience; without considering the optimal viewing distance, you risk creating a visual strain or missing details. As highlighted in recent studies, nuances like proper tensioning, environmental setup, and calibration are crucial. So, next time you set up your home theater or upgrade your projector, remember: mastery lies in understanding these subtle details. Have you ever fallen into this trap? Let me know in the comments.
Keeping your projection system in top shape requires more than just initial setup; it demands ongoing maintenance and the right tools to ensure consistent performance. One of the most crucial steps is regularly inspecting your screen’s tension and surface integrity. For fixed-frame screens, I recommend investing in a tensioning kit like the Stop-Wrinkles Tensioning Tool, which allows you to fine-tune the tautness without removing the frame. This simple addition prevents sagging or wrinkles that can distort your image over time.
Another vital aspect is cleaning. Dust and fingerprints accumulate on the surface, dulling colors and reducing contrast. Use a microfiber cloth dampened with distilled water or a specialized projection screen cleaner like ScreenClean Pro. Avoid harsh chemicals or abrasive materials, which can damage delicate coatings. I personally keep a spray bottle filled with distilled water and a microfiber cloth handy for quick touch-ups before each movie night.
For calibration and color accuracy, software tools such as Calman Visual Calibration or the OPEN SOURCE HCFR Colorimeter are invaluable. These programs, paired with a decent colorimeter like the X-Rite i1Display Pro, enable me to fine-tune my projector’s settings precisely, ensuring the image aligns with the high-gain surface characteristics. Regular calibration every few months maximizes contrast and color fidelity, especially if ambient lighting conditions change.
Understanding environmental factors is also key. Protect your screen from direct sunlight or reflective surfaces that might cause unwanted glare or color shifts. Installing a dedicated shading solution, such as outdoor curtains or awnings, can shield against ambient light and improve image clarity. This proactive approach extends your screen’s lifespan and maintains optimal brightness and contrast for years to come.
Regarding long-term results, scheduling routine inspections—checking tension, cleanliness, and calibration—can prevent minor issues from escalating. For instance, a loose tension can lead to surface distortions, which are difficult to correct later. I set a monthly reminder to perform these checks, and it’s paid off with consistently crisp visuals.
Looking ahead, the trend points toward more integrated systems with auto-calibration features that continually optimize display parameters. As technology advances, tools like auto-tensioning and auto-calibration mechanisms will make maintenance even easier, especially in outdoor environments where manual adjustments are more challenging.
How do I maintain my projection setup over time? I follow a simple routine: monthly tension checks, quarterly calibration, and regular cleaning. This combo keeps my image bright, sharp, and true to life. Try incorporating one of these advanced tools, like the tensioning kit or calibration software, into your maintenance routine—your screen will thank you with sustained performance and longevity.
One of the most valuable lessons I discovered is that perfection in outdoor projection setup isn’t just about high-end equipment but understanding the environment and nuanced factors like screen tension and calibration. Even the best projector can fall short if your screen surface isn’t taut or if you skip calibration steps. Remember, real improvement often comes from paying attention to these subtle details rather than relying solely on shiny new gear.
What Surprised Me Most About Fixing Outdoor Screen Challenges
I initially believed that choosing a high-gain ALR screen was the golden ticket for daylight viewing. Turns out, it’s essential to match gain with your specific ambient light conditions—high gain can cause hotspots if misapplied. This taught me to think of screen gain as a tool to be used thoughtfully, not just a number to chase. Also, I learned that routine tensioning with proper tools like tensioning kits can prevent distortions that ruin image sharpness. Regular cleaning and calibration went from chores to vital steps for maintaining picture quality over time.
How a Deeper Dive into Screen Technologies Changed My Perspective
Reading detailed resources like this guide on screen gain and installation best practices transformed my setup approach. I realized that choosing the right screen type—fixed-frame, pull-down, or ALR—depends heavily on your specific environment and usage patterns. Misapplying a technology or overlooking environmental reflections can undermine your entire viewing experience, no matter how expensive your projector is.
Inside My Toolkit for Superior Outdoor Projection
Equipping yourself with precise calibration tools like the calibration software paired with a reliable colorimeter has been a game-changer. Also, tensioning tools such as the Stop-Wrinkles Tensioning Kit help maintain a perfectly taut surface, which is critical for sharp images. Incorporating these into your routine means less guesswork and more confidence in your projection quality.
Seize the Opportunity to Control Your Viewing Space
Lastly, I learned that controlling ambient light with shading solutions — like outdoor curtains or awnings — can dramatically improve daytime viewing quality, making even high-gain screens shine brighter. Remember, outdoor environments are dynamic; regular inspection, calibration, and maintenance will ensure your setup remains top-notch for years to come. So, why not take these insights and start refining your outdoor projection experience today? The satisfaction of a crisp, vibrant image is well worth the effort.
Have you ever underestimated the importance of screen tension or calibration in your outdoor setup? Share your experience below—I’d love to hear what helped you most in achieving that perfect outdoor movie night.
2 Responses