I vividly recall the first time I tried to enjoy a movie night on my new projection setup only to be interrupted by an annoying smear across my pull-down screen. That moment felt like a slap in the face after investing so much time and money into my home theater. It was then I realized that keeping a 2026 pull-down screen pristine isn’t just about aesthetics—it’s about preserving image quality and ensuring that every cinematic detail shines through. Struggling with stubborn dirt, streaks, or cloudiness can turn a thrilling viewing experience into a frustrating game of maintenance. But here’s the truth: with the right techniques, you can easily tackle these issues, restoring your screen’s brilliance without breaking the bank.
Why Screen Cleaning in 2026 Is More Critical Than Ever
In 2026, home theater technology has advanced leaps and bounds. High-gain screens, ALR textures, and 8K projectors deliver unparalleled clarity. Yet, all these upgrades are rendered useless if your screen isn’t clean. Dirt, fingerprints, or accumulated dust can cause hotspots, reduce contrast, and even lead to persistent shimmer effects that degrade your favorite movies and shows. Did you know that unclean screens can decrease image brightness by up to 20%, undermining the benefits of high-end projectors? Proper cleaning not only maintains visual fidelity but also extends the lifespan of your investment.
If you’re like me, perhaps you’ve faced the all-too-common dilemma of a dirty pull-down screen that refuses to stay spotless. I used to think a quick wipe was enough—until I realized I was making costly mistakes that damaged my screen’s surface. Early on, I learned that improper cleaning can scratch or streak delicate projection fabrics, especially those with ALR coatings. A mistake I often made was using harsh chemicals or abrasive cloths, which worsened the problem instead of solving it. That’s why understanding the right methods is crucial.
Have you encountered stubborn stains or streaks that just won’t budge? If so, don’t worry. I’ll guide you through the proven techniques to safely clean your 2026 pull-down screen, ensuring it remains vibrant and spotless for years to come. Stay tuned—your next movie night awaits with a cleaner, brighter screen.
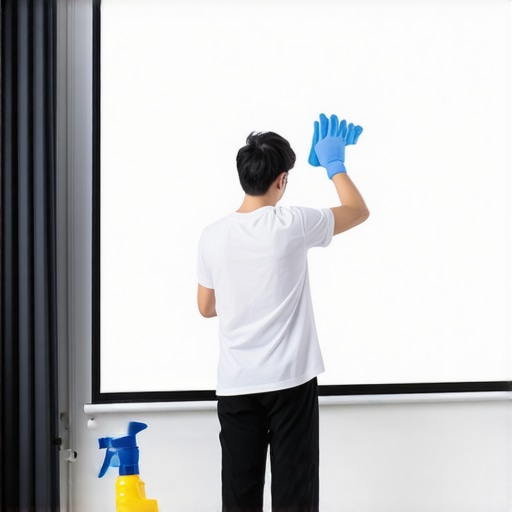
Prepare Your Workspace for Safe Cleaning
Set up in a dust-free, well-lit area, preferably with a large table or flat surface where you can lay your screen flat if necessary. Remove any barriers or obstacles that could interfere with your cleaning process. I once attempted to clean my screen in a cramped corner, which made it nearly impossible to reach all areas, leading to uneven cleaning and streaks; learning from that, I now choose a spacious space.
Choose the Right Cleaning Tools and Solutions
Use a microfiber cloth that is soft and lint-free to avoid scratching the delicate surface. Prepare a cleaning solution with distilled water mixed with a small amount of isopropyl alcohol (70%). Avoid harsh chemicals like ammonia or abrasive cleaners, which can damage ALR coatings or projection fabrics. Remember, gentle is the key—think of cleaning your screen as giving it a spa treatment rather than a rough scrub. I usually test the solution on a small corner first to ensure it doesn’t cause any discoloration or damage.
Implement Proper Cleaning Techniques
Wipe with the Grain of the Fabric
Gently wipe the screen in a straight line from top to bottom, following the weave or texture of the fabric. Use light pressure to lift dirt and fingerprints without damaging the surface. In my experience, a light touch helps prevent streaks or caused fibers to fray.
Avoid Excess Moisture and Water Spots
Lightly dampen the microfiber cloth—never soak it—to prevent drips that can seep into the edges or behind the fabric. Use a dry section of the cloth to buff the surface afterwards. I once used a very wet cloth, and it caused water spots that took days to dry out, so I learned to go easy on moisture.
Address Stubborn Stains and Surface Irregularities
For more persistent marks, spray a little cleaning solution directly on the cloth, not on the fabric. Gently rub the affected area with small, circular motions, and then wipe with a clean, damp cloth to remove residue. When I faced stubborn smudges after a movie night, this method restored clarity without leaving streaks, prolonging the life of my ALR coating.
Maintain Consistent Cleaning Schedule
Set a routine—once every few months or when visibly dirty. Regular maintenance prevents buildup that can reduce contrast or cause hotspots. Keep in mind, over-cleaning can sometimes cause more harm than good, especially if abrasive tools or solutions are used; moderation is key. I found that sticking to a gentle cleaning rhythm kept my screen performing optimally without risking surface damage.
Final Tips for the Best Results
Always turn off and unplug your projector before cleaning your screen to avoid accidental damage. Use distilled water to prevent mineral deposits or streaks caused by tap water impurities. Lastly, consider consulting expert advice for your specific screen type, such as [ALR screens](https://screens.homecinemaessentials.com/choosing-the-best-alr-screen-expert-insights-and-tips) or [fixed frame installations](https://screens.homecinemaessentials.com/fixed-frame-screen-installation-guide-for-home-theaters). Proper care ensures your projection surface remains pristine, allowing your high-end projector to shine in every detail.
When it comes to choosing the perfect projection setup, many enthusiasts fall prey to misconceptions about screen gain and types, often oversimplifying the nuances. Everyone seems to focus on specs like brightness or contrast, but what most overlook are the subtle but critical pitfalls associated with screen gain, pull-down screens, ALR fabrics, and fixed frame designs. Let me share some insights from my experience that might challenge your current assumptions. A common myth is that higher gain always equals better brightness. In reality, pushing gain above 1.0 can dramatically narrow viewing angles, resulting in significant black level loss during off-center viewing. This is especially problematic in larger rooms or multi-viewer setups. Advanced users should be cautious: according to research from [Home Cinema Essentials](https://screens.homecinemaessentials.com/understanding-screen-gain-how-to-optimize-brightness-and-clarity), optimizing gain involves balancing brightness with angular viewing considerations, not simply maximizing it.
Another trap to avoid is assuming all ALR (Ambient Light Rejection) screens are equal. Many presume that the latest ALR fabrics eliminate washout entirely. But in practice, some materials are prone to hotspots or shimmer effects under certain lighting conditions. This is particularly true for screens with textured surfaces designed for high gain. For example, high-gain ALR fabrics tend to be less tolerant of ambient light fluctuations, which can degrade image clarity. Interestingly, a more nuanced approach involves selecting ALR fabrics tailored for specific environments, such as those with lower gain for daytime use—something often overlooked by beginners. For detailed guidance, see [experts’ advice](https://screens.homecinemaessentials.com/alr-screen-technology-breakthroughs-to-watch-in-2025).
Have you ever fallen into this trap? Let me know in the comments.
Let’s explore a more advanced question: How do projection screen types influence image integrity when upgrading to 8K or HDR content? The answer is deeper than pixel resolution. Fixed frame screens generally provide superior tension and flatness, reducing wave or ripple effects that can distort high-resolution images. Conversely, pull-down screens, especially manual ones, can suffer from edge curl or uneven tension, which subtly distorts the image, especially at the edges—a critical concern for UHD content where every pixel matters. Furthermore, the choice of screen material—such as the texture or reflective properties—affects how HDR highlights and shadow details are perceived. For thorough insights, I recommend examining [this comprehensive guide](https://screens.homecinemaessentials.com/the-ultimate-blueprint-for-professional-projection-screen-setup).
In essence, understanding the complexities behind screen gain, fabrics, and mounting mechanisms empowers you to make smarter decisions that elevate your home theater experience. Don’t just chase higher numbers—consider the nuanced effects on image quality and viewing comfort. Have you ever experienced a setting where boosting gain or switching screen types unexpectedly degraded the picture? Share your stories or questions below—let’s unravel these mysteries together.
Keep Your Screen Running Smoothly: Essential Tools and Tips
Maintaining your projection screen over time ensures optimal image quality and longevity. Investing in the right tools and adopting precise methods can make this routine both effective and straightforward. One of my favorite investments is a high-quality microfiber cleaning cloth, specifically designed for delicate fabrics, which I’ve found crucial for avoiding scratches on high-gain ALR surfaces. Additionally, a spray bottle filled with a solution of distilled water and isopropyl alcohol (70%) offers a safe cleaning agent that evaporates quickly, preventing water spots and streaks. I personally mix small batches to ensure freshness and effectiveness.
To quantify the benefits of proper tools, I recommend checking out proven strategies for enhancing image quality, which emphasizes the importance of equipment in routine maintenance. Over the years, I’ve learned that regular cleaning with these tools maintains brightness and contrast, reduces shimmer effects, and preserves the fabric’s reflective properties—especially vital for high-end fixed frame and ALR surfaces.
How do I keep my projection screen functioning well over time?
Consistent, gentle maintenance is key. Set a schedule—every three to four months—to clean the fabric thoroughly. Use light, even strokes following the fabric’s weave, avoiding excessive moisture that could seep into edges. For stubborn smudges, a targeted spray on the microfiber cloth ensures safe removal without damaging coatings. Also, regularly inspect the tension and mounting to prevent sagging or edge curl, which can distort your image. For detailed tensioning tips, see how to tension a pull-down screen.
In future years, I predict that smart cleaning devices equipped with gentle ultrasonic vibrations may become mainstream, offering even more efficient and damage-free maintenance. Until then, combining proper tools with scheduled routines is your best bet for long-lasting screen performance. Don’t neglect this step—your cinematic experience depends on it. Try incorporating a microfiber cleaning cloth and distilled water solution into your maintenance routine today, and notice the difference in clarity over time.
Need more guidance? Reach out to us through our contact page for personalized advice on selecting the best tools for your specific screen type.
Lessons I Never Expected to Learn About Screen Gain and Setup
One of the most surprising insights I gained was that higher screen gain isn’t always better; it can narrow viewing angles and cause unexpected hotspots, especially with high-end projectors. I used to believe that boosting gain would maximize brightness, but I’ve come to realize that achieving a perfect balance is key to a cinematic experience. Additionally, I discovered that ALR fabrics aren’t a one-size-fits-all solution; some textures may not perform well under certain lighting conditions, which can actually diminish image quality. Lastly, I learned that regular, gentle cleaning is far more effective than aggressive scrubbing or harsh chemicals—preserving the delicate surface coatings and textures, like those in ALR screens, is essential for longevity and performance.
My Go-To Resources for Perfecting Projection Screen Setup
For anyone serious about optimizing their home theater, I highly recommend looking into this comprehensive guide on understanding screen gain. It offers in-depth explanations that helped me make more informed choices. Another essential resource focuses on selecting the right gain screens for various room sizes and lighting conditions, which has been invaluable. When it comes to installation and tensioning, I trust this step-by-step installation guide to get a perfect, ripple-free surface. Lastly, for ongoing maintenance, their tips on choosing the best cleaning tools have kept my screen in pristine condition.
Embrace Your Role as a Home Theater Enthusiast
Your journey into perfect projection starts with understanding the nuances of screen gain, materials, and maintenance. Remember, every detail—from choosing the right gain to properly cleaning your ALR fabric—can make a significant difference in your viewing experience. Don’t be discouraged by initial challenges; every step you take toward mastery enhances your home theater atmosphere. Keep experimenting, stay curious, and don’t hesitate to reach out with questions or share your successes. Your dedicated care will ensure your projection setup remains stunning for years to come. So go ahead—start refining your screen routine today, and enjoy the enhanced cinematic magic that a well-maintained, correctly selected screen can deliver.
Have you ever struggled with finding the perfect balance for screen gain or cleaning techniques? Let me know below!
,
No Responses