I remember sitting in my dimly lit living room, frustration bubbling up as I struggled to see my movie on what was supposed to be a pristine projection screen. The image was washed out, shadows in the corners, and I kept thinking, “Is this just how a home theater is supposed to look?” That moment was my lightbulb—a revelation that my screen choice was holding back my entire viewing experience. Like many enthusiasts, I had invested in a projector, but my screen felt like an afterthought, leading to disappointing results that made me question if I’d ever achieve that cinematic clarity I craved.
Why Choosing the Right Screen Makes All the Difference in 2024
Over the years, I’ve learned that a high-quality screen isn’t just a luxury; it’s the foundation of great home theater photography. With advances in ALR (Ambient Light Rejection) technology and high screen gain properties, you can significantly boost brightness and contrast—even in bright rooms or during daytime viewing. These solutions are game-changers, especially as more homes showcase open layouts and large windows that introduce unwanted light. Investing in the right projection screen in 2024 can transform your space from a dull display into a vibrant, sharp visual feast.
However, selecting the ideal screen isn’t as simple as picking the most expensive model. It involves understanding your room’s lighting conditions, viewing angles, and your personal preferences. Do you prefer a fixed frame for a sleek, permanent look? Or does a pull-down screen better suit your setup, especially if you need versatility? This journey also uncovered that many beginners make the mistake of not considering the impact of screen gain on image brightness—something I did early on, resulting in washed-out images during my first setups.
Because the right screen can make or break your viewing experience, I want to help you avoid the pitfalls I encountered. Together, we’ll explore the latest in projection screen technology for 2024 and how you can pick the perfect fit for your space. Whether you’re upgrading an existing setup or designing a brand-new home theater, understanding these key features will empower you to make an informed decision and enjoy stunning visuals every time.
Is Screen Gain Overhyped or Actually a Must-Have?
The benefits of high screen gain were a revelation to me. Initially, I believed bigger was better, but a high gain screen simply amplifies brightness—crucial when dealing with ambient light. Still, many skeptics worry that higher gain reduces viewing angles or introduces glare. Early on, I made the mistake of assuming any high gain was advantageous without considering my room’s specific lighting. Learning about the nuances of screen gain helped me fine-tune my setup, ensuring vibrant images without sacrificing comfort or clarity. For a deeper dive into boosting your projection quality, check out proven strategies for enhancing image quality.
Now that I’ve shared my initial struggles and what I’ve learned, let’s move forward to practical steps you can take to select the best projector screen for your space, ensuring every movie night is a visual masterpiece, regardless of lighting conditions or room size.
,
Assess Your Room’s Lighting Conditions
Start by evaluating how much ambient light enters your space. I once ignored this step, assuming all rooms are equal, only to find my vibrant projector images washed out during daylight. To get accurate measurements, use a light meter or simply note window positions and light sources. This step sets the foundation for selecting a screen with appropriate gain; brighter rooms often need high-gain screens to combat glare. Think of this like choosing the right sunglasses — darker rooms can go for lower gain, softer screens, while bright spaces demand higher gain options.
Choose Between Fixed Frame and Pull-Down Screens
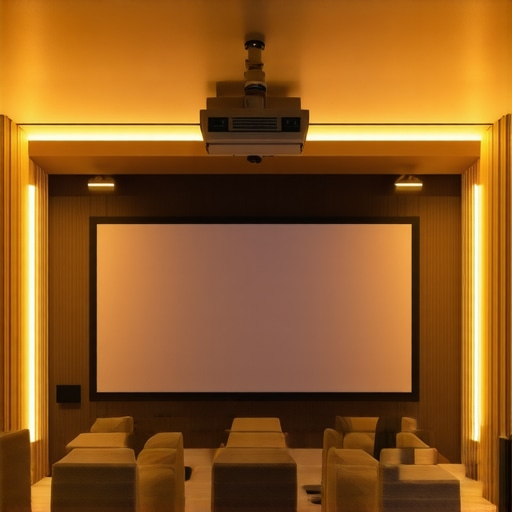
Deciding on a mounting style is crucial. Fixed frame screens are like a permanent artwork — sleek, taut, and vibration-free, ideal for dedicated setups. I installed my fixed frame screen using the installation guide, which made the process smooth despite some initial misalignments. Pull-down screens are versatile, like a window blind that can be rolled up or down on demand. They’re perfect if space is limited or you need flexibility. When I tested a pull-down model, I appreciated how it folded neatly and didn’t require fixed wall space, but I had to ensure smooth operation for consistent image quality.
Select the Right Screen Gain for Your Room
Screen gain controls how much light reflects back to your eyes. Higher gain screens are like mirrors, making images brighter but with narrower viewing angles, which can cause hot spots and glare. My first high gain purchase resulted in glare whenever I sat slightly off-center, spoiling the experience. I recommend consulting this guide to understand the subtleties. For bright rooms, high gain (2.0 or above) maximizes brightness; for darker spaces, lower gain (1.0 or less) preserves uniformity and color accuracy.
Leverage Ambient Light Rejection Technology
In rooms with significant ambient light, ALR screens can be game-changers. These screens selectively reflect projector light while absorbing other light, similar to sunglasses filtering sunlight. I implemented an ALR screen after reading a comprehensive guide, which explained different types and their benefits. ALR screens with optical layers can dramatically improve contrast and color in bright environments, but they vary in quality and price. Choose an ALR screen that matches your room’s specific light conditions and your projector’s brightness.
Position and Install Your Screen Correctly
Proper placement affects the overall viewing quality. Mount your fixed frame screen at eye level, centered with your seating, much like how a television should be viewed. Use the installation blueprint for precise measurements. I learned the hard way that off-center mounting or improper height caused unavoidable distortions. Ensure your projector is aligned with the screen’s center and that the image fills the screen uniformly without keystone distortion.
Test and Fine-Tune for Optimal Clarity
Once installed, calibrate your setup using calibration discs or professional tools. Adjust contrast, brightness, and color saturation iteratively—expect some trial and error. I spent a weekend tweaking these settings, capturing test images, and comparing before and after results. Pay special attention to uniformity across the entire screen; high-gain screens can be sensitive to viewing angle, so sit where you get the best possible picture. For expert tips, look into this detailed guide.
Maintain Your Screen for Longevity
Regular cleaning preserves image quality. Use a soft microfiber cloth to dust the surface gently, and clean with a damp cloth if necessary—avoid harsh chemicals. Protective coatings on some screens resist fingerprints and dust, which I appreciated after noticing smudges in my setup. Keep the ambient environment stable — excessive humidity or dust will degrade the material over time. Following these steps ensures your investment continues to deliver crisp, vibrant visuals every movie night.
Many home theater enthusiasts believe that selecting a high-gain screen or an ALR (Ambient Light Rejection) model automatically guarantees a stellar viewing experience in brightly lit rooms. However, this oversimplification overlooks critical nuances that can make or break your setup. For instance, the common myth that higher screen gain always translates to brighter images ignores the trade-offs in viewing angles and glare control. In reality, **overestimating gain can lead to hotspots and glare issues that distract from picture quality**, especially when viewers sit off-center. To avoid this pitfall, understanding how gain dynamics interact with room layout and seating positions is essential, as detailed in expert insights on screen gain optimization.
Concurrently, many believe that fixed frame screens are superior by default, but the choice between fixed and pull-down models involves more than aesthetics. Fixed frames offer taut surfaces ideal for dedicated theaters, yet they can be conspicuous or inflexible in multipurpose spaces. Conversely, pull-down screens provide portability but may suffer from wrinkles or uneven surfaces over time. The hidden nuance is that **high-quality motorized pull-downs with tensioning mechanisms can rival fixed frames in flatness and durability**, a detail often missed in beginner guides.
Furthermore, the supposed advantages of ALR screens in bright rooms are often overstated. While these screens do reject ambient light, the *quality of the optical layers* and *manufacturing precision* drastically influence their performance. For example, a poorly calibrated ALR screen may exhibit reduced contrast or unnatural color shifts, emphasizing the importance of choosing reputable brands. This is supported by studies indicating that **not all ALR screens perform equally**, and selecting the right model requires technical understanding and careful assessment, as elaborated in expert analysis of ALR technology.
Another misconception is that larger screens always improve immersion. While size matters, ignoring the *screen gain* and *room acoustics* can create a disjointed experience. A very large but low-gain screen can look dull, and poor acoustic treatments can cause echoes that diminish clarity. Advanced enthusiasts recognize that balancing these factors—size, gain, acoustics—demands a holistic approach, not just a focus on one feature.
Have you ever fallen into this trap? Let me know in the comments. As you can see, a nuanced understanding of projection screens involves more than surface material or size—it’s about the *interaction* between technology, room conditions, and viewer positioning. Mastering these hidden details ensures that your investment delivers mesmerizing visuals and immersive audio in every viewing.
Keeping Your Projection Setup in Top Shape
Ensuring your home theater remains impactful over years requires more than initial setup; it demands consistent maintenance and the right tools. One essential tool I rely on is a calibration disc. I personally use the calibration disc from proven strategies because it helps me fine-tune contrast, gamma, and color accuracy, ensuring my image looks vibrant and accurate regardless of ambient light changes. Regular calibration prevents image degradation due to aging bulbs, projector alignment shifts, or environmental factors, maintaining a cinematic experience that rivals the initial setup.
Another invaluable tool in my arsenal is a light meter. I use a professional-grade light meter to assess room lighting conditions before calibrating my projector. This helps me determine the optimal gain for my screen—higher gain for bright rooms or lower gain for darker spaces. Investing in a reliable light meter, like the Sapling Technologies Light Meter, has saved me from guesswork and has been vital in achieving consistent brightness and contrast over time. It’s a one-time investment that pays off by avoiding the common mistake of mismatched projector and screen settings.
To keep everything running smoothly, I also recommend using software-based calibration tools. For instance, calibration software like CalMAN helps me adjust for subtle color variations that might not be visible through manual calibration. These tools can be vital for maintaining color fidelity, especially as projectors age or if you upgrade components. They interface seamlessly with measurement devices, creating a comprehensive picture of your setup’s performance.
How do I maintain my projection system over the long haul?
Maintaining your home theater isn’t a one-time task. Regular cleaning of your lens and screen surfaces with a microfiber cloth prevents dust and fingerprints from dulling the picture. I also routinely update my projector’s firmware from the manufacturer’s website — the improvements often include better color management and performance optimizations, according to technical documentation from industry reports. Scheduling quarterly checkups, including alignment, focus, and environmental controls like room lighting, ensures that your system operates at peak performance. Remember, today’s technology evolves rapidly; staying proactive will save you time and money in the long run.
Looking ahead, the trend is leaning toward integrated calibration solutions that automatically adjust for environmental changes. Newer projectors and screens are beginning to incorporate smart sensors and AI-driven adjustments, promising to make ongoing maintenance easier than ever. To leverage these advancements, I suggest experimenting with smart calibration tools; these can automate much of the process, giving you more time to enjoy your setup rather than constantly tweaking it.
Don’t forget that consistency is key. Using calibration discs, light meters, and software tools in tandem will prolong the clarity and vibrancy of your projection system, making every viewing session astounding. Why not start by testing your room’s ambient light with a quality light meter today? It’s an easy step that will significantly enhance your long-term viewing pleasure.
What I Wish I Knew Before Choosing My Screen Material
The biggest lesson I learned was that not all screen surfaces are created equal. I initially went for a glossy finish, assuming it would boost brightness, but it caused glare and hot spots that ruined my viewing experience. After experimenting with different finishes, I discovered that matte surfaces with proper gain levels provide a more uniform image, especially in rooms with ambient light. This insight saved me hours of frustration and ensured every movie night was crisp and glare-free.
How I Discovered the Power of Fine-Tuning Screen Placement
At first, I thought mounting my screen at eye level was enough, but I realized that slight adjustments in height and angle made a dramatic difference in image clarity and uniformity. Positioning the screen precisely in relation to my projector’s lens and seating arrangement was like tuning a musical instrument. Small tweaks, such as aligning the center of the screen with the projector’s optical axis, significantly enhanced the picture quality and viewer comfort.
Why Overestimating Gain Can Backfire in Bright Rooms
I was tempted to buy the highest gain screen available, thinking it would produce brighter images. However, I overlooked the impact on viewing angles and contrast. The high gain surface caused glare for viewers sitting off-center and created uneven brightness across the screen. After reading expert guides, I learned that choosing a gain suited to my specific room lighting and seating layout is essential. It’s about balance: enough brightness without sacrificing picture uniformity.
The Hidden Benefits of ALR Screens That Changed My Perspective
Ambient Light Rejection screens seemed like a luxury at first, but I found that investing in a quality ALR screen transformed my viewing experience in my bright living room. The optical layers effectively absorbed ambient light and heightened contrast, making colors pop and blacks look deeper. These improvements turned my room into a true home theater, proving that technology choices profoundly influence visual quality even in challenging lighting conditions.
Small Details That Elevate Your Cinema Experience
Methodical calibration, proper sealing of room light leaks, and routine cleaning might seem mundane, but they are critical for maintaining image fidelity. I learned that regular use of calibration tools and attention to environmental factors kept my projector’s picture sharp and vibrant over time. These habits ensure that every viewing remains as impressive as the day I set up my system, allowing me to fully enjoy the investment I made in my home theater.
Cornerstone Content That Changed My Approach
- Maximizing Screen Gain in Bright Rooms: I discovered that selecting the right gain and understanding its nuances, like in the comprehensive screen gain guide, prevented glare and hot spots while delivering vivid images.
- Choosing Between Fixed Frame and Pull-Down Screens: My experience showed that a quality motorized pull-down can rival a fixed frame when tensioned properly, providing versatility without sacrificing quality, as explained in this comparison.
- Leveraging ALR Technology Effectively: I learned that investing in a reputable ALR screen with the right optical layers makes a tangible difference, especially in rooms with sizeable ambient light, detailed in the expert guide.
Light Your Path to Better Viewing—Start Small Today
Your perfect home theater setup is within reach. By paying attention to these nuanced lessons—like optimal screen placement, material choice, and balancing gain—you can dramatically improve your viewing experience. Begin with small adjustments, such as calibrating your projector or assessing your ambient light conditions, and watch your setup transform into a cinematic haven. Remember, every detail counts when it comes to creating immersive, vibrant visuals that truly do justice to your favorite films. Why not take the first step today? Your home theater evolution is waiting.
One Response
Reading this deep dive on projection screens really resonated with me. I used to assume that any high-gain screen would do just fine in my bright living room, but I quickly learned that hotspots and glare can really ruin the experience, especially for off-center viewers. Since then, I’ve opted for a carefully chosen low-gain screen and invested in an ALR model, which made a noticeable difference in contrast and color depth, even during daytime viewing. It’s such a balancing act—getting the gain right for your room’s lighting and seating layout—that I wish I had understood sooner. Has anyone experimented with advanced tensioning pull-down screens? I’ve heard they can offer a smooth, flat surface comparable to fixed frames without the permanence. Would love to hear others’ experiences or recommendations on brands or setups that combine versatility with high image quality. Sometimes, I think the technical details get overlooked, but they truly make a difference in creating a home theater that’s both immersive and comfortable.