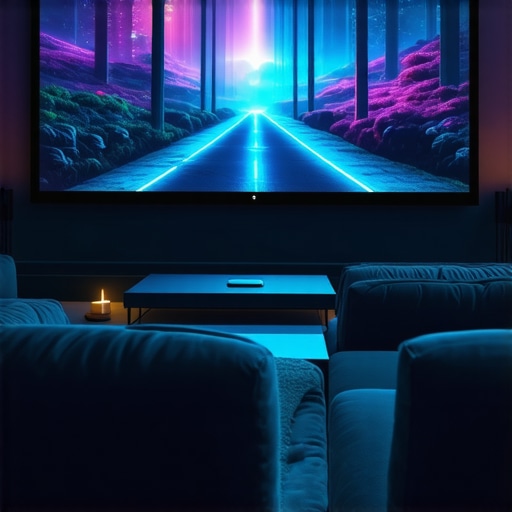
Have you ever sat in your home theater, squinting at the screen, trying to make out the picture in a bright room? I sure have. Early on, I made the mistake of investing in a shiny, high-gloss projection screen that was supposed to wow me with vibrant colors, only to realize that in my sunlit living room, it made everything look washed out and dull. That lightbulb moment drove me down a rabbit hole of research, testing, and ultimately, discovering the magic of Ambient Light Rejection (ALR) screens and high-gain projection surfaces. If you’re frustrated with poor picture quality in bright environments, you’re not alone—and there’s a solution.
Why Bright Rooms Demand Special Screens
Most traditional projection screens struggle under ambient light. It’s like trying to watch a movie through a foggy window—colors fade, contrast drops, and details get lost. The key is to find a screen that can reject or absorb unwanted light while boosting the image’s brightness and clarity. That’s where ALR screens come into play. These screens are designed with special optical coatings and surface geometries that reflect light from the projector directly into your eyes, while diverting or absorbing ambient light from other sources. The result? A sharper, more vivid picture that holds up even during daylight hours or in well-lit rooms.
But choosing the right screen isn’t just about picking the most expensive model. It’s about understanding your space, your projector’s capabilities, and the kind of content you watch. In 2024, the market is flooded with options—some promising, some disappointing. I’ve learned this the hard way, making a few costly mistakes early on. For example, I once bought a high-gain screen that promised bright images, only to realize that it introduced unwanted glare and hotspots because I didn’t account for my room’s specific light conditions. That mistake taught me the importance of tailored advice and proper research. To help you avoid similar pitfalls, I’ve compiled the best strategies and insights, starting with a look at the different types of projection screens and their suitability for bright environments.
Is a High-Gain or ALR Screen Actually Worth the Hype?
One of the biggest fears I hear from fellow home theater enthusiasts is whether investing in an ALR or high-gain screen is really justified. Will it truly improve my viewing experience, or am I just throwing money into a fancy gimmick? Honestly, it depends. In a bright room, a standard screen often struggles to produce vibrant, high-contrast images. High-gain screens, which reflect more light back to the viewer, can provide a noticeable boost in brightness. Meanwhile, ALR screens are engineered specifically to reject ambient light, making them a game-changer for bright spaces. But here’s the catch: not all high-gain or ALR screens are created equal. Some can cause glare or reduce image clarity if not chosen carefully.
Early in my journey, I made the mistake of assuming that all high-gain screens would work equally well. The truth is, understanding the technical nuances—like screen gain levels and surface technology—can make or break your setup. Want to learn more about how these factors influence your viewing quality? Check out this detailed guide on screen gain.
In the following sections, I’ll walk you through the key considerations for selecting the best ALR and high-gain screens for your space, so you can enjoy crisp, bright images no matter how much ambient light there is. Trust me, once you get the hang of it, your home theater experience will never be the same.
Measure Your Space Before Picking a Screen
Start by assessing your room’s ambient light levels and size. I vividly remember after measuring my living room, I realized that my projector’s placement and the amount of sunlight streaming through windows demanded a specialized screen. Use a light meter or simply observe during different times of the day to gauge how much ambient light you’ll contend with. This step is crucial because it guides whether you need a high-gain or an ALR screen, or perhaps a combination of both. For detailed guidance on space assessment, visit this proven strategy guide.
Many home theater enthusiasts operate under misconceptions that can lead to suboptimal choices, especially when it comes to selecting projection screens for bright environments. One of the most pervasive myths is that a high-gain or ALR screen will automatically solve all ambient light issues without considering room-specific nuances. While these screens are powerful tools, their effectiveness hinges on understanding the subtle differences in surface technology and how they interact with your space.
For instance, a common mistake is assuming that higher gain always results in a better, brighter image. In reality, screens with very high gain, such as 3.0 or above, tend to introduce hotspots—bright spots that vary depending on your seating position—causing uneven image quality. This effect becomes more pronounced if the screen isn’t properly installed or if your room’s lighting isn’t carefully managed. It’s a trap that many fall into, thinking that increasing gain is a straightforward path to brighter images, but the trade-offs can significantly impact overall clarity and uniformity.
Another misconception involves the role of ambient light rejection technology. Some believe that ALR screens eliminate ambient light entirely, but in truth, they are designed to *reject* or *absorb* ambient light, not eliminate it completely. They work best when paired with appropriate projector brightness and room light control. Relying solely on an ALR screen without adjusting room lighting or projector settings can lead to dissatisfaction, especially if expectations are set unrealistically.
Why do some advanced users still struggle with image quality despite using high-end screens?
This is where nuance matters. Even the most sophisticated ALR screens have optimal angles and light conditions for peak performance. If you position your projector or seating outside these angles, the benefits diminish. Additionally, choosing the wrong surface texture for your projector’s lens type and throw distance can cause glare or loss of contrast, undermining the intended benefits of ALR technology. For expert insight on optimizing these factors, check out this comprehensive guide.
Furthermore, many assume that once installed, a projection screen’s performance remains static. However, factors such as dirt, reflections from nearby surfaces, or even changes in room layout can degrade image quality over time. Regular cleaning, calibration, and even re-evaluation of screen placement are essential to maintain optimal performance. For advanced installation tips, see this installation guide.
In summary, avoiding these common myths and understanding the nuanced interplay between screen technology, room conditions, and projector setup will elevate your home theater experience. Remember, the goal isn’t just a brighter screen but a balanced, sharp image that performs reliably in your specific environment. Have you ever fallen into this trap? Let me know in the comments!
Keep Your Setup Running Smoothly with These Expert Tips
Once you’ve invested in a high-quality projection screen, the next crucial step is ensuring it remains in top condition over time. Regular maintenance not only preserves image quality but also extends the lifespan of your equipment. In this section, I’ll share the tools and methods I personally rely on to keep my home theater setup performing at its best.
Use the Right Cleaning Tools for Your Screen
Cleaning your projection screen requires gentle, non-abrasive tools to avoid damaging the surface. I recommend using a microfiber cloth—it’s soft, lint-free, and effective at removing dust and fingerprints without scratching. For stubborn stains or smudges, lightly dampen the cloth with distilled water or a specialized screen cleaner designed explicitly for optical surfaces. Avoid harsh chemicals or ammonia-based cleaners, as these can degrade the surface coating over time. Regular cleaning with these tools maintains clarity and prevents dirt buildup that can impair image quality.
Implement Calibration and Adjustment Routines
Over months of use, your projector and screen can drift from their optimal settings due to environmental factors like room temperature, humidity, or even minor shifts in equipment. I personally calibrate my projector using a colorimeter—such as the X-Rite i1Display Pro—to ensure color accuracy and contrast are maintained. Additionally, periodically reviewing the alignment and focus ensures sharp images. For detailed calibration procedures tailored for home theaters, check out this comprehensive guide.
Schedule Regular Checks and Replacements
Even with meticulous care, parts can wear out or degrade. I schedule routine inspections every six months to verify that the screen surface remains clean and free from damage. If you notice any persistent spots, warping, or discoloration, it might be time to consider replacing the screen or parts of your setup. Remember, a well-maintained screen ensures consistent brightness, contrast, and clarity—crucial for a true cinematic experience.
Stay Ahead with Technological Updates
As technology advances, new maintenance tools and techniques emerge. In recent years, automated calibration tools and software updates have simplified the process. I recommend keeping your projector firmware current and exploring advanced calibration software like CalMAN or LightSpace to fine-tune your setup. These tools help optimize image quality and adapt to changing room conditions, ensuring you get the most out of your investment.
Looking toward the future, I believe the trend will move toward smarter, self-calibrating projection systems that monitor and adjust settings automatically. Staying informed about innovations like these can keep your home theater at the cutting edge.
How do I maintain my projection screen over time?
The key is consistency. Regular cleaning with appropriate tools, periodic calibration, routine inspections, and staying updated with technological advancements will keep your setup performing flawlessly. I encourage you to try integrating a professional calibration session into your maintenance routine—it can make a significant difference in image quality and viewer experience.
For more expert insights on maintenance and setup, visit this dedicated resource.
Lessons I Learned from My Projection Screen Journey
- Room Light Matters More Than You Think: I once believed a top-tier projector would solve all ambient light issues, but I realized that without the right screen, even the best projector struggles in bright rooms. Tailoring your screen choice to your space is key.
- High-Gain Isn’t Always Better: I made the mistake of thinking higher gain meant brighter images. Instead, I discovered that too high a gain introduces hotspots and uneven brightness, which ruins immersion. Balance is everything.
- ALR Screens Are Not Magic Solutions: I assumed ALR screens would completely eliminate ambient light problems. The truth? They significantly reduce glare and improve contrast, but require proper room setup and projector calibration to truly shine.
- Proper Maintenance Extends Lifespan: Regular cleaning and calibration kept my projection quality consistent, proving that care and attention matter long-term, not just initial investment.
My Go-To Resources for Projection Perfection
- Understanding Screen Gain: This guide helped me grasp how gain levels influence brightness and uniformity, preventing costly mistakes.
- Expert Tips on ALR Screens: I trust this resource for selecting ALR screens tailored to my room’s specific lighting conditions.
- Fixed Frame Installation Guide: Proper setup is crucial, and this guide made me confident with my projector and screen alignment.
- Image Enhancement Strategies: Regular calibration and cleaning routines keep my image crisp, proving that maintenance is an ongoing process.
Your Turn to Transform Your Home Theater
Choosing the right projection screen for a bright room can truly revolutionize your viewing experience. Whether you opt for an ALR or high-gain screen, understanding your space and maintaining your setup will deliver cinematic quality every time. Don’t settle for washed-out images—take action now and elevate your home theater to professional standards. Have you ever struggled with ambient light ruining your projection? Share your story below and let’s learn together!
One Response
Reading this post really got me thinking about my own home theater setup. I used to rely solely on a standard screen and good projector, but after dealing with too much ambient light this past summer, I finally invested in an ALR screen. The difference was night and day—especially during daytime viewing. I appreciate the emphasis on tailoring the choice to your room’s specific light conditions because it’s easy to assume a high-gain or ALR screen is a one-size-fits-all solution. One challenge I faced was understanding the ideal gain level; I initially went for a 2.8 gain, which created hotspots when I sat closer to the screen. It took some trial and error, but I’ve learned that moderation is key for a balanced, immersive experience. For those new to ALR and high-gain screens, I’d suggest starting with moderate gain levels and closely observing how your room’s lighting evolves at different times of the day. Have others found that combining different types of screens or adjusting room lighting proactively yields the best results? I’d love to hear your experiences.