I remember the moment vividly: I set up my new home theater, excited to finally enjoy cinematic experiences in my own space. As I powered up the projector, the screen flickered and washed out in the bright daylight streaming through the window. Every movie felt dull, lacking the vibrant contrast I craved. That realization hit me hard—my trusty old screen just wasn’t cut out for my environment anymore. It was a lightbulb moment that prompted me to dive deep into the world of projection screens, leading me to discover the game-changing technology of fixed frame and pull-down screens in 2024.
Why Choosing the Right Projection Screen Can Make or Break Your Home Theater
In a time when home entertainment has become a top priority for many, the quality of your projection screen can truly transform your viewing experience. The right screen doesn’t just display images; it enhances brightness, clarity, and color accuracy—especially crucial in rooms with ambient light. My early mistake was sticking with a standard, low-gain screen that looked perfectly fine in a dark room but failed miserably when I wanted to enjoy my favorite movies during the day.
Understanding the latest advancements in screen technology, like high-gain fixed frame screens and innovative ALR (Ambient Light Rejection) solutions, can revolutionize your setup. These options are designed to handle bright rooms and deliver vivid, crisp images without the hassle of controlling ambient lighting. If you’re tired of washing out in the sunlight or struggling to see details on your current screen, it’s worth exploring these breakthroughs. For a detailed overview of upcoming innovations, check out this recent article on ALR screen technology breakthroughs to watch in 2025.
Is Screen Gain Overhyped for Bright Rooms?
I used to think that a higher screen gain was a magic bullet, but I learned the hard way that it’s not a one-size-fits-all solution. Early on, I purchased a high-gain screen expecting brighter images, only to realize that it introduced unwanted glare and hotspots that made viewing uncomfortable. My mistake was not understanding how gain affects viewing angles and image uniformity. If you’re considering a high-gain screen, make sure to evaluate your room’s lighting conditions and viewing angles. More insights about optimizing brightness and clarity can be found here: Understanding Screen Gain.
Having experienced these pitfalls firsthand, I want to guide you through selecting the right screen with confidence. The trick is to balance gain, room lighting, and screen placement to achieve a picture-perfect home theater. Next, we’ll explore how fixed frame and pull-down screens fit into this puzzle, helping you make an informed decision tailored to your space.
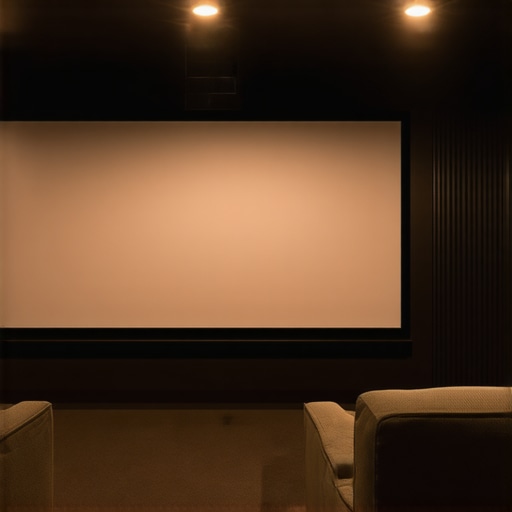
Measure Your Room for Optimal Screen Choice
Start by measuring your available space, including height, width, and ceiling height. Use a tape measure to note these dimensions accurately. For example, in my living room, I had 12 feet of width and 8 feet of height, which dictated the maximum size of my projection screen. Proper measurement prevents selecting a screen that overwhelms or underwhelms your space, ensuring a balanced viewing experience.
Match Screen Type to Your Room Conditions
Decide between fixed frame and pull-down screens based on your room’s lighting and usage patterns. Fixed frame screens are rigid and ideal for dedicated dark rooms, providing a flat surface that resists wrinkles. Pull-down screens are flexible, allowing you to retract them when not in use, and suit multipurpose spaces. I initially chose a pull-down for versatility, but I found that mounting it slightly lower in my room reduced glare and improved image quality.
Choose the Right Screen Gain for Bright Settings
Screen gain determines brightness and viewing angles. For rooms with ambient light, a high-gain screen (above 1.5) can make images pop, but beware hotspots and narrow viewing angles. I experimented with a 2.0 gain screen using a test pattern, and while it brightened the center, the edges looked washed out—similar to holding a flashlight directly in front of your face. To avoid this, consider a screen with a moderate gain (around 1.3) or an ALR screen designed for ambient light rejection. For deeper insights on selecting gain, visit this guide.
Assess the Benefits of Fixed Frame Versus Pull-Down
Review the pros and cons of each type. Fixed frame screens offer superior flatness and image uniformity, ideal for in-room setups with permanent placement. Pull-down screens are more adaptable but may sag or develop wrinkles over time if not quality-made. I installed a fixed frame screen using a step-by-step guide, which helped me achieve a perfectly flat surface that enhanced sharpness and contrast.
Optimize Screen Placement for Clarity
Mount the screen at a height that aligns with your seated eye level to reduce neck strain and minimize keystone effects. Use a stable mounting bracket, ensuring it’s anchored into wall studs. In my setup, I hung the screen slightly below eye level, which created a natural viewing angle and avoided glare from lamps. For detailed mounting techniques, see this comprehensive guide.
Set Up Comfortable Lighting and Acoustics
While not directly related to the screen, controlling room lighting and sound greatly enhances image perception. Use blackout curtains or window film to limit ambient light, especially if utilizing a high-gain screen. Position speakers to complement the viewing area, avoiding reflections that can spill onto the screen. Even with the best screen, poor room environment diminishes quality—so pay attention to these details.
Many home theater enthusiasts believe that selecting a high-gain screen automatically guarantees bright, vivid images in any environment. However, this oversimplification ignores nuanced factors like viewing angles and hotspot issues, which can impair the viewing experience. Contrary to popular belief, higher gain isn’t always better—it can lead to uneven brightness and discomfort if not chosen carefully. For instance, a gain of 2.0 can produce bright centers but may cause glare at edges, especially in rooms with wide seating arrangements. This is why understanding the specifics is crucial; a moderate gain (around 1.3) often strikes a better balance between brightness and uniformity, especially in rooms with ambient light, as detailed in this guide.
Can fixed frame screens truly outperform pull-down options in varied environments?
The misconception is that fixed frame screens are only suitable for dedicated dark rooms. In reality, with advancements in materials and tensioning techniques, high-quality fixed frame screens now offer superior flatness and image uniformity that can benefit even versatile spaces. They resist wrinkles and sagging better than pull-downs, making them ideal for permanent setups. However, many overlook the importance of precise mounting and room conditions; poor installation can negate these advantages. For tailored advice, consult this comparison to determine what fits your specific needs.
Another common myth involves projection screen type and ambient light. Many think that all screens are equally effective in bright environments, but the reality is different. Advanced ALR (Ambient Light Rejection) screens are engineered to mitigate real-world lighting challenges, not just increase gain. These screens use specialized micro-structures to reflect projected light directly back to the viewer, reducing spill and washout. This nuance is often missed, leading users to invest in high-gain options that may cause hotspots rather than solving the problem of ambient light interference. To explore these innovations, see this detailed overview.
A trap to avoid is assuming that bigger is always better when it comes to screen size. Oversizing a projection screen can result in pixelation and loss of image clarity, especially if your projector’s resolution isn’t adequate for the size. The ideal size balances room dimensions, projector capabilities, and viewer distance. Remember, a screen that’s too large can detract from contrast and sharpness, negating the benefits of high-quality projection technology. Check out this resource for best practices on sizing and placement.
Keep Your Home Theater Gear Running Smoothly
Investing in high-quality projection screens and accessories is just the beginning. To ensure your setup continues delivering crisp, vibrant images, regular maintenance and the right tools are essential. Personally, I rely on a few specialized instruments and routines that keep my system operating at peak performance, extending the lifespan of my equipment and preserving image quality over time.
One of the most important tools I use is a microfiber cleaning kit designed specifically for optical surfaces. Regularly wiping the screen with these gentle, lint-free cloths helps prevent dust buildup, scratches, and smudges that can impair image clarity. For more stubborn spots, I employ a 99% isopropyl alcohol solution applied with a microfiber cloth, ensuring a streak-free clean without damaging the surface. As recommended in professional projection maintenance guides, avoiding harsh chemicals and abrasive materials is crucial to maintain the integrity of ALR (Ambient Light Rejection) or fixed frame screens.
Beyond cleaning, monitoring the projector’s lamp lifespan and color calibration is vital. I use calibration software like CalMAN, which connects via USB to my projector and provides precise color adjustments. This software assists in correcting color drift caused by aging lamps, ensuring that whites are truly white and colors remain accurate. For long-term results, I schedule calibration every six months—especially if I frequently display vivid content or in rooms with ambient light influences. The future of calibration technology is heading toward automated, smart calibration systems, which will make maintaining optimal image quality even easier in the coming years.
In terms of physical setup, maintaining the tension of fixed frame screens is important. Over time, slight sagging can occur, especially in larger models, leading to image distortion. I use a tensioning tool kit that allows me to tighten the frame edges subtly, restoring a perfectly flat surface. For pull-down screens, inspecting the roller mechanism periodically ensures smooth operation and prevents uneven retraction or wrinkles. Routine checks using a level tool can help confirm the screen remains evenly mounted and tensioned.
How do I maintain projection screens over time?
Consistent cleaning with microfiber cloths and gentle cleaning solutions prevents dust and smudges. Regular calibration of your projector, utilizing tools like CalMAN, preserves color accuracy and brightness. Inspecting the tension and mounting of fixed frame or pull-down screens periodically ensures a flat, wrinkle-free surface that enhances image sharpness. By staying attentive to these details, you prolong your equipment’s lifespan and keep your home theater experience stunning for years to come. Want to explore advanced calibration techniques? Check out this expert guide for professional tips that can elevate your setup.
For the ultimate in maintenance efficiency, I recommend adopting a routine schedule—perhaps quarterly—that combines cleaning, calibration checks, and physical inspections. As projection technology evolves, expect tools to become more automated, making maintenance less of a chore and more of a seamless aspect of your home theater care. Staying proactive now ensures your setup will adapt smoothly to future innovations like AI-driven calibration or self-cleaning projection surfaces.

Throughout this journey, I realized that investing in the right projection screen isn’t just about equipment—it’s about transforming your entire viewing experience. The real breakthrough came when I understood that the perfect setup requires blending technology with room-specific solutions. I’ve learned that fixed frame screens with high-quality ALR technology, combined with careful placement and maintenance, can make your bright room transform into a cinema paradise. These lessons aren’t just my personal insights but practical strategies that I wish I had known sooner, guiding you to avoid common pitfalls and embrace innovations that truly matter.
One Response