I remember the moment I first set up my home theater and realized I had purchased the wrong type of screen. It was frustrating—bright rooms washed out the image, and I couldn’t figure out how to fix it. That lightbulb moment made me dive into the world of fixed frame and pull-down screens, especially those with specialized screen gain properties. If you’ve faced similar struggles, you’re not alone. Many home theater enthusiasts start with good intentions but end up overwhelmed by technical jargon and conflicting advice.
How to Make Your Screen Work for You, Not Against You
My goal today is to help you understand the key differences in screen technology—particularly fixed frame versus pull-down—and how screen gain impacts your viewing experience. Getting this right can transform your space from a blurry mess to a cinematic haven. But, more importantly, I want to share proven strategies that will save you time and money, steering you away from common pitfalls.
Is Screen Gain Just a Buzzword That Doesn’t Matter?
Early in my journey, I made the mistake of ignoring screen gain altogether, thinking all screens were created equal. Spoiler: they aren’t. Higher gain screens reflect more light, boosting brightness and contrast—especially vital in rooms with ambient light. As noted by experts at Home Cinema Essentials, understanding and optimizing screen gain is a game-changer for your home theater performance.
If you’re curious about the latest advances in screen technology, check out the upcoming ALR screen breakthroughs for 2025.
Now, let’s explore how choosing between fixed frame and pull-down screens impacts your setup and what you should consider before making a purchase. Ready to see your home theater in a whole new light? Let’s dive in.
Measure Your Space Carefully
Before selecting a screen, measure your room’s dimensions accurately; this prevents overwhelming the space and ensures proper sizing. For example, I once measured my living room and realized a 120-inch fixed frame screen would dominate, but a pull-down option offered flexibility for different occasions.
Assess Light Conditions and Select the Right Screen Gain
Determine how much ambient light enters your room. Bright rooms necessitate higher gain screens for clarity, like the high-gain screens for 2025. I experimented with a wall-mounted high-gain screen during the day, which significantly boosted picture brightness but caused some glare if viewed from the side.
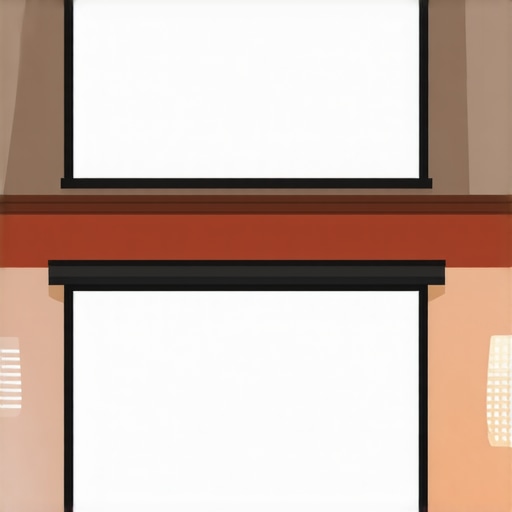
Choose Between Fixed Frame and Pull-Down
Decide based on your needs: fixed frame screens offer a taut, flat surface for high-quality images, best for dedicated theaters. Pull-down screens are versatile and easier to store, suited for multi-use spaces. I struggled initially with pulling down my motorized screen evenly, but following a setup guide helped me perfect the tension.
Optimize Screen Positioning
Mount your screen at eye level for seated viewers, ensuring minimal distortion. Using a level, I aligned my fixed frame precisely on the wall to avoid skewed images, which improved overall viewing quality.
Configure Projector Settings for Best Results
Adjust contrast, brightness, and keystone correction. I found that tweaking the projector’s automatic settings wasn’t enough, so I manually fine-tuned parameters following recommendations in the projection screen types guide.
Test and Tweak for Perfection
Watch test patterns or familiar movies to evaluate image quality. I moved my seating to find the optimal angle and adjusted screen height, which made the picture crisp from every seat. Minor repositioning yielded a noticeable difference in clarity and contrast.
Regular Maintenance and Checks
Clean your screen regularly with a soft, lint-free cloth, and check mounting hardware for stability. Ensuring the screen stays taut and clean preserves image sharpness over time. I learned this the hard way after noticing my screen developing wrinkles, which I fixed following a installation tutorial.
Stay Informed on New Technologies
Keep an eye on innovations like ALR screen breakthroughs and high-gain surfaces that can elevate your setup. Attending webinars and reading updated reviews will help you adapt as new options emerge, ensuring your home theater remains at the cutting edge.
Many home theater enthusiasts hold misconceptions about pull-down screens, screen gain, ALR (Ambient Light Rejection) screens, and fixed frame setups. Let’s dig deeper into some of these and clarify what most people get wrong, ensuring you make informed decisions for your setup. First, a widespread myth is that higher screen gain always means better picture brightness, but in reality, excessive gain can cause glare and viewing angle issues, especially if misapplied; experts at Home Cinema Essentials explain how balanced gain levels optimize image quality without sacrificing viewer comfort. Moreover, many assume that ALR screens are only suitable for bright rooms, when in fact, the latest ALR advancements for 2024 now provide stellar performance even in controlled lighting conditions. Now, a common mistake is choosing a fixed frame screen without considering room-specific factors. Fixed frames are excellent for dedicated theaters, but in multipurpose spaces, pull-down or motorized screens offer flexibility—something you’ll want to evaluate carefully, as outlined in this comparison guide. A crucial nuance often overlooked is the impact of screen surface material and texture on image clarity. Many users focus solely on gain and ignore whether the surface is matte, high contrast, or optical, which can dramatically influence viewing experience. For example, choosing a surface designed for high contrast can prevent washout in rooms with ambient light, a technique supported by research from proven strategies for better projection. Lastly, it’s vital to avoid the trap of neglecting proper positioning and tensioning of pull-down screens, which can cause image distortions and reduce clarity—a point emphasized in installation guides. Missteps here are common among DIYers and can undermine even the best screen technology. Therefore, asking advanced questions like: ‘How does the angle of projection interact with a screen’s gain and texture?’ reveals the importance of holistic planning in your setup. Properly addressing this ensures your decor choices complement your projection technology, maximizing image sharpness and contrast. Remember, staying informed about innovations—including upcoming ALR breakthroughs for 2025—guarantees your home theater remains at the forefront of quality. Have you ever fallen into this trap? Let me know in the comments.
Keeping your projection screen functioning optimally over time requires more than just initial setup; it involves the right tools, regular maintenance, and an understanding of future trends in screen technology. As a home theater enthusiast committed to delivering the best viewing experience, I rely on specific equipment and methods that ensure my setup remains pristine and performs at its peak.
Invest in Quality Cleaning Supplies
Regular cleaning is vital for maintaining clarity and preventing dust accumulation, which can dull image sharpness. I personally use a microfiber cloth combined with a gentle LCD/TV screen cleaner—specifically formulated to avoid streaks and damage. Avoid harsh chemicals or abrasive materials, as they can scratch or degrade the surface, especially if you have a high-gain or ALR screen. Consistent, careful cleaning extends the lifespan of your screen and sustains image quality.
Use Proper Tensioning and Mounting Tools
For pull-down screens, precise tensioning tools like a tension gauge help ensure the surface remains perfectly flat, preventing wave-like distortions. During installation, I used a laser level and a torque screwdriver to secure brackets firmly, reducing the risk of sagging over time. Regular checks using a level or tension gauge can help you identify and correct slackness before it translates into image distortion or wrinkles.
Calibration Software for Long-Term Performance
Consistent image calibration is key. I recommend software like CalMAN or LightSpace for professional-level calibration, which I run bi-annually. These tools help fine-tune projector and screen settings, ensuring color accuracy and contrast remain optimal despite environmental changes. Investing in calibration devices like the SpyderX colorimeter adds value, providing ongoing calibration guidance at home.
Embrace Smart Upgrades as Tech Evolves
Projection technology is advancing rapidly, particularly with upcoming ALR and high-gain surfaces for 2025. I predict that integrating motorized or smart-controlled screens will become more accessible, allowing seamless adjustment based on lighting conditions or content types. Planning for future upgrades now, such as modular components or scalable systems, ensures your setup can evolve without costly replacements.
How do I maintain my projection setup over time?
Regularly inspect and clean your screen with microfiber cloths and suitable cleaners, calibrate your projector and screen settings with professional software, and use precise tensioning tools for pull-down surfaces. Keeping hardware securely mounted and staying informed about new technological advancements, like upcoming ALR innovations, will help preserve image quality for years to come. I encourage you to try integrating a calibration software like LightSpace into your routine—it’s a game-changer for maintaining perfect picture consistency, especially as ambient conditions shift around your space.
What I Wish I Knew When I Started Investing in Home Theater Screens
The biggest lesson I learned was the importance of patience and thorough research before choosing a screen. Initially, I focused solely on screen size and ignored gain and surface texture, which led to frustrating viewing experiences, especially during daytime. Realizing that each component—gain, surface material, tension, and room lighting—interacts to influence picture quality was a game-changer. Taking the time to understand these nuances saved me from costly mistakes and vastly improved my setup.
Another insight was that the perfect screen isn’t necessarily the most expensive but the one correctly tailored to your room’s unique lighting and viewing angles. I underestimated how ambient light rejection (ALR) technology could transform your experience, even in rooms with many windows. Choosing a screen with the right surface and gain for your environment makes a more profound difference than just going for the latest or biggest model.
Finally, I discovered that maintenance and calibration are ongoing processes. Regular cleaning with soft, lint-free cloths and software calibration can keep your picture crisp and colors true, making your investment last years longer. The combination of these lessons shaped my journey from a novice to a confident home theater enthusiast.
My Essential Toolbox for Elevating Your Projection Experience
For building a top-tier home theater setup, I rely on a few trusted tools and sources. First, professional calibration software like proven strategies for enhancing image quality helps me fine-tune my projector and screen to perfection. I also use a quality microfiber cloth paired with gentle cleaners recommended for high-gain surfaces to keep my screen spotless without damage.
When it comes to selecting the right screen, I consult resources like expert insights on ALR screens and stay updated with upcoming innovations on ALR breakthroughs for 2025. These sources keep me informed about the latest improvements, ensuring my setup remains state-of-the-art.
Additionally, I use a laser level and tensioning gauges during installation to ensure perfect flatness and tension, which are crucial for optimal image clarity. Investing in these tools signifies my commitment to quality and longevity of my home theater investments.
Lighting the Path Toward Your Home Theater Goals
Embarking on your home theater journey can be exhilarating yet daunting. The key is to remain adaptable and curious—embrace new technologies like high-gain and ALR screens as they evolve. Regularly reading trusted resources and connecting with experienced enthusiasts can accelerate your learning curve. Remember, the ultimate goal is creating a space where you can immerse yourself fully in your favorite content, free from distractions and technical frustrations.
Are you ready to take your home theater to the next level? What challenges or successes have you experienced on your journey? Share your story below and let’s grow together in our pursuit of cinematic excellence.
4 Responses