I remember the first time I set up my home theater in a room that was anything but ideal—bright windows, ambient light bouncing everywhere, and a screen that seemed to wash out at the slightest glare. It was frustrating, and honestly, I almost gave up on creating the perfect viewing experience. That’s when I stumbled upon the concept of 0.5 gain ALR screens. The moment I installed one, everything changed. Colors popped, contrast improved, and I could finally enjoy my movies without groaning at the washed-out picture. It was a lightbulb moment that I want to share with you.
The Hidden Power of Screen Gain in Bright Rooms
Living with a bright room can feel like a curse when it comes to home theater setups. You might think that the brighter the projector, the better, but that’s only part of the story. The actual magic lies in how your screen reflects light. My early mistake was underestimating the importance of screen gain. I naively believed that a high gain would always boost brightness, but that’s not quite right. High gain screens, especially in bright environments, can cause hotspots and uneven images. That’s where 0.5 gain ALR screens come into play—they help balance brightness and contrast, making your room’s ambient light work for you instead of against you.
Is the Hype About 0.5 Gain ALR Screens Realistically Worth It?
In my early days, I made the mistake of thinking that the latest tech buzz would automatically improve my viewing experience. I dove into high gain screens without considering whether they suited my space, leading to harsh reflections and glare. This taught me that understanding the nuances of screen gain is vital. According to expert strategies, selecting a screen with the right gain for your environment ensures consistent quality and prevents visual burnout. So, if you’re tired of fighting glare or watching your vivid HDR content turn dull in bright rooms, the solution might be much closer than you think.
Interested in diving deeper? Next, we’ll explore specific strategies and product recommendations that can help you transform your space into a cinematic haven, even with the brightest rooms. But first, ask yourself: have you faced issues with washed-out images during daytime viewing or in rooms with lots of ambient light? If so, you’re not alone—and there’s a clear path to solving this problem once and for all.
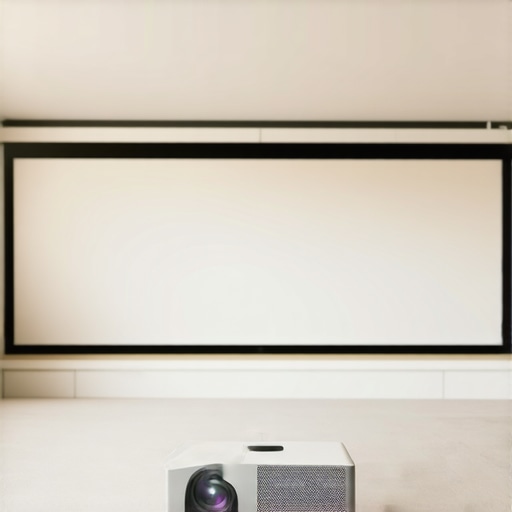
Pick the Right Screen Size and Placement
Start by measuring your room’s dimensions and deciding on a screen size that fits comfortably without overwhelming the space. Mount your fixed frame or pull-down screen at the optimal height — typically so the bottom edge is a few inches above your seated eye level for the best viewing angle. Use a level during installation to prevent tilt, which can cause distortions. I remember struggling with a pull-down screen that was slightly crooked; a simple level and re-tensioning fixed it immediately.
Select the Correct Projection Surface and Material
Choose a fabric designed specifically for ALR applications with a gain around 0.5, ensuring it reflects ambient light evenly without hotspots. For bright rooms, a matte, velvet-like texture minimizes glare. I once tried a shiny high-gain surface in my living room — the reflections were unbearable during daylight. Switching to a matte ALR fabric made the picture crisp and glare-free, proving the importance of fabric choice. For more understanding, check this guide on screen gain fundamentals.
Install and Tension Your Screen Properly
For fixed frames, ensure the fabric is stretched tight and evenly around the frame, avoiding sagging that causes waves or wrinkles — these become distracting during movies. When installing pull-down screens, follow the manufacturer’s tensioning instructions precisely, or consider tensioning kits if available. I once installed a pull-down screen without fully tightening the spring; it developed waves within days. A quick adjustment with a tensioning tool restored a flat surface. Proper tension prevents edge curl and maintains a smooth projection surface.
Optimize Ambient Lighting and Placement
Since your room has ambient light that affects the image, control glare with window coverings or strategic room layout. Position your projector to minimize direct reflections. Use blackout curtains if possible, especially during daytime viewing. I moved furniture to block sunlight from hitting the screen, which helped me get the most out of my 0.5 gain ALR surface. This step is essential because even the best screen can’t compensate for uncontrolled environmental light. To refine your setup further, explore tips in this comprehensive setup guide.
Calibrate Your Projector for Bright Rooms
Adjust your projector’s brightness, contrast, and color settings to complement your screen’s gain and fabric. For bright environments, increase the projector’s brightness or lumens output to match your 0.5 gain surface, preventing images from appearing dull. I recall lowering the contrast unintentionally, which washed out details; after recalibration, the picture regained depth. Use a calibration disc or software to fine-tune settings for peak performance in your specific lighting conditions. This ensures your projector and screen work together harmoniously for vibrant, clear images. For advanced calibration techniques, consider consulting resources like expert calibration strategies.
Maintain Your Screen for Long-Term Clarity
Regularly clean your fabric surface with a soft, dry cloth or a vacuum brush to remove dust and debris that can diminish image quality. Avoid harsh chemicals or abrasive materials that may damage or discolor the fabric. Check tension periodically and re-tension if you notice waves forming. I once neglected this, and dust accumulation caused some loss in contrast; after a thorough cleaning, the image crisped up noticeably. Proper maintenance preserves your investment and keeps the views stunning over time. For more maintenance tips, see this installation guide.Many enthusiasts believe that a high gain screen is always better for bright rooms, but that isn’t necessarily true. A widespread myth is that increasing screen gain linearly boosts brightness without drawbacks. In reality, higher gain surfaces—like 1.5 or above—tend to cause hotspots and uneven image distribution, which can severely diminish perceived contrast. This is especially problematic when paired with pull-down screens that aren’t properly tensioned, leading to wave-like distortions that compromise image clarity.
Why do some high gain screens cause more glare than low gain options?
The answer lies in the way these surfaces reflect light. High gain screens reflect more light directly back to the viewer, intensifying glare and hotspots, while low gain or 0.5 gain ALR screens diffuse light evenly, providing a smoother viewing experience even in high ambient light conditions. Experts suggest that selecting a screen with a gain around 0.5 strikes a better balance, optimizing contrast without sacrificing brightness, particularly for daylight viewing. For a deeper dive into how screen gain impacts image quality, check this article on screen gain fundamentals. Many overlook one critical aspect: the alignment and tensioning of their screens. Improper installation can introduce waves or wrinkles that distort the image, which becomes noticeable especially with larger, fixed frame screens. Ensuring precise tension during setup can prevent this ‘oops’ factor, resulting in sharper and more uniform pictures. Another nuance often missed involves the choice between fixed frame and pull-down screens. Fixed frames, when tensioned correctly, provide superior flatness, but are less adaptable to room constraints. Conversely, pull-down screens can be more flexible but are prone to edge curl and sagging if tension isn’t carefully maintained—an advanced mistake that can wreck your viewing quality. If you want to avoid these pitfalls, consulting detailed setup guides like this installation guide can save you headaches. Have you ever fallen into this trap? Let me know in the comments. Remember, mastering projection setup involves understanding these nuanced details—more than just choosing a screen size or projector. For further insights into optimizing your home theater, explore our comprehensive resources on image quality strategies and professional setup blueprints.
Maintaining your projection screen’s performance over time requires more than just initial setup; it involves using the right tools, implementing consistent routines, and understanding the technology behind your display surface. Personally, I swear by a combination of specialized cleaning equipment and calibration software that ensures my screen remains pristine and correctly tuned for optimal contrast and brightness. Investing in a microfiber cleaning cloth designed for delicate fabrics, like the Zeiss Pre-Moistened Lens Cleaning Wipes, allows me to gently remove dust and fingerprints without damaging the surface.
Keep Your Screen in Top Shape with Precision Tools
Regular cleaning is crucial, but I also rely on a digital calibration software like CalMAN or DELL’s Color Calibration Tool. These programs help me fine-tune my projector’s output to match my ALR surface’s gain characteristics perfectly. For fixed frame screens, maintaining tension prevents wrinkles and wave formations; a tensioning kit with adjustable straps is invaluable here. I also use a laser level during installation and re-adjustment stages to ensure the screen remains perfectly flat and aligned, which is essential for images to stay sharp and uniform.
The Future of Screen Maintenance and Scalability
Looking ahead, I predict that more advanced automated calibration systems, integrated directly into projectors or app-controlled, will make long-term maintenance even easier. Voice-controlled or AI-driven calibration could become standard, automatically adjusting settings based on ambient light and usage patterns. Such innovations will empower even casual users to keep their screens at peak performance with minimal effort.
How do I keep my projection setup working seamlessly over the years?
Regularly inspect your tensioning and cleaning routines, and stay informed about the latest advancements in ALR and screen coating technologies. Consistent calibration plays a vital role in preventing image degradation; for instance, using tools like expert strategies ensures your picture remains vibrant and contrast-rich. Don’t forget to periodically check for signs of wear or sagging, especially in pull-down models, and address issues promptly with recommended fixes like tension adjustments or fabric re-tensioning. Remember, a little proactive effort today extends your screen’s clarity and lifespan for years of enjoyment.
Lessons the Bright Room Taught Me Personally
- My biggest mistake was neglecting the importance of proper tensioning; even a slight wave can ruin a crisp image in bright environments. Now, I always double-check my tensioning tools and methods to ensure flatness and clarity.
- I underestimated ambient light’s impact for years, until I installed blackout curtains and realized how much control over room lighting elevates projection quality—ambient light isn’t the enemy; it’s the obstacle we can overcome.
- Choosing the right screen fabric was a game-changer. Switching from a shiny high-gain surface to a matte, 0.5 gain ALR fabric resulted in vibrant colors and improved contrast, even during daytime movies.
- Calibrating my projector with specialized software made all the difference. Matching my projector’s output to my screen’s characteristics revealed hidden details and enhanced overall visual performance.
My Top Tools for Perfect Projection Adventures
- Expert calibration strategies: They provide step-by-step guidance, ensuring your projector and screen work harmoniously, especially in bright rooms.
- Installation guides: Precise setup and tensioning are crucial; these resources prevented me from costly mistakes during my initial install.
- Understanding screen gain fundamentals: A deep dive into how different gains reflect ambient light, helping me choose surfaces that complement my environment.
- Setup blueprints: They condensed complex processes into simple steps, saving time and frustration, especially when adapting to bright room challenges.
Step Up Your Game and Embrace the Bright Room Challenge
Transforming your projection experience in bright environments isn’t just a technical upgrade—it’s a mindset shift. With the right tools, proper room control, and understanding of screen gain, you can create a cinematic haven that defies the glare and ambient light obstacles. So, I challenge you today: start experimenting with a 0.5 gain ALR screen, refine your calibration, and watch your movies come alive in ways you never thought possible. Remember, every great film fan was once a beginner, and your perfect home theater adventure is just a few thoughtful steps away.
What has been your biggest obstacle in optimizing your bright room projection setup? Share your story below—I’d love to hear and help you troubleshoot!
,
No Responses