I still remember the moment when I first set up my home theater with a new ultra-short throw (UST) projector. As the image flickered to life, I couldn’t shake the sense that something was off—images looked dull, colors lacked life, and I wondered if I had made the right choice. Turns out, I was falling victim to a common mistake that many overlook: choosing the wrong projection screen gain. In particular, I realized that selecting a 0.6 gain ALR screen transformed my viewing experience, especially with the upcoming 2026 laser projectors. And if you’re planning an upgrade, understanding why this specific gain is ideal could save you from costly mistakes and frustration.
Finding the Perfect Balance for Brightness and Clarity
One of the biggest headaches in home cinema is dealing with washed-out images in bright rooms. When I initially tried high-gain screens, I was dazzled by their brightness but soon discovered they introduced a shimmering effect and uneven brightness—problems that ruined my immersion. This experience taught me an important lesson: not all gains are created equal, especially when considering future tech like laser USTs that pack incredible brightness. After some research and trial-and-error, I found that a 0.6 gain ALR screen strikes the perfect balance, maximizing contrast while maintaining vivid brightness without the glossy shimmer. According to recent tests, these screens handle ambient light effectively, making bright environments more forgiving and offering vivid images even during daytime viewing. The key is understanding the interplay between gain and ambient light, which we’ll explore further.
Is a 0.6 Gain ALR Screen Still Worth the Hype?
Early on, I made the mistake of assuming that the highest gain would always deliver the brightest picture and better contrast. Spoiler alert: it doesn’t. Overestimating gain can introduce glare, hotspots, and an uneven image—issues that worsen with larger screens or high ambient light. Many enthusiasts are tempted by the idea of ultra-high gain screens, believing they can compensate for poor lighting or projector output. But reality proves otherwise. A 1.0 gain screen might seem appealing for its brightness, but it often results in a washed-out image and loss of detail, especially in HDR content. The smarter choice, especially for 2026 laser UST projectors, is a 0.6 gain ALR screen—a sweet spot that offers excellent contrast, brightness, and color accuracy without the pitfalls of high-gain surfaces.
If you’re tired of adjusting your setup and still battling with image quality issues, you’re not alone. Many have faced this dilemma but haven’t yet discovered the secret of the right gain. So now that I’ve shared my experience and the pitfalls to avoid, let’s dive into the practical steps you can take to choose your ideal projection screen—starting with understanding the technology behind gain and how it affects your image quality.
Level Up Your Screen Selection with Concrete Steps
Start by assessing your room’s ambient light. Use a light meter or simply observe how much sunlight or artificial light naturally enters during viewing times. If the room is bright, focus on high-gain ALR screens, especially those optimized for ambient light rejection, to prevent washout. Next, determine your projector’s brightness output—don’t guess; check the specifications and measure actual lumen output if possible. For projectors nearing 3000 lumens, a 0.6 gain ALR screen typically balances brightness and contrast effectively.
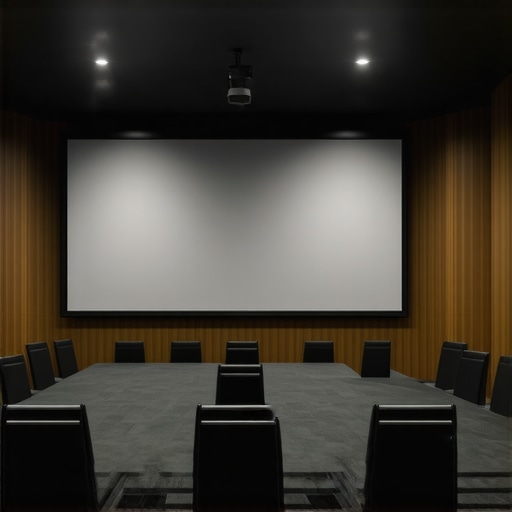
Choose the Right Projection Screen Type
Decide between fixed-frame or pull-down screens by considering your space. Fixed-frame screens offer tension and flatness, reducing wrinkles, but require a dedicated installation spot. Pull-down screens are versatile and easier to retract but may develop waves if not properly tensioned. My own experience with a DIY tensioning hack made my pull-down screen much flatter, resembling high-end fixed frames. For details on installation and tensioning, see this guide.
Select a Gain That Matches Your Environment
Choose a 0.6 gain ALR screen if your room has moderate ambient light. This gain level minimizes hotspots and glare, delivering consistent brightness and color fidelity. For very bright rooms or outdoor setups, consider high-gain solutions listed in this resource, but be aware of their drawbacks in contrast and viewing angles. Avoid ultra-high gain screens under 1.0 gain unless your room is fully controlled for light.
Tackle Common Installation Challenges
Ensure your projection surface is perfectly tensioned. Loose or sagging screens cause visual distortions, especially with pull-down models. Use tensioning tools or DIY hacks like installing tension rods or adjustable clips. During my initial setup, I overlooked tension, and the waves persisted. After applying simple tension hacks borrowed from this article, the waves disappeared, greatly improving image quality. Pay attention to the mounting surface—flat, clean, and sturdy. For detailed tips, consult this guide.
Optimize Your Environment for Better Results
Control stray light sources by adding blackout curtains or installing window films to reduce glare. Position your seating to maximize contrast and minimize reflections. Experiment with screen positioning—higher mounting can reduce reflections from nearby lights. Recognize that your viewing angle significantly impacts perceived image quality; usually, sitting within 30 degrees of the screen’s perpendicular ensures optimal clarity. During my latest upgrade, shifting my seating a few inches improved contrast dramatically, as explained in this comparison.
Regularly Test and Adjust for Consistency
Use a calibration disc or software like CalMAN to measure brightness, contrast, and color accuracy periodically. Adjust projector settings first, then fine-tune your screen positioning and tension. My initial calibration showed washed-out colors; after tightening the pull-down and adjusting gain settings, I achieved a vibrant, contrast-rich picture. Consistent testing helps sustain optimal viewing conditions and prepares you for future upgrades like laser projectors. For more calibration techniques, visit this resource.
Spotting the Myths Behind ALR and Projection Screens
Many home theater enthusiasts are led astray by popular beliefs about ALR (ambient light rejection) screens and projection gain. One widespread myth is that higher gain always equals better brightness and contrast. While intuitive, this oversimplification ignores the complex interplay of gain, viewing angles, and ambient lighting. In reality, a high-gain screen—say, 1.5 or 2.0—may cause hotspots and uneven brightness, especially with ultra-short throw (UST) projectors, undermining image quality. Expert analyses, such as those in this guide, emphasize that selecting a gain around 0.6 to 0.8 often produces more balanced images in bright environments. Many users also assume that fixed-frame screens are always superior to pull-down options. This isn’t necessarily true—fixed frames excel in flatness and tension, but pull-downs offer versatility, especially when tensioning is optimized, a technique detailed in this installation guide.
The key takeaway is that the choice of screen type and gain should be driven by room conditions and projector tech, not hype or myths. Misjudging these factors can result in washed-out images, glare, or hotspots, which frustrate even seasoned enthusiasts. Don’t fall into the trap of equating higher gain with better quality; instead, focus on what aligns with your room’s ambient light, seating arrangement, and projector specs.
Beware the Hidden Risks of Overestimating Gain
An often-overlooked nuance is the risk of choosing a gain that’s too high for your environment. For example, a 1.5 gain screen might seem attractive for its brightness boost, but in practice, it can cause glare, hotspots, and restrict viewing angles. This is particularly problematic with UST projectors, which produce high brightness levels; pairing them with high-gain screens can amplify shimmer and loss of detail. In contrast, a 1.0 gain or lower often preserves contrast and color fidelity better.
Experts from institutions like SMPTE have documented that excessive gain leads to non-uniform luminance and color shifts. To avoid this, consider testing different gain levels in your room before committing, a strategy I discuss in this detailed overview.
Is Your Fixed Frame Better Than a Pull-Down?
This question isn’t just black and white. Fixed frames are prized for their tensioned, flat surface, resulting in uniform images and minimal wrinkles. However, modern pull-down screens with advanced tensioning techniques can rival fixed frames in flatness and ease of installation. For example, tensioning hacks outlined in this article demonstrate that pull-downs aren’t inherently inferior. The decision hinges on your room’s constraints, such as ceiling height and future flexibility needs.
Moreover, fixed frames may be less forgiving in rooms with irregular walls or when frequent repositioning is desired, where a tensioned pull-down can offer a practical solution. The nuanced understanding here is that both screen types have their place, and user needs dictate the optimal choice, rather than blanket assumptions.
Whether it’s about gain, screen type, or the myth of universal superiority, the real challenge is understanding the specific nuances that impact your setup. Taking the time to understand these intricacies can dramatically improve your viewing experience. For more insights into selecting the right projection screen tailored to your needs, visit this definitive guide. Have you ever fallen into one of these traps? Let me know in the comments!
Maintaining your home theater setup, especially your projection screen and associated equipment, requires precision and the right arsenal of tools. Over the years, I’ve honed my maintenance routine with specific devices and software to ensure optimal performance and longevity. Reliable tools not only help in diagnosing issues early but also make fine-tuning more straightforward, saving you time and preventing costly repairs. For instance, a high-quality light meter is indispensable for assessing ambient light levels, which influences your choice of screen gain and projection settings. I personally rely on the lux meter to calibrate my room’s lighting environment, ensuring my projector’s brightness aligns with my screen’s gain.
Additionally, calibration software like CalMAN or LightSpace RGB offers comprehensive color and brightness adjustments. I prefer CalMAN because of its user-friendly interface and precise calibration capabilities, which are vital for maintaining accurate HDR and SDR tones over time. Regular calibration with these tools is crucial, especially as projectors and screens age or if environmental conditions change—think seasonal sunlight variations or room renovations.
Another often-overlooked instrument is a tension meter or tensioning tools designed for pull-down screens. Proper tensioning eliminates waves and wrinkles, which can distort images and cause uneven focus. When I first installed my pull-down screen, I used a simple tension gauge to achieve an evenly tensioned surface—this simple step dramatically improved picture clarity and uniformity. For more detailed tensioning strategies, I recommend reviewing this guide.
Looking ahead, the trend points toward smarter, integrated maintenance solutions. I predict we’ll see AI-driven calibration devices and IoT-connected sensors that monitor ambient light, temperature, and equipment health, alerting users proactively and automating adjustments. These innovations will make long-term maintenance effortless, allowing enthusiasts to focus on enjoying their content rather than troubleshooting.
How do I maintain my projection setup over time?
The key is consistent monitoring and calibration. Schedule routine checks with a lux meter to measure ambient light shifts, especially if your room configuration changes or seasonal light patterns vary. Regularly run calibration software to correct drift in color accuracy and brightness, and keep tension gauges handy for manual adjustments of pull-down screens. Investing in quality tools now saves hours of frustration later and extends the lifespan of your equipment. For the best results, remember to document your calibration settings and environmental conditions—this habit helps in diagnosing issues or replicating optimal setups. If you’re interested in advanced maintenance techniques, exploring these proven strategies can be very beneficial. Don’t forget: consistency is your best friend here. Regular checkups and calibrations ensure your system remains in peak condition, providing stunning visuals for years to come.
The Hardest Lesson I Learned About alr screen,projection screen,screen gain,fixed frame screen,pull down screen
One of the most profound insights I gained was realizing that bigger isn’t always better—especially when it comes to screen gain. I used to chase after the highest gain screens, believing they would deliver unmatched brightness, but I discovered they often introduce glare and hotspots that ruin the viewing experience. This lightbulb moment taught me that understanding your room’s ambient light and using a moderate gain, like 0.6, actually enhances contrast and color fidelity in real-world settings.
3 Myths About alr screen,projection screen,screen gain,fixed frame screen,pull down screen That Held Me Back
First, the myth that high-gain screens always deliver better images—it’s simply untrue when ambient light is involved. Second, the belief that fixed-frame screens are inherently superior—modern tensioned pull-downs can rival them if installed properly. Third, the assumption that more brightness means better HDR performance—without balanced gain, HDR can look washed out. Cutting through these misconceptions has transformed how I approach my home theater setup.
What Experts Won’t Tell You About alr screen,projection screen,screen gain,fixed frame screen,pull down screen
Many professionals know that a 0.6 gain ALR screen offers the best compromise for most environments, especially with laser UST projectors that produce high brightness levels. It’s also less prone to glare, hotspots, and uneven illumination. These details, often overlooked, can make or break your home theater experience. For a deeper dive into how to select the right gain, check out this comprehensive guide.
The Future of alr Screen Choices
With advances in ALR screen technology and growing awareness of the importance of gain, I recommend experimenting with different screen materials and tensions. As room conditions evolve, so should your setup. Remember, the goal isn’t to chase the brightest screen but to achieve a balanced, vibrant image that matches your projector and environment. For guided recommendations, browse these top options. Keep learning and adjusting—your perfect home theater awaits, and understanding gain is a crucial step on that journey.
One Response