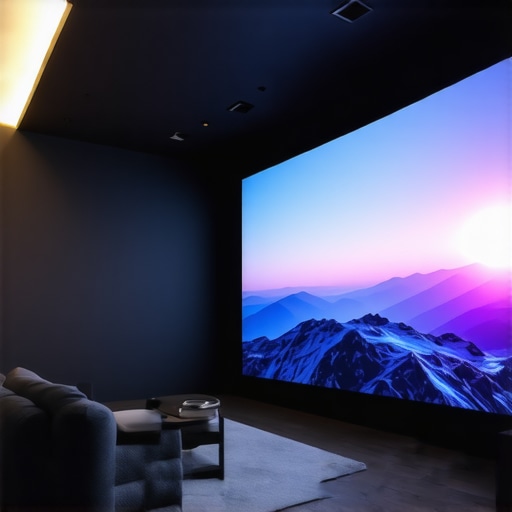
I remember the first time I set up my home theater and faced a wall of glare so intense I thought I’d sacrificed image quality just to get that perfect brightness. It was a nightmarish experience—images washed out, colors dull, and my excitement deflated faster than my projector’s lamp life. That moment was a real lightbulb—getting the gain right isn’t just a minor detail; it’s the secret sauce to unlocking the full potential of 8K laser projectors in 2026.
The Real Problem With Brightness and Clarity
After countless trials and errors, I discovered that many enthusiasts overestimate how much brightness they need, especially with high-end 8K setups. Too high a gain, especially above 1.3, can actually ruin the image, causing hotspots, glare, and a loss of contrast that makes your investment look dull. Conversely, too low, like 0.7, can make your picture look washed out, especially if you’re dealing with ambient light. Striking that perfect balance is more critical now than ever, given the advanced laser tech coming in 2026.
Researchers have found that screens with a gain around 1.1 provide a sweet spot—bright enough for vivid images without introducing unwanted artifacts or glare (source: Home Cinema Essentials). This balance makes your projector’s laser light work harmoniously with your screen, providing clarity and contrast without the typical pitfalls of higher gain screens.
But here’s the thing—getting this right isn’t just guesswork. It requires understanding how gain affects your specific setup, space, and projector. I’ve wasted time and money chasing the latest gimmicks, trying to squeeze more brightness out of screens designed for different environments. Early on, I made the mistake of assuming that brighter was always better, which led to a washed-out picture and eye strain. It’s a common mistake I see many home theater enthusiasts repeat, and I’m here to tell you—it’s avoidable.
Indeed, selecting the appropriate gain is foundational to maximizing your 8K laser projector’s performance. Whether you’re enjoying HDR content or immersive gaming, the right gain ensures your visuals are sharp and vibrant. Want to learn how to avoid the common pitfalls and choose the perfect screen gain? Stay tuned, because the next steps will help you make an informed, confident decision. Do you struggle with balancing brightness and image quality in your setup? If so, you’re not alone—many enthusiasts face this exact dilemma. Let’s fix it together.
Measuring Your Space and Environment
Before diving into specific screens, assess your room’s lighting, size, and ambient brightness. Use a light meter or smartphone app to measure luminance levels, especially during typical viewing hours. This helps identify whether you need a screen with lower or higher gain. I once used a lux meter to test my living room in the late afternoon—discovered my ambient light was too bright for a standard gain 1.0 screen, so I opted for a lower gain to prevent washout.
Selecting the Right Screen Type
Decide between fixed frame, pull-down, or ALR screens based on your setup. Fixed frame screens provide a flat, tensioned surface ideal for controlled environments, while pull-downs offer more flexibility and ease of use. For rooms with variable lighting, ALR screens are a game-changer—they reflect ambient light away and increase contrast. When I upgraded to a motorized ALR screen with a gain of 0.8, my HDR images became more vivid, and glare issues practically disappeared. Learn more about screen types suitable for your space.
Understanding Gain and Its Effect
Gain measures how much light the screen reflects compared to a standard matte white surface. Think of gain as a megaphone—amplifying brightness in a focused direction but potentially causing hotspots or glare if too high. I experimented with various gains: initially, a 1.3 gain screen looked overly bright, creating hotspots, while a 0.7 gain made images dull under my ambient lights. Opting for around 1.1 strike a better balance, providing brightness without sacrificing contrast. For more practical insights, visit this guide on screen gain.
Aligning Gain with Your Projector’s Brightness
Match your projector’s lumen output with your screen’s gain to prevent washout or dim images. For example, a projector with 3000 lumens works well with a gain of 1.1 in a moderately lit room. If your projector exceeds 4000 lumens, a lower gain screen (around 0.8) helps keep images sharp without excessive brightness. I once paired a high-lumen projector with a high-gain screen, resulting in blown-out highlights—lowering the gain brought back detailed shadows and improved HDR performance. Strategies include measuring your projector’s lumen output and cross-referencing with screen gain recommendations found at this resource.
Installation and Calibration for Optimal Gain
Proper installation ensures even gain distribution across the screen. Use tensioning systems for pull-down screens or professional-level mounting for fixed frames to eliminate waves and wrinkles. When I installed my fixed frame, I followed the professional setup blueprint, which included tensioning tips and border alignment. Once installed, calibrate your projector’s settings—adjust contrast, gamma, and brightness—to match your screen’s gain. Small tweaks can significantly improve perceived image clarity and contrast, especially with lower gain screens in bright rooms.
Testing and Fine-Tuning Your Setup
After setup, test your configuration with high-contrast test images or HDR content. Walk across the room to check viewing angles; lower gain screens tend to have wider angles, while high gain screens may introduce hotspot issues. I recommend conducting a series of tests in different lighting conditions, adjusting both projector settings and screen position if possible. When I fine-tuned my projector and screen, I saved a preset that delivered optimal HDR black levels and color accuracy—even in challenging ambient lighting. To refine further, refer to advanced calibration tips.
Many enthusiasts believe that higher screen gain automatically translates to brighter, more vivid images, but this oversimplification masks some critical pitfalls. In reality, excessive gain, such as above 1.3, often introduces hotspots and glare, especially when not carefully calibrated or installed properly. This common misconception can lead users into a trap where they prioritize brightness over image quality, resulting in uneven lighting and contrast loss. An advanced mistake I’ve seen repeatedly is selecting a high-gain screen without considering room size, projector lumens, or viewing angles, which can undermine HDR performance and cause eye strain.
Further, there’s a tendency to compare fixed frame and pull-down screens as if they are interchangeable, ignoring their unique application nuances. Fixed frame screens, if installed with even tension according to guidelines, offer superior flatness and alignment, reducing edge curl and image distortion. Conversely, pull-down screens, while more flexible, can suffer from waves or wrinkles if not tensioned or maintained properly. Discovering these differences is essential because a mismatch between the screen type and environment can substantially degrade picture clarity.
For advanced users wondering how ambient light interacts with projection surfaces, the key lies in surface texture and coating. ALR (Ambient Light Rejection) screens utilize specialized fabrics to reflect light directly toward the viewer while diffusing ambient light, but their effectiveness depends heavily on proper texture and room setup. A common mistake is assuming all ALR screens perform equally well in bright rooms; in fact, some textures can cause hotspots or shimmer under certain lighting conditions. To truly optimize your setup, it’s vital to select an ALR screen designed specifically for your projector’s technology and room lighting profile, referencing recent breakthroughs in ALR fabrics that enhance contrast without sacrificing color fidelity.
Now, let’s address a question that trips up many — does the physical size or aspect ratio influence the ideal gain? Interestingly, larger screens typically benefit from lower gain to avoid hotspots and maintain uniformity. Similarly, wider aspect ratios can introduce viewing angle issues if the gain isn’t carefully matched to room dimensions. An overlooked aspect is the installation height and viewing distance, which significantly impact perceived image quality regardless of gain, projector specs, or surface type. For an in-depth dive into this topic, check out the comprehensive guide on fixing fixed frame screen edges, which emphasizes precise installation techniques to maximize screen performance.
It’s easy to fall into the trap of oversimplifying the relationship between gain and image quality. The nuances—like understanding how gain interacts with projector brightness, room ambient conditions, and surface texture—are what truly elevate your home theater experience. Remember, the right combination enhances contrast, minimizes glare, and preserves HDR depth, especially critical as 2026’s laser projectors push the boundaries of color and contrast capabilities. If you’re unsure whether your current setup hits these marks, exploring proven strategies for enhancing image quality with projection screens can provide clarity. Have you ever fallen into this trap? Let me know in the comments.
Investing in Reliable Equipment for Durability
To keep your projection setup performing optimally over the years, selecting high-quality, durable equipment is essential. I personally recommend the Stewart Filmscreen FiberFrame. Its tensioning system and sturdy frame help prevent sagging and warping, ensuring a perfectly flat surface that maintains image clarity. Regularly inspecting the tension and adjusting as needed can prolong the lifespan of your screen, especially in environments with fluctuating humidity or temperature. For detailed guidance on proper installation, consult the fixed frame screen setup guide.
Effective Maintenance Practices Keep You Ahead
Consistent cleaning is vital. Use a soft, lint-free cloth and avoid harsh chemicals that can degrade the surface. I use a microfiber cloth dampened with distilled water to gently wipe down my screen every few months. Additionally, paying attention to environmental factors such as dust accumulation and ambient humidity helps prevent issues like mold or warping. Regularly checking for signs of wear or damage allows for proactive repairs, saving you from costly replacements. Installing a cover or using a dust-free environment during unused periods can extend your screen’s pristine condition.
Leveraging Advanced Calibration Tools
Maintaining perfect image quality over time requires precise calibration. I rely on the X-Rite i1Display Pro when fine-tuning my projector, as it provides highly accurate measurements of luminance, contrast, and color accuracy. Calibration software like CalMAN or ColourSpace complements this hardware, helping to fine-tune projector settings and ensure consistent results. This combo allows me to detect subtle shifts in performance and correct them promptly. In the near future, I predict that AI-powered calibration tools will become more accessible, offering automated and even more precise adjustments.
Ensuring Compatibility and Scalability
As your home theater evolves, so should your equipment. When considering upgrades, verify that new components—such as a higher lumen projector or an advanced ALR screen—are compatible with your existing hardware. Modular and motorized screens facilitate easy maintenance and upgrades, reducing downtime and the risk of mishandling during setup. For example, if you decide to switch to a high-gain or ambient light rejecting screen, ensure your projector’s brightness can match the new surface to avoid washed-out images. Staying informed through resources like professional setup blueprints helps you plan future-proof solutions.
How do I maintain my projection surfaces and equipment over time?
Consistent inspection, gentle cleaning, and precise calibration are your best strategies. Keep an eye out for signs of wear, and don’t hesitate to replace aging components before they become problematic. Regular maintenance, paired with quality tools like the X-Rite device, ensures your image remains sharp and vibrant. As I mentioned earlier, future advancements like AI calibration will make this even easier—so staying updated on tech trends can help keep your setup ahead of the curve. Have you tried integrating smart calibration systems yet? Give one of these advanced tools a shot—it might be the upgrade your home theater needs.
The Hardest Lesson I Learned About screen gain,projection screen,fixed frame screen,alr screen,pull down screen
If I could turn back time, I’d tell myself that not all gains are created equal—especially when it comes to 8K laser projectors. The most stubborn lesson was realizing that a gain above 1.3 often does more harm than good, causing hotspots and glare that ruin perfect contrast. Patience is key; sometimes, choosing a lower gain like 0.8 or 1.1 offers a more consistent, immersive picture. Trust me, sacrificing that instant brightness for uniformity pays off during long movie nights.
How Room Size and Ambient Light Shape Your Screen Choices
I underestimated the importance of room-specific factors early on. Bigger rooms with lots of ambient light need a nuanced approach—lower gain screens often work better in these settings, minimizing washout and glare. I learned this after experimenting with different surfaces, realizing that in my bright living room, a gain of 0.8 maintained contrast without sacrificing brightness. Measuring your environment can make all the difference—use a light meter or a smartphone app to get precise readings and tailor your setup accordingly.
The Power of Precise Calibration and Installation
One of the most overlooked aspects was the installation and calibration process. A perfectly tensioned fixed frame screen, installed with professional guidelines, ensures an even surface and sharp image. Pair that with calibrated projector settings—using tools like the understanding of screen gain—and your visuals transform dramatically. I found that small adjustments, especially gamma and contrast, can bring HDR content to life, making colors pop without glare or hotspots.
Why a Balanced Gain Strategy Wins Every Time
It’s tempting to chase the brightest image, but the truth is, balance is where real magic happens. High gain surfaces might look dazzling at first, but they often introduce unwanted artifacts—hotspots, uneven brightness—that distract from your cinematic experience. Instead, think of gain as a tuning knob; combining a screen with a gain around 1.1 and aligning it with your projector’s lumen output consistently yields stunning, HDR-rich images. For a deeper dive into this balancing act, check out this guide.
Inspiring Confidence to Elevate Your Setup
Upgrading your home theater isn’t just about the latest tech; it’s about making smarter choices with gain, environment, and calibration. Once I understood that a modest gain could outperform a high-gain surface in many scenarios, my confidence skyrocketed. The best part? You don’t need to splurge on the most expensive setup; informed decisions—like selecting the right gain, installing properly, and calibrating—are what truly unlock your projector’s potential. Remember, the right knowledge transforms complexity into clarity, and your home theater into a personal cinema.
One Response
I completely relate to the challenge of balancing brightness and image quality in a home theater setup. When I first configured my projector, I also thought increasing gain would naturally boost the vividness of my images, but I soon ran into hotspots and glare issues. After switching to a gain around 1.1 and fine-tuning my projector calibration, the difference was remarkable. It’s clear now that understanding the specific room environment, projector lumen output, and screen gain interplay is crucial. I’ve learned that patience and proper calibration are key—rushing for higher gain can often backfire. How do others here approach measuring ambient light and setting their gain for optimal performance? Do you find that room-specific factors always necessitate several adjustments before settling on the right setup? Would love to hear your experiences and tips for fine-tuning the perfect balance.