It was late at night, and I was sitting in my living room, bathed in the glow of my projector. I tried to watch a movie, but the glare from the windows and the harsh ambient light made everything look washed out and dull. Frustration crept in as I realized I was fighting a losing battle with my setup. That moment marked a turning point — I knew I needed a better solution for bright rooms. If you’ve ever faced the same struggle, you’re not alone. Bright ambient light can turn your dedicated home theater into a frustrating experience, but there’s hope. Today, I want to share how choosing the right projection screen can transform your viewing, even in the brightest rooms. Whether you prefer fixed, pull-down, or ambient light rejecting (ALR) screens, understanding the nuances can save you time and money. So, if you’re tired of squinting or settling for subpar image quality, stick around. We’re about to dig into practical tips to get crystal-clear images in bright environments, backed by real-world insights and my personal journey of trial and error.
Why Bright Rooms Demand Special Screen Solutions
Most people assume that a dark room is essential for enjoying a projector. That’s true to an extent, but what if your space doesn’t allow for blackout curtains or you want a versatile setup that works all day? That’s where the right projection screen makes all the difference. Bright rooms pose a unique challenge because ambient light washes out the projected image, reducing contrast and clarity. This is where high-gain screens and ALR technology shine. High-gain screens reflect more light back to your eyes, making images appear brighter and more vibrant. Meanwhile, ALR screens are designed to reject ambient light from angles that aren’t directly in front of the screen, significantly improving contrast and color performance in well-lit spaces. I learned early on that not all screens are created equal — a fact I wish I’d known sooner. My initial mistake was selecting a standard matte white screen, which left me disappointed in daylight settings. Since then, I’ve discovered that investing in specialized screens tailored for bright environments can elevate your home theater experience from mediocre to stunning. If you’re tired of the glare and washed-out images, you’re in the right place. We’ll explore the types of screens that work best for bright rooms, plus practical tips on installation and setup. And if you’re wondering whether these high-gain or ALR screens are worth the investment, I’ll share honest insights to help you make an informed decision.
Is an ALR Screen Worth the Hype for Bright Rooms?
Honestly, I was skeptical at first. It sounded too good to be true. My early mistake was thinking that a high-gain screen would make my projector brighter automatically. Spoiler alert: it doesn’t. The real magic lies in how ALR screens are engineered to reject ambient light from the sides while reflecting light directly from your projector. This means sharper contrast and better color in daylight conditions. According to recent breakthroughs, ALR screens have become more affordable and effective, making them a game-changer for bright room setups. If you want to see the difference for yourself, check out some of the latest innovations in ALR screen technology breakthroughs. Just be sure to choose a reputable brand and consider the proper setup. Trust me, the investment is worth it if you’re serious about enjoying your content without the need for complete darkness. My journey from disappointment to satisfaction was a matter of understanding the right type of screen for my environment and properly calibrating it. Now, I can watch movies in bright daylight without squinting or sacrificing image quality. Ready to find out how you can do the same? Let’s get into practical tips that will make your bright room projector setup truly shine.
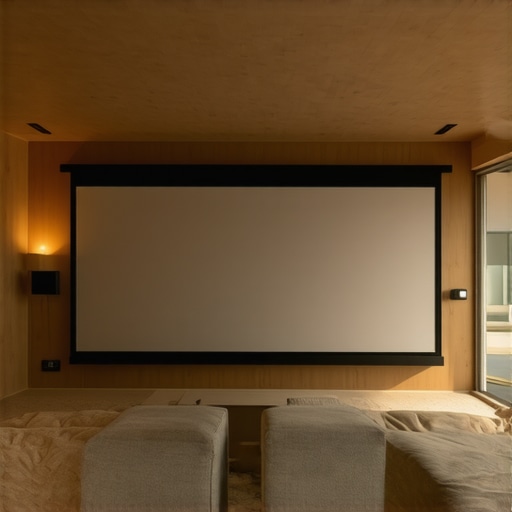
Pick the Right Screen Type for Your Bright Space
Start by assessing your room’s setup. If you have a fixed space with minimal sunlight, a fixed frame screen offers stability and excellent image quality. For rooms where sunlight or ambient light varies, consider a pull-down screen. These are versatile and easier to retract when not in use. When ambient light is a major challenge, an ALR (Ambient Light Rejection) screen becomes a game-changer, significantly improving contrast and color in daylight conditions. I personally replaced my white matte screen with an ALR model, which instantly brightened my viewing experience in the daytime. Remember, choosing the right type is the foundation for a bright room setup that truly works.
Position Your Screen Strategically
Placement is crucial. Position your screen away from direct sunlight or reflective surfaces. If windows are unavoidable, consider mounting blinds or blackout curtains. When installing a fixed or pull-down screen, ensure it’s at eye level and centered in the room. I once mounted my pull-down screen too high, which caused glare and distorted the image. After lowering it to eye level and adjusting the angle slightly, the clarity improved noticeably. Proper positioning maximizes your projector’s brightness and minimizes unwanted light interference.
Optimize Your Projector Settings for Bright Environments
Adjust your projector’s brightness and contrast settings. Increase lumens for more brightness, but don’t overdo it — this can wash out colors. Use a calibration disc or professional calibration tools to fine-tune. In my experience, boosting brightness by 20-30% and decreasing contrast slightly helped retain detail and vibrant colors in daylight. Also, enable any ambient light compensation features your projector offers. This is especially useful if your projector has dynamic iris or auto-brightness modes.
Enhance with Proper Room Lighting Control
Control ambient light sources. Use blackout curtains, dimmable LED lights, or indirect lighting to reduce glare. I installed blackout roller shades that block 99% of sunlight, transforming my room into a daylight-ready home theater. When lighting cannot be fully controlled, rely on your screen’s reflective properties. High-gain or ALR surfaces reflect projector light effectively while rejecting side ambient light, keeping the image crisp and vibrant.
Regularly Maintain and Fine-Tune Your Setup
Keep your screen clean and dust-free to prevent image degradation. Periodically check projector alignment and keystone correction to ensure the image is rectangular. When I first set up my projector, I spent time fine-tuning the lens shift and zoom, which made a huge difference in image sharpness in my bright room. Also, revisit your calibration after any major room changes or new equipment to maintain optimal picture quality.
By combining the right screen technology, strategic positioning, optimized settings, and light control, you can enjoy stunning projection quality in a bright room. These steps are proven to maximize your setup’s potential and create a cinematic experience regardless of ambient lighting conditions.
Many home theater enthusiasts fall prey to misconceptions that can hinder their setup in bright environments. Let’s challenge some of the most widespread myths and shed light on overlooked nuances that could save you time and money.
Why Your Bright Room Setup Might Be More Complex Than You Think
One common misconception is that a higher gain screen will automatically solve all brightness issues. While it’s true that high-gain screens reflect more light, they can introduce unwanted glare and hotspots if not chosen carefully. This is a classic trap: selecting a screen with too high a gain without considering viewing angles or room layout can worsen image uniformity. Instead, focus on balanced gain and proper placement, and consider advanced technologies like ALR screens that reject ambient light from sides while maintaining a wide viewing angle.
Another myth is that ambient light rejection (ALR) screens are only for dedicated dark rooms. In reality, they’re designed to optimize contrast and color in spaces with unavoidable daylight. However, many users overlook the importance of correct installation and calibration. A poorly mounted ALR screen or incorrect angle can diminish its benefits. For the best results, consult expert tips on choosing and installing ALR screens.
Moreover, some believe that projector brightness alone can compensate for ambient light. This is a dangerous oversimplification. Increasing lumens can lead to washed-out colors and reduced contrast if not balanced with proper screen selection and room lighting control. According to a recent expert analysis, effective brightness management involves a holistic approach—matching projector specs, screen gain, and ambient lighting strategies.
Are You Falling Into These Traps?
Before investing in the latest high-gain or ALR screens, evaluate your room’s specific conditions and read detailed guides like pull-down screen tips. Remember, the goal isn’t just a brighter image but a balanced, glare-free picture with vivid colors. Proper setup, calibration, and understanding of technology nuances often outweigh the allure of high gain alone.
So, have you ever fallen into this trap or believed a misconception? Let me know in the comments. Staying informed helps you avoid costly mistakes and enjoy a truly cinematic experience in any lighting condition.
Maintaining your projection screen and using the right tools are crucial for preserving image quality and ensuring your setup remains reliable over time. From cleaning routines to calibration software, I rely on specific equipment and methods that have proven effective in my own home theater journey. In this post, I’ll share my recommended tools and maintenance strategies that can help you keep your projection system performing at its best for years to come.
Why Regular Maintenance Matters
Projection screens, especially high-gain and ALR types, are sensitive to dust, smudges, and environmental factors. Without proper care, their reflective surfaces can degrade, leading to diminished contrast and clarity. Regular upkeep not only prolongs the lifespan of your screen but also keeps your image sharp and vibrant. Think of it as routine tune-ups for your car—small, consistent efforts prevent costly repairs down the line.
Tools I Recommend for Cleaning and Calibration
One essential tool I use is a microfiber cloth designed specifically for delicate surfaces. It gently removes dust without scratching or leaving streaks. For stubborn spots, a mixture of distilled water and isopropyl alcohol (70%) applied with the cloth works wonders. Avoid harsh chemicals that can damage the reflective coating. Additionally, a high-quality lens cleaning solution can be used for projector lenses, which directly impacts image clarity and brightness.
Calibration software like the proven strategies for enhancing image quality offers precise control over brightness, contrast, and color settings. I personally rely on a calibration disc combined with this software to fine-tune my setup. It’s worth investing in a colorimeter or spectrometer if you want professional-level calibration, but even basic tools significantly improve the viewing experience.
How do I maintain my setup over time?
Consistency is key. Schedule bi-annual cleanings of your screen and lens. Keep ambient light sources in check and ensure your projector’s filters are cleaned or replaced as recommended by the manufacturer. Regularly revisit your calibration settings after any room changes or upgrades. Over time, projector lamps dim, and environmental factors shift, so a quick recalibration can restore peak performance. Keeping a record of your settings can help you quickly return to optimal configurations after maintenance.
Looking ahead, the evolution of automated calibration tools and self-cleaning screens suggests a future where maintaining high-quality projection will become even easier. Companies are developing smarter surfaces that resist dust and smudges, and software that automatically adjusts color and brightness based on ambient light conditions. Staying updated with these trends can help you invest wisely and keep your home theater at the cutting edge.
If you haven’t already, try using a calibration disc combined with software like these proven strategies. It’s a simple step that can dramatically improve your image quality and ensure your investment continues to pay off. Regular upkeep and the right tools will keep your projection system shining bright for years to come.
The Hardest Lesson I Learned About Bright Room Projection
One of my biggest surprises was realizing that choosing a high-gain screen without considering room angles could cause hotspots and glare, ruining the viewing experience. It taught me to always test different screen angles and gain levels before settling on a setup.
Why Ambient Light Rejection Screens Are Worth the Extra Investment
Initially, I thought ALR screens were just fancy marketing. But after trying one, I saw how side-rejecting technology dramatically increased contrast and color vibrancy in my daylight setup. It’s a game-changer for bright rooms.
The Power of Proper Calibration and Positioning
Even with the best screen, I learned that projector alignment and calibration are crucial. A slight tilt or misalignment can wash out the image or create uneven brightness. Fine-tuning my projector’s settings and mounting the screen at eye level made a world of difference.
Curated Recommendations for Bright Room Success
- ProCalibration Software: I use calibration tools like CalMAN to match my projector’s output to my screen, ensuring vibrant, accurate colors.
- Blackout Curtains: Investing in quality blackout shades helps control ambient light and keeps my projection crisp throughout the day.
- High-Gain Screens: For daylight viewing, I recommend the Elite Screens Cyclone series, which offers excellent gain and wide viewing angles.
- Projection Setup Guides: The Ultimate Blueprint for Professional Projection Screen Setup is my go-to resource for perfect installation tips.
Don’t Hesitate — Elevate Your Bright Room Viewing Experience
Mastering bright room projection is within your reach. With the right screen, proper placement, and calibration, you can enjoy stunning images even in daylight. Take action today and transform your setup into a bright-room cinema. Have you ever struggled with ambient light interference? Share your experience below — I’d love to hear your story!
One Response
Reading this post really resonated with me because I faced similar issues with ambient light destroying my movie nights. I initially bought a standard matte white screen, thinking it would suffice, but my daytime viewing was always disappointing. Transitioning to an ALR screen made a tremendous difference; I noticed richer contrast and less glare from my windows. It’s incredible how technology has advanced to make these solutions more affordable and accessible. I especially appreciate the tips on positioning and calibration, as small adjustments like mounting the screen at eye level or recalibrating my projector’s settings noticeably improved picture quality. One challenge I’d love to hear others share their solutions for is managing reflections from nearby reflective surfaces—any tactics that work well? Also, do you think investing in high-gain screens is worthwhile if I’m on a tight budget, or should I focus more on room light control? I believe a combination of good technology and smart room setup is the key to achieving the best results in bright environments.