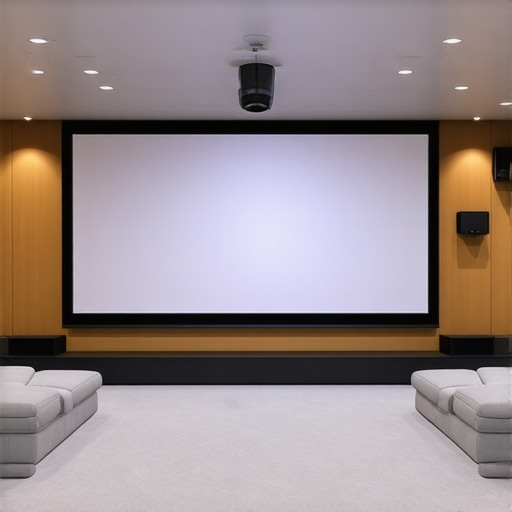
I remember the first time I set up a home theater in my bright living room. I was so excited to finally enjoy movie nights on a big screen. But as soon as I turned on the projector, disappointment hit me like a ton of bricks. The picture was washed out, details lost in the glare. I felt like I’d wasted my money. That moment was a real eye-opener. I realized that choosing the right projection screen is absolutely crucial—especially if your room isn’t darkened or has lots of ambient light.
Why Bright Rooms Demand Special Projection Screens
Most traditional screens do a decent job in darkened rooms, but in bright environments, they often struggle. The ambient light washes out the image, making it hard to see details and colors. That’s where high gain screens come into play. These screens are designed to reflect more light back to your eyes, ensuring a bright, vivid picture even in well-lit spaces.
In fact, according to recent industry insights, choosing a high screen gain projection surface can improve perceived brightness by up to 50%, transforming your viewing experience. Yet, many people overlook this critical factor when hunting for the perfect screen. They stick to standard matte surfaces or assume that blackout curtains are enough—big mistake.
Have You Faced This Problem in Your Setup?
If you’ve ever struggled to see details in your bright room, you’re not alone. I made that mistake early on, thinking that a high-end projector alone would do all the work. But the truth is, the right screen makes all the difference. I learned this the hard way, and I want to save you from the same frustration.
Today, I’ll walk you through the essentials of selecting the best projection screens for bright rooms with high screen gain in 2024. We’ll cover what features to look for, common pitfalls, and how to ensure your setup delivers crisp, clear images regardless of ambient light. Whether you’re upgrading your current setup or starting fresh, these tips will help you find the perfect match.
What’s Next? Turning Your Bright Room Into a Cinematic Haven
Ready to transform your space? Let’s dive into the specifics of high gain screens, their advantages, and how to install them for maximum impact. If you’re curious about how technology like ALR (Ambient Light Rejection) surfaces can further improve your viewing, check out this latest ALR innovations for 2025. Now, let’s get started on making your bright room the envy of all home theaters.
Pick the Right Screen Material and Gain
Start by selecting a high-quality projection surface with a high gain—typically between 1.8 and 3.0—that reflects more ambient light back to your eyes. I once bought a standard matte white screen, expecting good results, but in my bright living room, the image was dull and washed out. After researching, I chose a high gain screen, which instantly boosted brightness and contrast. Check out the detailed comparison of best screens with screen gain to find one that fits your room.
Measure Your Space Carefully
Accurate measurements ensure the screen fits perfectly and reduces light spill. I measured my wall twice, then cross-referenced with the manufacturer’s specs. Use a tape measure and note the height and width, considering space for mounting hardware. This prevents surprises during installation and guarantees optimal viewing angles. For detailed tips, see the projection screen type guide.
Choose Between Fixed Frame and Motorized Pull-Down
Decide whether a fixed frame or motorized pull-down screen suits your setup. Fixed frames are rigid, stable, and less prone to wrinkles, but less flexible. I installed a fixed frame in my dedicated room, following the fixed frame setup guide, which made installation straightforward and the picture crisp. If you prefer a retractable option for versatility, explore pull-down models that can be motorized for convenience.
Optimize Lighting Conditions
Controlling ambient light is crucial. Use blackout curtains or blinds to minimize sunlight during daytime viewing. I darkened my windows and added dimmable lights to reduce glare. Remember, even the best high gain screen needs a controlled environment for maximum effect. For advanced tips, check out ALR and high gain screen insights.
Proper Installation Technique
Follow a precise installation process to ensure the screen is perfectly aligned and tensioned. Use a level to keep the frame straight and secure mounting hardware into studs or anchors. I used the fixed frame installation guide to avoid sagging or crookedness. Correct installation maximizes image clarity and prevents future issues.
Test and Adjust Your Setup
After installation, fine-tune your projector’s placement and settings. Adjust the height, focus, and keystone correction for a perfect image. I calibrated my projector using test patterns and made small adjustments until the picture was sharp across the entire screen. Regular testing ensures consistent quality. For in-depth calibration techniques, visit image quality enhancement strategies.
Keep Your Environment Clean and Maintained
Dust and smudges can diminish picture quality over time. Clean your screen gently with a microfiber cloth, avoiding harsh chemicals. I make it a habit to wipe down my screen monthly, which keeps the reflection clear and vibrant. Proper maintenance extends the lifespan of your projection surface and maintains optimal brightness.
By following these concrete steps, you can dramatically improve your bright room projection experience with high screen gain screens in 2024, turning your space into a true cinematic haven.
Many home theater enthusiasts believe that simply opting for a high gain screen will solve all their visibility issues in a bright room. While high gain surfaces do reflect more light, relying solely on this feature can lead to unexpected drawbacks. One of the most overlooked nuances is the myth that higher gain always means better brightness without compromise. In reality, screens with a gain above 2.0 tend to introduce hot-spotting, where the center of the image appears significantly brighter than the edges, creating an uneven viewing experience. This can be especially problematic in larger screens or rooms with multiple light sources.
Let’s dig deeper. When selecting a projection surface, many assume that the highest gain available is the best choice. However, experts emphasize the importance of balancing gain with viewing angle and ambient light conditions. For instance, a screen with a gain of 2.5 might look fantastic when viewed straight on, but if you sit at an angle, the image can become washed out or distorted. This is because high gain surfaces typically have narrower optimal viewing zones. To avoid this, consider screens with a gain around 1.8 to 2.0 that offer a wider viewing angle while still providing sufficient reflectivity for bright environments.
Another common mistake is neglecting the quality of the screen material itself. Not all high gain surfaces are created equal. Cheaper options may reflect more light but at the cost of color accuracy and contrast. This can lead to images that look overly luminous but lack depth, making the picture appear flat or washed out. Reading expert reviews and testing samples before purchase is crucial. For advanced insights into selecting the right material, check out expert tips on ALR screens.
Are high gain screens truly the best for every bright room?
Not necessarily. While they are a powerful tool, they are just one part of a holistic setup. Proper room darkening, projector calibration, and even strategic placement of furniture can significantly enhance image quality. Additionally, emerging technologies like Ambient Light Rejection (ALR) surfaces are designed specifically to mitigate the effects of ambient light without the typical drawbacks of high gain screens. For a comprehensive understanding, explore the latest ALR innovations.
One more pitfall to avoid is the misconception that screen size doesn’t matter. Oversized screens in bright environments can exacerbate hot-spotting and reduce overall clarity. It’s better to choose a screen size that fits your room dimensions and viewing distance, ensuring optimal brightness distribution and image sharpness. For tailored advice, consult the installation guide.
Have you ever fallen into this trap? Let me know in the comments. Remember, the key to a stunning projection in a bright room lies in balancing gain, material quality, and environment control. When in doubt, testing different options and consulting expert resources can save you time and money, ensuring your home theater truly shines even in challenging lighting conditions.
How do I keep my projection system running smoothly over time?
Maintaining a home theater setup is crucial to preserve image quality and equipment longevity. I personally rely on a few key tools and routines to ensure my projector and screen stay in top shape. First, I use a microfiber cloth to gently clean the projection surface regularly, avoiding harsh chemicals that can damage delicate materials. For the projector lens, I opt for a specialized lens cleaning brush and a soft cloth to remove dust and smudges, which can degrade image clarity over time.
To keep the internal components dust-free, I schedule quarterly air filter replacements and use compressed air to blow out vents. This proactive approach prevents overheating and ensures consistent brightness. Additionally, I calibrate my projector every six months using test patterns and software like CalMAN, which I highly recommend for precise adjustments in color, contrast, and geometry. Regular calibration is especially important when upgrading bulbs or changing ambient conditions.
Investing in surge protectors for your electronics is another simple yet effective step. Power surges can damage sensitive components, leading to costly repairs. I use a high-quality surge protector with a noise filter to stabilize power supply and minimize interference.
Looking ahead, I believe automation and smart maintenance systems will become more prevalent, allowing homeowners to monitor device health remotely and receive alerts for service needs. This trend will make upkeep even easier and more reliable.
Keep Your Equipment in Peak Condition with These Tips
One tip I swear by is maintaining a controlled environment. Humidity and temperature fluctuations can harm electronics and screen materials. I use a dehumidifier and a climate monitor to keep conditions stable. Additionally, I avoid excessive direct sunlight and bright artificial lights that can cause glare and damage over time.
Try scheduling routine cleanings and calibrations, and consider investing in a professional service every couple of years for deep maintenance. These small efforts will extend the lifespan of your setup and ensure you enjoy crisp, vibrant images for years to come. For detailed maintenance procedures, check out this comprehensive installation guide and keep your system performing at its best.
Remember, consistent care not only preserves your equipment but also enhances your viewing experience. Don’t wait until issues arise—stay proactive and enjoy your home theater for many years ahead!
The Hardest Lesson I Learned About Bright Room Projection
One of my biggest surprises was realizing that a high gain screen isn’t a magic bullet. I once assumed that simply increasing gain would fix all my visibility issues, but I learned that too much can cause uneven brightness and hot-spotting—ruining the experience. The key is finding a balance that matches your room’s specific lighting conditions, which I discovered through trial, error, and plenty of research.
3 Myths About Projection Screens in Bright Rooms That Held Me Back
- Higher gain always equals better brightness: Not true. Excessive gain can lead to glare and uneven images, especially when sitting at an angle.
- All high gain surfaces are the same quality: Quality varies greatly—look for reliable brands and materials designed for ambient light.
- Darkening the room isn’t necessary if you have a high gain screen: Ambient light control still plays a crucial role in achieving the best image quality.
What Experts Won’t Tell You About Bright Room Projection
Many overlook the importance of viewing angles and material quality. A screen with a gain of 2.5 might seem ideal, but if it doesn’t distribute light evenly or causes hot-spotting, your picture suffers. I now prioritize screens with a gain around 1.8 to 2.0 for broader viewing zones and better contrast, even in well-lit conditions. For the latest innovations, I recommend exploring ALR technology breakthroughs that further enhance brightness and clarity.
Curated Tech Tools for Bright Room Home Theater Success
- CalMAN Calibration Software: I trust it for precise projector calibration, ensuring optimal contrast and color accuracy even with high gain screens.
- Measuring Tape and Level: Critical for perfect installation—small details make a big difference.
- Premium Projection Surface Brands: Brands like Stewart Filmscreen and Elite Screens have proven reliable for high gain, ambient light-friendly surfaces.
- Blackout Curtains and Light Control Accessories: Essential for minimizing ambient light and maximizing your screen’s potential.
Your Path to a Brighter, Clearer Home Theater
Now, armed with insider lessons and trusted tools, you’re ready to transform your bright room into a cinematic paradise. Remember, success lies in balancing screen gain, environment control, and quality materials. Stay curious, experiment, and don’t hesitate to explore emerging tech like ALR solutions for even better results. Your perfect home theater awaits—take that first step today!
4 Responses
Reading this reminds me of my own experience trying to set up a home theater in a bright living room. I initially thought that just investing in a high-end projector would be enough, but the washed-out images made me realize I overlooked the importance of the screen material and gain. Once I switched to a high gain, wide-angle screen with better material quality, the difference was night and day. It’s fascinating how much impact the right screen can have, especially in challenging lighting conditions. I’m curious, how do others balance choosing a high gain screen with avoiding hot-spotting? Do you prefer fixed frames or motorized retractable options for versatility? I’d love to hear different setups and tips for optimizing brightness without sacrificing uniformity. This post really emphasizes the need for a holistic approach to home theater setups, combining environment management, proper equipment, and screen choice. Looking forward to experimenting more with these insights!
This article really resonated with me because I recently upgraded to a high gain screen for my bright living room, and the difference in brightness and clarity was astonishing. However, I also noticed some hot-spotting issues when watching from the edges of the room. It made me realize that choosing the right gain isn’t just about maximum reflectivity but also about the viewing zone and material quality. I’m curious: how do others manage or mitigate hot-spotting when choosing high gain screens? Do you favor larger screens with lower gain, or have you found certain brands that distribute light more evenly? Also, I’ve been considering motorized pull-downscreens for flexibility—has anyone had good experiences with specific models? Combining good environmental control, like blackout curtains, with an optimal screen seems key. Would love to hear about your setups or tips to keep the image consistent across the entire viewing area.
This article hits the nail on the head about the importance of selecting the right projection screen, especially for bright rooms. I’ve struggled with washed-out images myself, and it’s clear that a high gain screen can make a significant difference. However, I’ve also learned that hot-spotting can be an issue with high gain surfaces, especially if the material isn’t high quality or if the room isn’t properly calibrated. I’ve found that maintaining even lighting and choosing screens with a gain around 1.8 to 2.0 helps balance brightness with uniformity. I’m curious — have others experimented with different gain levels in similar setups? How do you mitigate hot-spotting, especially in larger screens? Also, I’m considering upgrading to an ALR screen, but I wonder how that compares in terms of cost and effectiveness in a bright environment. Would love to hear personal experiences or suggestions from the community.
This article really highlights a crucial aspect of home theater setup that many overlook—screen choice especially in bright rooms. I’ve learned from personal experience that not just high gain but also the material quality and viewing angle are key to a good picture. A high gain screen with poor material can sometimes cause color washout or glare, defeating its purpose. I was amazed when I switched to a well-reviewed, high-quality screen with a gain around 2.0; the brightness increased significantly without hot-spotting. I’m curious, has anyone here experimented with using a grey or neutral-tone high gain screen instead of pure white? From what I’ve read, these can reduce hot-spots and improve contrast in bright conditions. Also, do you think combining a high gain screen with ambient light rejection technology is overkill or complementary? Would love to hear your experiences and any tips you might have for balancing brightness and image quality in a daylight-filled room.