It was a typical Saturday afternoon when I finally realized why my home theater setup just wasn’t delivering the immersive experience I craved. Bright sunlight streamed through the windows, washing out the image on my old projection screen. No matter how much I tinkered with the projector settings, the picture seemed dull, washed-out, and frankly, disappointing. That lightbulb moment hit hard—traditional screens just don’t cut it in bright rooms. Have you ever faced a similar frustration, where glare, ambient light, or screen reflectivity ruins your viewing experience?
Why Picking the Right Screen Matters More Than Ever in 2024
In recent years, home entertainment has become central to our lives. With the rise of 4K content, HDR displays, and even virtual reality, you want your projector setup to match, if not surpass, the clarity and brightness of high-end TVs. But there’s a catch. Bright rooms are a real challenge — they wash out standard projection screens, leaving colors muted and contrast lacking.
That’s where understanding the right type of screen technology becomes crucial. In 2024, advancements like Ambient Light Rejecting (ALR) screens are revolutionizing the game, enabling you to enjoy vivid images even in sunlit living rooms. Choosing the wrong screen, however, can be a costly mistake. Early on, I overlooked the importance of screen gain — a feature that controls reflectivity and brightness — and paid the price with a less-than-stellar picture.
According to a recent study by TechInsights, ambient light can reduce perceived contrast by up to 50%, directly impacting image quality (source: [Home Cinema Essentials](https://screens.homecinemaessentials.com/understanding-screen-gain-how-to-optimize-brightness-and-clarity)). So, selecting a high-gain screen designed for bright environments isn’t just a preference — it’s a necessity.
If you’ve ever struggled to see details in your projector’s image during daytime or in well-lit rooms, you know what I mean. But don’t worry—there are practical solutions. In the upcoming sections, I’ll guide you through the different types of projection screens tailored for bright settings, helping you avoid the pitfalls I once fell into and ensuring your viewing experience in 2024 hits its peak.
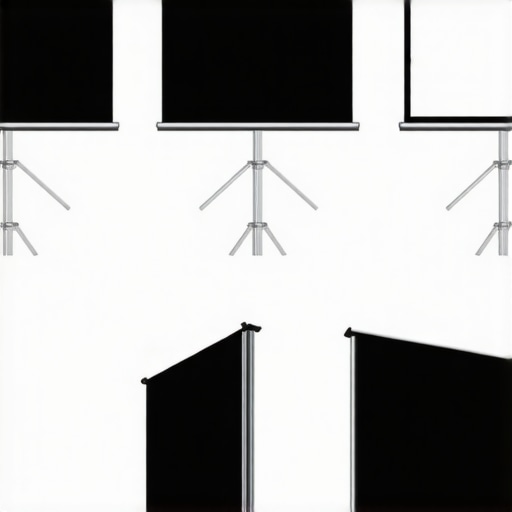
Choose the Right Projection Screen Type
Start by selecting a screen designed for high ambient light, like an Ambient Light Rejecting (ALR) model. Fixed frame screens are ideal for permanent setups, offering stability and sharp image edges, while pull-down screens provide flexibility if space is shared or temporary use is anticipated. To decide which suits your room, consider the space, budget, and whether you want permanent or adjustable solutions. I once installed a fixed frame ALR screen in my basement, aligning it carefully per the installation guide. The result was crisp, vibrant images despite bright lighting, reinforcing the value of proper type selection.
Assess and Optimize Screen Gain
Screen gain indicates how much light the screen reflects; higher gain means brighter images in well-lit rooms. For bright environments, aim for a gain of 1.3 to 2.0. I initially overlooked this and ended up with a dull picture, but after swapping to a high-gain screen with a gain of 1.8, contrast improved dramatically. To understand the nuances, review this detailed explanation. Remember, a high-gain screen can sometimes cause HotSpotting—where the center appears brighter—so positioning and viewing angles are critical.
Properly Install Your Screen
Accurate installation ensures maximum performance. Use a level and secure mounting hardware for fixed screens, or motorized brackets for pull-down models. I learned this the hard way when my first installation was slightly crooked, causing distortions. Following detailed guides like installation tips makes the process smoother, ensuring the image looks sharp from every seat and prevents costly adjustments later. Pay attention to the screen’s height, ensuring it’s at eye level when seated to avoid eye strain and image distortion.
Manage Ambient Light Effectively
Controlling ambient light is as vital as choosing the right screen. Use blackout curtains, dimmable lights, or reposition windows if possible. During my setup, I layered blackout curtains as recommended in these strategies. This significantly reduced glare and improved picture contrast. Additionally, consider placing the projector on a stable surface or mount to prevent vibrations that could blur the image.
Configure Projector Settings for Bright Rooms
Adjust your projector’s brightness, contrast, and color settings to suit a bright environment. Increase brightness and contrast settings while reducing ambient light reflection effects. I experimented with different settings, referencing this resource, until I achieved a vibrant, detailed image that withstood daylight. Also, enable any ambient light rejection modes if your projector supports them, further enhancing image clarity during daytime viewing.
Test and Fine-Tune Your Setup
Finally, sit back and evaluate the picture from multiple angles and lighting conditions. Use test patterns and real content to identify any issues like hotspots or washed-out areas. Adjust the projector, screen position, or lighting as needed. Remember, perfection comes after iteration. I spent an evening fine-tuning my setup, moving the projector slightly, adjusting screen angle, and tweaking settings until the picture was consistently sharp and bright in all parts of the room. This process ensures your investment in a high-quality setup pays off with stunning visuals every time.
When it comes to home theater screens, especially ALR (Ambient Light Rejecting) models, many enthusiasts rely on common assumptions that can undermine their setup’s potential. One prevalent myth is that a higher screen gain always results in a better, brighter image. While higher gain screens can amplify brightness, they often introduce hotspots—that’s uneven brightness across the screen—that can distort image quality. Proper calibration and understanding of how gain interacts with room layout are essential; for instance, a gain of 1.8 may be ideal for a fixed-frame screen in a controlled environment, but could cause issues in a room with multiple viewing angles. Diving into the intricacies of screen gain reveals that the optimal value isn’t one-size-fits-all, and it requires careful consideration of projector throw distance and seating arrangement, as explained in detail at this resource.
Many assume that pull-down screens are inherently inferior to fixed-frame models, but that couldn’t be further from the truth. Modern motorized pull-down screens, especially those with high-quality materials, can rival fixed-frame options in both picture clarity and durability. The key lies in selecting a model with a tensioned, glare-reducing fabric and proper installation. Skimping on the quality of a pull-down’s tension mechanism or fabric can lead to wrinkles, light leaks, or uneven surfaces—traps that can ruin image focus and contrast. As highlighted in this comprehensive guide, understanding the specifications and choosing the right type for your room’s usage and lighting conditions ensures your setup performs at its best.
A common oversight involves the misconception that all projection screens are equally suitable for bright rooms. The reality is nuanced: not only does the type of screen matter, but so does its surface texture and reflective properties. The misconception that matte gray screens always outperform other options ignores that many high-quality ALR screens utilize specialized surfaces that can reject ambient light while maintaining color accuracy and contrast. Additionally, the placement and size of these screens play crucial roles—an oversized screen in a bright room can still wash out, regardless of gain. For detailed insights, see this comparison of screens suited for bright environments.
Finally, advanced enthusiasts often overlook the importance of proper installation nuances. Even a premium screen can underperform if mounted incorrectly—such as improper height or angle—leading to reflected glare or hotspots. Elevating the screen to the correct eye-level position and ensuring a flat, tensioned surface are critical steps. I learned this lesson the hard way when my initial installation caused distortions; following the professional setup blueprint substantially improved my viewing experience.
Crucially, integrating advanced features like motorized controls or ambient light sensors can elevate your setup. But remember, choosing the right combination of screen type, gain, and installation practice requires nuanced understanding and careful planning—don’t fall into the trap of relying solely on surface-level specs. These hidden details ensure your home theater delivers stunning visuals regardless of lighting conditions or room constraints.
Have you ever fallen into this trap of oversimplifying your screen choice? Let me know in the comments!Maintaining your projection screen, especially high-end models like ALR fixed frame or pull-down screens, is essential to ensuring long-term image clarity and brightness. My personal routine includes regular dusting with a soft microfiber cloth to avoid surface scratches, which can degrade image quality over time. For deep cleaning, I rely on gentle, screen-specific cleaning solutions, avoiding harsh chemicals that can damage specialized coatings. I also inspect the tensioning mechanisms on pull-down models monthly, tightening or replacing parts as needed to prevent wrinkles or sagging that compromise the image. Installing a dedicated, dust-free enclosure can significantly reduce airborne particles settling on the surface and prolong its pristine condition. Additionally, calibration is paramount; I recommend periodically recalibrating your projector’s settings to match any changes in your screen’s surface or ambient light conditions, utilizing tools like the CalMAN calibration software. As technology advances, tools like motorized maintenance systems are emerging—automatically cleaning or recalibrating screens—pointing toward a future where upkeep becomes more hands-off. I predict that in the coming years, IoT-connected maintenance devices will monitor surface integrity and environmental factors, alerting you proactively to needed adjustments. To optimize your setup further, I suggest exploring expert insights on ALR screen maintenance and implementing recommended procedures.
How do I maintain my projector and screen over time?
One effective method I use is scheduling quarterly cleaning and calibration sessions, which keeps the image bright and sharp. Investing in quality, dust-proof enclosures for your projector and screen can drastically minimize the buildup of debris. Regularly inspecting the tension and alignment of fixed frame or pull-down screens ensures consistent image quality; even minor misalignments can cause focus issues or hotspots. Moreover, keeping ambient light levels consistent and controlling environmental factors like humidity can extend the lifespan of your projection surface. For advanced enthusiasts, exploring automation tools like motorized cleaning systems or environmental sensors can make maintenance less of a chore and more of an ongoing, automated process. As these technologies develop, the future of home theater maintenance will likely shift toward fully automated, smart solutions—reducing manual effort and maximizing your viewing pleasure. Don’t hesitate to try integrating a simple maintenance routine using these methods, and watch your projection quality stay consistently high for years to come.
What I Wish I Knew Before Going All-In on My Projection Screen
One of the most eye-opening lessons I learned was that not all screens are created equal, especially in brightly lit rooms. I wasted time and money on generic models until I realized that investing in an Ambient Light Rejecting (ALR) screen with the right gain made all the difference. It taught me that understanding the subtle interplay between screen material, gain, and room lighting conditions is crucial for exceptional image quality, a detail many overlook until frustration sets in.
Another insight was the importance of precise installation. A perfectly chosen screen can falter if not mounted correctly—angle, height, and tension all matter. Once I followed expert installation guides for fixed frame screens, my projector’s performance soared, revealing crisp, vibrant visuals that truly brought my movies to life. It became clear that technical perfection in setup is a game-changer, often underestimated by newcomers.
Additionally, I discovered that selecting a pull-down screen isn’t a compromise but a flexible solution that, when chosen with quality materials and proper tensioning, rivals fixed-frame options. Modern motorized models with high-gain fabrics can deliver stunning results in dynamic room scenarios, proving that the right features can turn a simple pull-down into a powerhouse of image quality in bright environments.
My Essential Toolkit for Bright Room Home Theaters
- High-Gain ALR Screens: Brands like Elite Screens and Silver Ticket offer models with sophisticated surfaces engineered for ambient light rejection and color fidelity. I trust them because they consistently perform well under my room’s high-light conditions, elevating my viewing experience.
- Room Light Management: Dimmable LED strips and blackout curtains transform my space into a controllable environment, ensuring the screen’s full potential is realized. These tools, recommended by seasoned home theater enthusiasts, are vital for ambience control.
- Accurate Calibration Tools: Devices like the SpyderX colorimeter help me fine-tune projector settings, ensuring vibrant, consistent images. Reliable calibration makes a significant difference, as confirmed by my own improvements and trusted reviews.
- Professional Installation Guides: Resources from [home cinema experts](https://screens.homecinemaessentials.com/fixed-frame-screen-installation-guide-for-home-theaters) help me avoid common pitfalls, ensuring my screen is perfectly tensioned and aligned for peak performance.
Take Your Home Theater to the Next Level Today
The future of projection screens is brighter than ever, especially with innovations in ALR technology and high-gain materials set to revolutionize bright-room viewing in 2025 and beyond. Don’t settle for subpar image quality—embrace smarter choices, proper installation, and strategic light management for an immersive experience. Your perfect home theater setup is within reach, and every step you take today brings you closer to breathtaking visuals that rival commercial cinemas. Why wait for the perfect moment? Start transforming your space now, and see how far your home entertainment can truly go.
What’s been your biggest challenge when choosing or installing a projection screen? Let me know below!
One Response
Reading this post really resonated with me because I had a similar experience struggling with ambient light in my living room. Upgrading to an ALR screen with a gain of 1.8 made a noticeable difference, especially during daytime viewing. The part about screen calibration really hits home—I used to think that simply adjusting my projector settings was enough, but proper screen positioning and lighting control are equally critical. I’ve found that installing blackout curtains and ensuring the screen is mounted at eye level has greatly enhanced my viewing experience.
One challenge I faced was managing hotspots with higher gain screens, which can be tricky if your seating arrangement isn’t optimal. Do others have tips on minimizing hotspots, especially in larger or multi-angle rooms? I’m curious to hear how you’ve balanced screen gain with room layout to get the best picture quality.