I remember the first time I noticed that annoying curl developing along the edges of my pull down projection screen. It was only a few months after I had installed it, and suddenly, my once crisp image began to look wrinkled and sagging at the edges. At first, I thought it was a minor issue, but as the curl worsened, I felt a sinking frustration. That moment was a real eye-opener—realistically, it can ruin the entire viewing experience and make you question if your investment in that home theater upgrade was worth it.
Why Edge Curl Can Ruin Your Home Theater Experience
Edge curl isn’t just an aesthetic problem; it impacts the quality of your picture, causes distracting shadows, and even reduces contrast during critical scenes. In 2026, with the advent of high dynamic range (HDR) content and ultra-high-definition resolutions, having a perfectly flat projection surface is more important than ever. A curled edge can cause light diffusion, uneven brightness, and a less immersive viewing experience. If you’re like me, you’ve probably tried all sorts of temporary fixes—tightening, taping, or even tipping the screen—only to find that the problem keeps recurring. That’s because most of these are just band-aids, not permanent solutions.
Thankfully, over the years, I’ve discovered some effective, proven fixes that actually work long-term. Today, I’ll share three of them based on my honest experience and research, because no one wants to deal with that pesky curl again. Whether you’re dealing with a new model or an older setup, these methods will help you regain that pristine, flat surface that your movie nights deserve. Are you tired of watching your favorite films with distracting wrinkles? Well, stick around—because I’ve been there and found the fixes you need.
Is Fixing Edge Curl Actually Worth the Effort?
Early in my journey, I made the mistake of assuming that a little curl wasn’t a big deal—until it started affecting image quality and became a noticeable eyesore. It’s easy to underestimate how much a simple curl can diminish your viewing experience. According to expert insights, addressing edge curl can significantly enhance image clarity and contrast, especially in bright rooms or with high-gain screens. To be honest, I was tempted to just replace the whole screen initially, but I learned that proper tensioning and maintenance are often enough to save the day. For more tips on selecting the right screen for your space, check out our guide on choosing the best ALR screen.
So, let’s dive into the top proven methods I’ve used to keep those edges flat and your image perfect. Trust me, once you implement these, you’ll wonder why you didn’t fix it sooner.
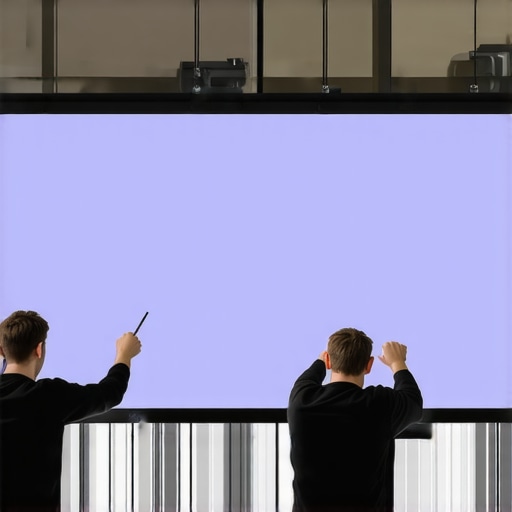
Stretch the Screen Properly During Installation
Recall the time I installed a pull-down screen in my basement home theater. I carefully followed the manufacturer’s instructions but noticed slight curling after a few days. To combat this, I reinstalled the screen, ensuring it was evenly tensioned and secured to the mounting surface. Use a tensioning system or tension rods if your setup permits. Think of it like tuning a guitar string—tight enough to stay flat, but not so tight that it causes stress. Applying this step immediately after installation prevents initial curling and promotes a flat surface over time.
Adjust Tension Using a Tensioning Kit or Tapes
If you notice upward or downward edges curling, a quick fix involves tensioning. For pull-down screens, you can attach tensioning tapes or cords to the ends, then tighten gradually. Imagine pulling a sagging tent camping—every small adjustment adds up. I once used adhesive hook-and-loop tapes on the edges, tightening them with small hooks connected to a tensioning cord. This method provided immediate relief from curl, but ensure you don’t over-tighten, which could damage the fabric or mechanism. For detailed tensioning techniques, check out our comprehensive tensioning guide.
Maintain Proper Environmental Conditions
In my experience, environmental factors like humidity and temperature can cause contraction or expansion of the screen material, worsening curl over time. To counter this, keep your room at a consistent temperature (around 20°C/68°F) and humidity levels between 40-50%. Think of your screen like a sensitive fabric; exposing it to extreme conditions is akin to wringing out a damp cloth repeatedly. Using a dehumidifier or air conditioner helps maintain stability, preventing the fabric from loosening or contracting, which exacerbates edge curling. Regularly monitoring your room’s environment is a simple yet effective preventative step.

Illustration showing a person tensioning a pull-down projection screen using tension rods and clips, demonstrating proper installation techniques to prevent curling.
Choose the Right Screen Material and Frame
Not all screens are created equal. I made the mistake of picking a material that was too flexible for my setup, which led to persistent curl. Today, I prefer rigid fixed-frame screens made of aluminum or MDF, which resist warping and maintain flatness over years. When selecting a screen, opt for fabrics with low stretch properties and a sturdy frame. Think of it like choosing a sturdy canvas for a painting—more rigidity equals fewer wrinkles. For the best long-term results, consider source materials tested for minimal flex and warp, such as those highlighted in our fixed frame screen reviews.
Regular Maintenance and Inspection
Periodically check your screen’s tension and fabric condition. I caught a small tear early and reinforced problematic areas, preventing larger curling issues down the line. Keep the mounting points tight and free of dust or debris. As with any precision equipment, routine inspections ensure your screen stays flat. Establish a monthly check routine—think of it as the oil change for your car—that keeps everything functioning smoothly and prevents minor issues from snowballing into major repairs.
When it comes to setting up a home theater, many enthusiasts believe they understand all the nuances of projection screens and related technologies. However, even seasoned users often fall into traps due to misconceptions or overlooked details. Let’s dig deeper into some prevalent myths and advanced pitfalls that can impact your viewing experience. Contrary to popular belief, *not all ALR (Ambient Light Rejecting) screens are created equal*. Many assume that a higher gain value always translates to brighter images, but in reality, excessive gain can cause hot spotting and uneven brightness, especially in larger screens. Experts recommend selecting a gain tailored to your room’s ambient lighting and projector specs; for instance, a gain of 0.8 often strikes a good balance, as highlighted in recent studies on screen gain impacts.
Another widespread mistake involves fixed frame screens. Some think that their rigid frame guarantees long-term flatness and optimal performance. Yet, if the frame isn’t constructed with quality materials or is improperly installed, warping and sagging can develop over time. It’s a common oversight to dismiss the importance of sturdy framing and proper tensioning, which are vital to maintain flatness and prevent wrinkles. Regular inspection and correct installation practices are essential; our comprehensive installation guide delves into these details.
Now, about screen gain—many believe that high gain always enhances image brightness. But, higher gain screens often sacrifice viewing angles and image uniformity, leading to potential hotspot issues. This is especially true for screens with gains above 1.3, which can create glare and diminish picture consistency. Moreover, the assumption that all pull-down or motorized screens are equally resistant to waves and wrinkles is false. Mechanical tension and environmental factors play significant roles, and neglecting these can result in sagging edges or ripple effects. To avoid this trap, ensure your screen’s tensioning system is properly maintained, and consider environmental controls.
For advanced users asking, “Why do some high-gain ALR screens exhibit hotspots or color shifts under bright projectors?” the answer often lies in the screen’s microstructure and coating technology. A recent research article explains that innovations in nanostructured coatings can manipulate light reflection for better ambient light rejection while maintaining color integrity. Choosing a screen with such cutting-edge technology can be beneficial, especially in rooms with high ambient light.
Remember, these nuances and pitfalls are often overlooked because of misconceptions propagated by marketing or incomplete knowledge. Doing thorough research and understanding the trade-offs can significantly elevate your theater experience. For comprehensive tips, check out our guide on screen gain optimization, and avoid falling into common traps.
Have you ever fallen into this trap? Let me know in the comments!Maintaining your projection screen’s optimal condition over time requires the right tools and proven methods. Personally, I rely on a combination of specialized tensioning kits and environmental monitoring devices to ensure my screen remains flat and free of wrinkles. A high-quality tensioning kit, such as the professional tensioning set, allows precise adjustments without damaging the fabric, preventing sagging or curling. Additionally, I use a digital hygrometer and thermometer to keep room conditions steady, as fluctuations in humidity and temperature can cause material warping or contraction, leading to wrinkles or edge curl. For keeping the fabric clean and free of dust, a soft microfiber cloth combined with compressed air is my go-to, minimizing wear and tear. It’s important to calibrate and replace tools periodically to maintain accuracy, especially the tensioning mechanisms which can loosen over years of use. Prediction-wise, as screen technology advances with nanocoatings and new fabrics emerging, I believe maintenance will incorporate smart sensors that automatically alert you to tension loss or environmental risks, simplifying care routines. > How do I maintain long-term projection screen quality? Regularly inspect tension points and environmental conditions, and invest in quality tensioning tools. By doing so, you prevent early wear and extend your screen’s lifespan significantly.
Lessons From My Projection Screen Journey
One hard-won insight was realizing that patience and precise tensioning are more powerful than quick fixes. Rushing to tighten or re-install without understanding the root cause often leads to recurring curl issues. I learned that consistent environmental control, like maintaining room humidity, plays a crucial role—something I overlooked initially. Applying quality tensioning tools early in the setup process saved me endless headaches later. Lastly, I discovered that choosing the right fabric and frame materials—not just the screen size—makes all the difference in long-term flatness and image clarity.
Tools and Reads That Changed My Approach
I swear by the pro tensioning kits for maintaining optimal tension over years, which is vital for preventing curl recurrence. For deeper understanding, the comprehensive guide on fixed frame and ALR screens helped me make informed choices about materials and technology. The screen gain articles taught me how gain impacts image uniformity, especially under challenging ambient light conditions. These resources combined have revolutionized my home theater experience.
Let Your Passion Drive Your Next Step
Taking control of your projection setup means embracing ongoing maintenance and learning—your theater deserves nothing less. My hope is that you’re inspired to experiment, fine-tune, and ultimately master your viewing environment. Whether you’re correcting curl, selecting materials, or adjusting tension, remember that each small step brings you closer to cinema-quality perfection. Don’t wait for worse issues—start applying these insights today, and transform your home theater into the immersive escape you’ve always wanted. What’s the first fix you’re excited to try? Let me know down below!
One Response
Reading through this detailed guide really resonated with my own experience trying to fix edge curl in my retractable projector screen. I particularly appreciate the emphasis on proper tensioning and environmental control—these are often overlooked but crucial aspects of long-term maintenance. Over the past year, I’ve found that monitoring my room’s humidity with a digital hygrometer made a noticeable difference in preventing further curling, especially during seasonal changes. I’ve also been considering upgrading to a fixed-frame screen made from a more rigid material like MDF to avoid warping. Has anyone had experience transitioning from a pull-down to a fixed-frame for better flatness? Also, I wonder if incorporating smart tensioning systems, as the article suggests, could further streamline long-term upkeep. It’s fascinating how small adjustments can significantly improve picture quality, especially with 4K and HDR content now standard. Would love to hear from others about their maintenance routines or any DIY tips that worked well.