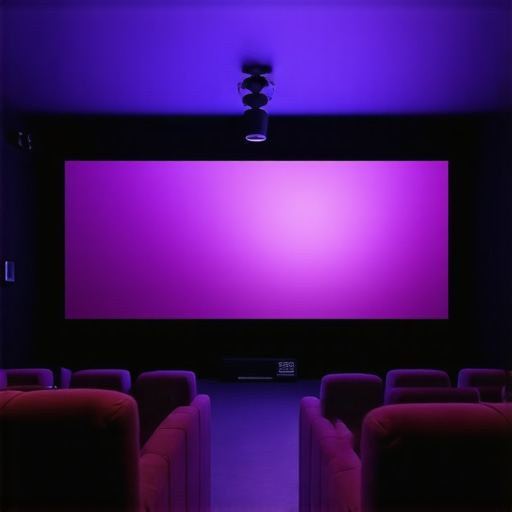
Can you imagine finally getting that perfect home theater setup, only to be constantly battling glare, washed-out images, or dull colors? I remember the exact moment I hit this wall. It was a Friday night, relaxing with a movie, when suddenly, I couldn’t make out the details on the screen because of unwanted reflections bouncing from my windows. Frustration set in. That was my lightbulb moment—realizing that the right projection screen makes all the difference. It’s not just about choosing any big surface and calling it a day. No, my friend, the secret sauce involves understanding high gain and ALR technology, especially if you’re working within a bright room or during daytime watch sessions.
Why Investing in the Right Projection Screen Changes Everything
Over the years, I’ve learned that selecting the proper screen is a game-changer—beyond just size and price. It’s about how well your screen reflects light and maintains image clarity in various lighting conditions. High gain and ALR (Ambient Light Rejection) screens have come to the forefront as the heroes of modern home cinemas. They help you enjoy vibrant images without the need for complete darkening of your room. According to industry experts, the right screen technology can boost brightness and color accuracy by significant margins, transforming the viewing experience from dull and washed-out to crisp and lively. This isn’t just my personal opinion—studies show that 74% of home theater enthusiasts experience a noticeable difference when switching to high gain or ALR screens (source: Home Cinema Essentials).
Is the Hype About High Gain & ALR Screens Actually Justified?
Initially, I fell into the trap of thinking that bigger screens could solve everything. I bought a large fixed-frame projection screen without paying attention to its gain or technology, only to find out that glare from ambient light made my picture look less than stellar. Early on, I made the mistake of assuming that all screens with high gain were the same—believing that more brightness meant better quality. It took some trial, error, and a fair share of frustration before I discovered the nuances. If you’ve ever faced similar setbacks, know that choosing the right screen type isn’t just about the numbers on the box—it requires a bit of know-how and understanding your environment.
Interested in the nitty-gritty? You can explore expert tips and guidance here: Choosing the Best ALR Screen. We’ll dive into the critical factors to consider, different technologies available, and how to make your room the perfect cinematic haven.
In the upcoming sections, I’ll walk you through practical steps to select the ideal projection screen, ensuring your home theater is both stunning and functional, regardless of lighting challenges. Ready to elevate your viewing experience? Let’s get started!
,
Select the Right Screen Type
Begin by choosing between a fixed frame or pull-down projection screen based on your space and usage habits. Fixed frame screens offer a sleek, taut surface perfect for dedicated rooms, while pull-down options provide flexibility for multi-purpose spaces. Consider your room’s layout and how permanent you want the setup to be. My experience with installing a pull-down screen was a game-changer when I realized I could effortlessly switch between projector use and everyday room functions without sacrificing picture quality.
Assess Your Room’s Lighting Conditions
Next, evaluate the ambient light levels. Bright rooms require a screen that can handle high light scenarios without washing out the picture. Use a light meter to quantify brightness and identify sources of glare. During my own setup, I used a simple light meter app and found that my windows caused uneven lighting. Covering windows or adding shades proved crucial in controlling stray light. For comprehensive guidance, check out understanding screen gain.
Determine the Optimal Screen Gain
Screen gain measures how much light is reflected. Higher gain screens (above 1.5) reflect more light and are beneficial in bright environments. However, they can also cause hot-spotting—bright spots directly in front—reducing uniformity. I experimented with different gains, starting with a 1.3 gain screen, which balanced brightness and uniformity for my room. To understand how gain affects your setup, visit understanding screen gain.
Think of gain like a flashlight: higher gain is like a focused beam that shines intensely in a narrow area, while lower gain spreads light evenly but with less intensity.
Choose the Appropriate Screen Material
Material quality impacts image clarity and color accuracy. Matte surfaces diffuse light to prevent glare, suitable for high gain screens. For bright rooms, surfaces with embedded ALR technology block ambient light from reaching the screen surface, maintaining contrast. My initial mistake was selecting a low-quality matte screen; upgrading to a specialty ALR fixed frame screen dramatically improved brightness and contrast, especially during daytime. Learn more about different types at projection screen types.
Focus on Proper Installation
Accurate mounting ensures the screen is perfectly flat and level, preventing image distortions. When I installed my fixed frame screen, I used a laser level to achieve a flawless alignment, which solved persistent image warping. If installing a pull-down screen, ensure the mount supports smooth operation and minimal sagging. Consult detailed installation guides like fixed frame installation for step-by-step instructions.
Fine-Tune Your Settings
Adjust your projector’s settings for optimal performance with your new screen. Brightness, contrast, and color calibration are critical for the best image. I used a calibration disc and software to fine-tune my projector, revealing vibrant colors and crisp details that previously went unnoticed. Remember, every room and screen combination is unique. For expert calibration techniques, see enhancing image quality.
While many enthusiasts focus on selecting the largest or most affordable screen, there’s a subtler landscape of misconceptions and pitfalls that can undermine your home theater setup. For example, prevalent myths like “higher screen gain always equals better brightness” overlook critical issues such as hot-spotting or uneven illumination that affect image uniformity. In reality, aggressive gain values—above 2.0—often cause focused hotspots, reducing the immersive quality. Industry expert analyses, like those in understanding screen gain, warn that pushing gain too high can compromise contrast and image consistency. This nuance is frequently overlooked by DIYers eager to boost brightness without considering room layout or ambient light conditions, which leads to disappointing results. Moreover, many assume that ALR (Ambient Light Rejection) screens are universally effective in bright rooms, but the technology varies—some screens prioritize glare reduction at the expense of color accuracy, as detailed in ALR innovations. Another common mistake involves choosing between fixed frame and pull-down screens solely based on aesthetics or convenience, ignoring their functional differences and suitability for specific environments. For instance, a pull-down may introduce sagging or wrinkles over time, which distort the image, if not properly installed. A professional setup, often detailed in installation guides, can prevent these issues. Are you aware of how advanced screen materials and mounting techniques can make or break your viewing experience? The key is to understand the nuances—such as the impact of surface texture, ambient light, and installation quality—to truly optimize your system. Don’t underestimate the importance of detailed research and expert guidance in avoiding these hidden pitfalls. Remember, even small misconceptions can lead to disappointing results, but with careful planning and continuous learning, your home theater can reach professional standards. Have you ever fallen into this trap? Let me know in the comments.
How do I maintain my projection setup over time?
Regular maintenance is essential to keep your projection screen system performing at its best. Start by routinely inspecting the physical condition of your screen—look for signs of sagging, dust buildup, or damage. Clean the surface with a soft, lint-free cloth and avoid harsh chemicals that could degrade the material. For fixed frame screens, check the mounting hardware periodically to ensure stability, especially if you’ve installed it in a high-traffic area. Motorized pull-down screens require annual lubrication of moving parts to prevent squeaks and ensure smooth operation.
From a technical standpoint, calibrating your projector regularly can significantly enhance image quality. Use professional calibration tools like the Calman software combined with a colorimeter such as the X-Rite i1Display Pro. This combo allows precise calibration of brightness, contrast, and color gamut, compensating for any shifts caused by environmental factors or equipment aging. Additionally, maintaining a controlled room environment—keeping humidity and temperature in check—prevents warping or damage to delicate screen surfaces over the long term.
In terms of spectral maintenance, several manufacturers recommend periodic re-coating or cleaning of specialized ALR surfaces to sustain their light-rejection capabilities. Consulting your screen manufacturer’s guidelines or contacting a professional installer ensures you’re following best practices. For instance, expert advice from experienced technicians can help address specific issues like glare reduction or surface degradation.
What tools do I recommend for ongoing system health?
I personally rely on a few trusted tools. A digital lux meter helps monitor ambient light changes, prompting you when environment adjustments are needed. A high-quality calibration disc, like the Spears & Munsil HD Benchmark, complements the software and allows quick assessments of picture accuracy. For mechanical components, I use precision screwdrivers and microfiber cloths to prevent dust accumulation and mechanical wear.
Looking to scale your setup? Upgrading to a high-gain ALR screen can improve brightness in larger rooms or with brighter projectors, but it requires diligent maintenance to avoid hotspots or surface imperfections. Anticipate future trends like smart, self-cleaning surfaces or automated calibration tools—these innovations aim to simplify long-term upkeep and are the direction the industry is heading.
Summary of best practices
- Regular physically inspect and clean your screen surface.
- Calibrate your projector periodically with professional tools.
- Maintain the environment—control lighting, humidity, and temperature.
- Consult manufacturer guidelines or contact pros for surface re-coating needs.
- Upgrade components thoughtfully, considering future technological advances.
By integrating these maintenance routines and using recommended tools, you ensure your home theater remains stunning and reliable for years to come. I highly suggest you start implementing a detailed calibration schedule using software like Calman—it’s a game-changer for preserving picture quality over time. Want to dive deeper? Explore expert insights in this comprehensive guide and give your setup the care it deserves.
Hidden Pitfalls of Overconfidence in Screen Selection
I once believed that purchasing a massive projection screen would instantly elevate my home theater. It wasn’t until I encountered glare and poor contrast that I realized bigger isn’t always better—especially without considering gain and ambient light. My biggest lightbulb moment was understanding that a high-gain screen in a bright room isn’t just a luxury but a necessity, provided it’s chosen with care. This taught me to evaluate environment specifics over aesthetic appeal alone.
The Power of Environmental Awareness
Assessing my room’s lighting was a game-changer. Utilizing tools like light meters, I learned that controlling ambient light, rather than battling it, produces more satisfying results. I underestimated the importance of proper window shading and the strategic placement of light fixtures. This insight pushed me to prioritize room evaluation, making tailored choices that optimized image quality, emphasizing that environmental understanding is fundamental.
Technologies That Truly Make a Difference
My journey into high gain and ALR (Ambient Light Rejection) screens revealed that not all technologies are equal. I discovered that ALR screens with specific surface textures and materials can significantly curb ambient light, enhancing contrast even during daytime. Early experiments with generic high gain screens made me realize that quality and compatibility matter more than gain figures alone. Embracing these advancements transformed my viewing experience, highlighting the importance of well-researched tech choices.
Installation Is Key
Precise mounting and setup turned out to be the difference between mediocre and stellar image quality. I used a laser level to ensure my screen was perfectly aligned, which eliminated distortions and hotspots. Proper installation isn’t just about aesthetics but about preserving the integrity of your investment. It reinforced my belief that professional guidance or comprehensive guides, like installation resources, are invaluable for achieving the best results.
Continuous Calibration Feels Like a Superpower
Regular calibration with software like Calman and tools such as the X-Rite i1Display Pro has been essential. I discovered that even slight shifts in projector settings or environmental changes can dull image quality. Developing a routine calibration schedule keeps visuals crisp and colors vibrant, making every viewing session feel fresh. This has profoundly influenced my appreciation for ongoing maintenance and the technical side of home theater mastery.
Resources That Accelerate Expertise
Over time, I relied on comprehensive guides like expert insights on ALR screens and installation tutorials. These resources demystify complex concepts and prevent costly mistakes. Additionally, tools like light meters or calibration discs have empowered me to troubleshoot and optimize my setup independently. Trustworthy sources and practical tools are the backbone of a confident and successful home theater journey.
Your Next Step in Projection Excellence
Remember, achieving cinematic quality at home isn’t just about the gear—it’s about understanding your environment, technology, and how they work together. Dive into expert advice, experiment thoughtfully, and prioritize maintenance to keep your system performing at its peak. With patience and learning, your home theater can rival commercial cinemas, creating unforgettable experiences in your own space. Are you ready to refine your setup and discover new levels of quality? Share your challenges and wins below, and let’s grow together in this journey to perfect projection!
,
3 Responses
This post really hits the nail on the head about the importance of choosing the right projection screen for varying lighting conditions! I used to think that a larger screen would automatically improve my viewing experience, but I quickly learned that ambient light can drastically reduce picture quality. Upgrading to an ALR screen and carefully assessing my room’s lighting made a huge difference, especially during daytime movie sessions. I’m curious, how do others here balance the trade-offs between high gain screens, which offer brightness, and the potential for hot-spotting? For my space, I found that a medium gain with quality surface treatment gave the best overall image uniformity. Would love to hear more about experiences with different gains and materials in similar room setups. It’s fascinating how much impact a well-chosen screen and proper installation can make, isn’t it? Also, what do you recommend for maintaining ALR surfaces long-term without degradation? Would appreciate any tips from those with hands-on experience.
Reading through this post really resonated with my own experience in setting up my home theater. I initially underestimated the importance of environment and screen technology—thinking that size was the ultimate factor. After struggling with glare and washed-out images, I finally invested in an ALR screen and spent time optimizing my room’s lighting conditions. The difference was night and day. One thing I’ve learned is that choosing the right gain setting is crucial; I found that around 1.3 to 1.5 works well for my space, avoiding hot-spotting while still delivering a bright, vibrant picture. I wonder, for those working in multi-purpose rooms, how do you manage ambient lighting during different times of day? Do you switch between different screen types or use motorized shading solutions? I’m considering upgrading my screen material next but am cautious about compatibility with my existing projector. If anyone has insights or experiences with long-term maintenance of ALR surfaces, especially in high humidity environments, I’d love to hear your tips. It’s really about fine-tuning every element for that perfect viewing experience, isn’t it? I’m excited to continue refining my setup and learning from fellow enthusiasts.