I remember the exact moment I realized my pull-down projection screen was more than just a little taut—it was actively fighting me. I reached up, tugged, and suddenly felt that jarring snap as the spring tension exceeded safe limits. My first instinct was panic—what if I had broken it? But then I thought, “Wait, this isn’t the end; it’s an opportunity to learn how to fix it.” Over time, I discovered that a pulled-tight screen isn’t inevitable, and, more importantly, it’s fixable. If you’ve ever experienced that frustrating feeling when your screen feels more like a drum than a smooth surface, you’re not alone. I’ve been there, and I want to walk you through how to address it effectively.
Why Your Pull-Down Screen Might Be Too Tight—and Why You Should Care
The tension in your projection screen isn’t just a minor detail—it directly impacts picture quality and longevity. When a screen is excessively taut, it can cause image distortions, permanent warping, or even damage the spring mechanism, leading to costly repairs or replacements. Moreover, with the advent of high-gain and ALR (ambient light rejecting) screens, maintaining proper tension has become even more critical for optimal performance. According to experts, improper tension can cause hotspots and uneven brightness, which ruin the viewing experience. That’s why understanding how to keep your screen tension in check is a vital part of maintaining a stunning home theater. Do you remember the last time your screen sagged or fluttered during a show? If so, keep reading, because I’ll share practical solutions that work based on my own frustrating but ultimately rewarding experiences.
Is Fixing a Tight Pull-Down Screen Really Worth the Hassle?
Early on, I made a mistake that cost me time and money—trying to force the spring mechanism back into shape without understanding how it functions. I assumed that more tension meant better quality, but that quickly turned into a tense, stressful ordeal. The key is to approach these problems with patience and proper knowledge, rather than brute force. For detailed guidance on choosing the right type of screen based on your room and usage, I recommend checking out this resource.
So, if you’re tired of flickering images, sagging edges, or waking up to a battleground of springs every morning, you’re in the right place. I’ll walk you through four proven methods to restore your screen’s tension and prevent future issues, turning that frustration into pride in your home entertainment setup. Ready to get started? Let’s dive into the fixes that will extend the life of your pull-down screen and keep your picture perfect.
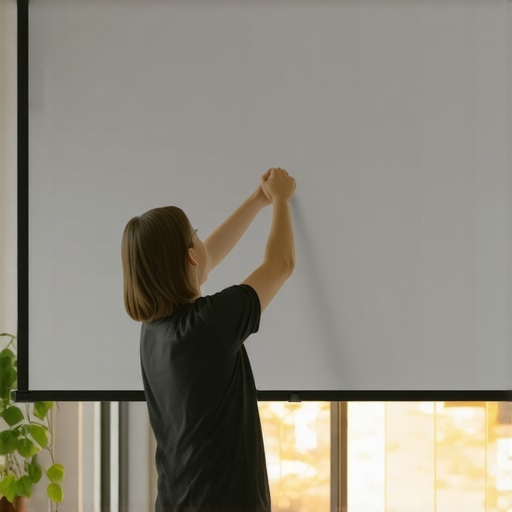
Assess Your Screen’s Tension Carefully
Begin by evaluating whether your screen is too tight or loose. Grip the bottom edge and gently tug inward; if it resists strongly or springs back aggressively, it’s overly tight. In my experience, using a cloth or gloves can help prevent damage during inspection. This initial step is crucial because improper tension can harm your screen’s lifespan.
Loosen the Spring Mechanism Methodically
Locate the spring tensioner, usually at the top or sides of the pull-down assembly. Using a screwdriver or the included adjustment tool, turn the tension screw counterclockwise to release spring tension gradually. I once hurried this step and caused a sudden snap, so take your time. Turning incrementally ensures safety and control, preventing damage or injury.
Apply Consistent Adjustments in Small Increments
Make small adjustments—about quarter-turns—and pause to test the tension after each. For example, after loosening, pull down the screen slightly; if it sags unevenly or feels loose, further adjust. I remember a time when I over-loosened and had to re-tighten, which was frustrating. Patience here guarantees a smooth, even tension across the surface.
Use a Tensioning Tool for Precision
Some pull-down screens come with a tensioning mechanism or recommend specific tools. If yours does, follow the manufacturer’s instructions meticulously. If not, a pair of needle-nose pliers can help grip and turn the tension screw more precisely. This helps avoid over-correcting, which can lead to fluttering or wrinkles during projection. I found this method enhanced stability significantly, especially on larger screens.
Test and Fine-Tune the Tension
After initial adjustments, slowly retract and deploy the screen several times. Observe for waviness, flutter, or edges that sag. Adjust as needed, applying the same incremental steps. Remember, a slight over-tension can cause tearing or warping, so aim for a firm but not overstressed surface. During my last tweak, I kept adjusting until I achieved a taut, wrinkle-free surface that remained stable over days.
Securement and Final Checks
Once satisfied, ensure all screws are tightened securely but not overly tight. Check that the tensioning mechanism is locked in place. It’s wise to inspect periodically—every few months—to maintain the ideal tension and catch issues early. Consistent maintenance extends your screen’s life and preserves picture quality.
For more detailed guidance tailored to your specific screen type, I suggest consulting this resource. Proper tension ensures your projection surface remains smooth, vibrant, and durable—saving you money and enhancing your viewing experience.
Many home theater enthusiasts and even seasoned professionals often fall prey to misconceptions about screen gain, ALR screens, fixed-frame setups, and pull-down models, leading to suboptimal performance. First, a common myth is that higher screen gain always translates to brighter images and better clarity. However, in reality, overly high gain surfaces—like 2.0 or above—can cause hotspots and uneven brightness, especially in larger screens or rooms with ambient light. For example, the belief that a 1.5 gain is universally ideal ignores room-specific lighting conditions; optimal gain depends on your environment and projector lumens, as discussed in expert guides like this resource.
Second, many mistake ALR (Ambient Light Rejection) screens for being a magic fix for bright rooms, but not all ALR materials perform equally across different projector types or viewing angles. Some assume that all ALR screens share the same effectiveness, yet in reality, certain high-gain ALR surfaces can introduce glare or hotspotting if not carefully selected. It’s crucial to match your ALR screen to your projector’s output and room parameters—something that detailed reviews like this article clarify.
Another misconception is that fixed-frame screens are inherently superior to pull-down models. While fixed frames often provide a taut, wrinkle-free surface ideal for light-controlled rooms, they can be less practical in spaces where ceiling installation or temporary setups are needed. Conversely, pull-down screens offer flexibility, but their tensioning mechanisms require frequent maintenance to prevent sagging or waviness. My experience shows that neglecting tension adjustments can lead to image distortion. For an in-depth comparison and setup tips, check out this comprehensive guide.
Now, let’s address a more advanced question: how does projection screen gain interact with projector lens lens characteristics to affect image quality? You might wonder, ‘Is it better to prioritize low gain for wider viewing angles or high gain for brightness?’ The answer depends on your project’s specific requirements; for example, low gain screens (around 0.8) minimize hotspots and provide better uniformity, especially with ultra-wide lenses or short-throw projectors, as discussed in this resource. Failing to consider this nuance can cause washed-out images or uneven brightness, particularly in rooms with strategic seating arrangements.
Finally, a common pitfall is selecting a projection surface based solely on specifications without considering environmental factors like room reflectivity, ambient light levels, or projector specs. Do your homework: test different materials and gain levels, and verify compatibility with your projector to avoid costly mistakes. Remember, the goal isn’t just a bright picture but a balanced, vibrant, and immersive viewing experience. Have you ever fallen into this trap? Let me know in the comments and share your stories!
Invest in Precision Tools for Consistent Performance
To maintain your projection screen effectively over time, I personally rely on a high-quality tension meter, such as the SECO-LARM Tension Gauge. This device allows me to measure the spring tension accurately, ensuring the surface stays taut and wrinkle-free without risking over-stretching that could cause damage. I use it every few months during routine checkups and upon noticing any waviness. Additionally, a digital level helps verify that the screen is perfectly aligned, preventing skewed images that can detract from your viewing experience.
Simplify Maintenance with Smart Tools
Another tool I recommend is a spring tension adjustment wrench, which streamlines the process of tightening or loosening tension screws. This reduces wear on the mechanism and makes adjustments safer and more precise. For regular cleaning, I use a microfiber cloth combined with a specialized screen cleaner to remove dust and fingerprints without damaging the surface. Regular cleaning preserves screen brightness and color accuracy, especially vital for high-gain or ALR screens where surface imperfections can cause hotspots or glare.
Keep Long-Term Results in Mind
Implementing a scheduled maintenance routine is crucial. I set reminders every three to six months to inspect and adjust tension, check for sagging, and clean the surface. Proper storage—such as retracting the screen fully when not in use—also prolongs its lifespan. For fixed-frame screens, occasionally tightening the velvet borders ensures that the fabric remains tight and wrinkle-free.
Scaling Your Setup with Advanced Adjustments
If you’re expanding your home theater or upgrading your projector, consider investing in a motorized tensioning system. Automated tensioners can be programmed to recalibrate tension after installation or during seasonal changes, ensuring consistent quality without manual effort. As projection technologies evolve rapidly, staying proactive with your maintenance tools allows you to adapt quickly and avoid costly replacements. For detailed insights on integrating such systems, visit this resource.
How do I maintain my projection screen effectively over time?
Maintaining your screen involves a combination of regular inspections, precise adjustments using specialized tools, and ongoing cleaning. I recommend periodically measuring spring tension with a tension gauge, using a spring adjustment wrench, and cleaning the surface with a microfiber cloth and quality cleaner. For larger setups or frequent use, investing in motorized tensioning systems can save time and prevent issues caused by shifting or sagging. Remember, consistent care not only preserves image quality but also extends the lifespan of your investment, allowing you to enjoy stunning picture clarity for years to come. Don’t hesitate to try out a tension meter or upgrade to an automated system—these small steps make a significant difference in the robustness of your home theater environment.
The Hard Lessons That Changed My Perspective on Projection Screens
One of the most eye-opening experiences I had was discovering how little I knew about maintaining proper tension on my pull-down projection screen. I once believed that a tight surface meant clearer images, but I learned the hard way that over-tightening can cause warping, damage, and degraded picture quality. That realization pushed me to experiment with tension adjustments, tools, and expert advice, transforming my approach and dramatically improving my home theater setup.
My Secret Tools for Consistent Screen Performance
Over time, I developed a toolkit that includes a high-precision tension gauge, a spring adjustment wrench, and a microfiber screen cleaning cloth. These tools have become my trusted allies in maintaining a perfectly taut, wrinkle-free projection surface. They provide the control I need to fine-tune tension accurately and prevent issues like waviness or sagging, saving me time and costly repairs. If you’re serious about a stellar picture, investing in such tools is a game-changer.
Embracing the Power of Proper Maintenance and Knowledge
Regular inspections and gentle adjustments are vital. I set reminders every few months to check tension levels and surface cleanliness. A stable, well-maintained screen not only ensures outstanding image quality but also extends the lifespan of your investment. Remember, a little effort toward routine care yields stunning results that make your home theater truly special. Start small—your future self will thank you for the crystal-clear, wrinkle-free projection surface you’ll enjoy for years to come.
One Response
Wow, this post really hit home for me! I recently had to do a tension adjustment on my pull-down screen after noticing flickering images and a slight waviness during movies. I didn’t realize how crucial proper tension is for image quality and the longevity of the screen until I read this. Using a tension gauge and following the incremental adjustment tips made the process much smoother and safer. One thing I learned the hard way was how over-tightening can actually cause warping—something I experienced firsthand. Now I regularly check the tension, and my picture quality has improved noticeably. I wonder, do others here use any specific tools or methods for routine maintenance? I’d love to hear recommendations on affordable yet precise tension meters or adjustment wrenches that work well for different screen types. Keeping my home theater in top shape is a priority, and these small but effective steps seem to make a big difference.