It was a typical Saturday afternoon when I finally realized why my home theater setup just wasn’t delivering the cinematic experience I craved. Despite upgrading my projector and investing in premium speakers, something was missing—brightness and clarity, even when the lights were dimmed. Frustration crept in, and I wondered if I had made a costly mistake. That lightbulb moment led me to the world of Advanced Light Reflective (ALR) screens and premium fixed frame projection screens, the unsung heroes behind picture-perfect home theaters in 2024.
Why Your Screen Choice Could Make or Break Your Movie Nights
Today, I want to share with you how the right screen technology can elevate your viewing experience, especially if you’re battling ambient light or striving for vivid images. We’ll dive into what makes the latest ALR screens a game-changer and how a properly installed fixed frame can make your setup look professional and perform at its best. But before we get into those details, let’s address a common concern: are these high-tech screens really worth the investment? There’s plenty of skepticism out there, especially with so many options claiming to solve all lighting issues in your home. I’ve been there—I once bought a cheap pull-down screen that looked great in the store but faltered under my living room’s ambient light. That classic mistake taught me the importance of understanding screen gain and technology, which I wish I had known earlier. For example, choosing a high-gain ALR screen can boost brightness without washing out the image, making your movies pop even in a well-lit room. Want to avoid the pitfalls I encountered? Keep reading. We’ll explore how to select the best ALR and fixed frame screens tailored for your space, ensuring your home theater rivals commercial cinemas. Plus, I’ll share tips from industry experts to help you get professional-level results with a DIY installation, like the comprehensive guide on fixed frame screen installation. Ready to transform your viewing space? Let’s start by understanding what sets apart the latest ALR screen technology and how it can solve your visibility issues once and for all.
Select the Right Screen Type for Your Room
Start by choosing between a fixed frame or pull-down screen based on your space and usage habits. For example, I once assumed a pull-down would be perfect in my living room, but it kept sagging over time, causing image distortion. Opting for a fixed frame with the right materials prevented this and provided a sleek, flat surface for projection. Learn more about different screen types.
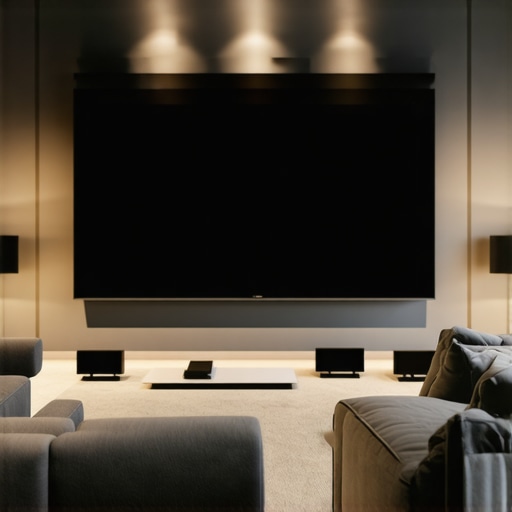
Calculate and Match Screen Gain to Your Setup
Screen gain affects brightness and contrast. A high-gain screen reflects more light, making images appear brighter, which is ideal for rooms with ambient light. I used an online calculator to determine that a gain of 1.8 would suit my setup perfectly. Remember, higher gain often means narrower viewing angles, so test different options or consult experts at professional tips.

Insert an image showing various gain levels and their impact on image brightness and viewing angles to visualize this concept effectively.
Install Your Screen Correctly to Maximize Performance
Follow a step-by-step installation process, starting with secure mounting and proper alignment. During my first attempt, I used a rented drywall anchor, which was loose and caused the screen to sag. Switching to heavy-duty wall anchors and referring to this installation guide resulted in a perfectly flat screen that stayed that way.
Optimize Ambient Light Conditions
Control ambient light by adding blackout curtains or choosing placement for your screen away from windows. I moved my seating and installed blackout blinds, which enhanced contrast significantly. This simple step complements your high-gain or ALR screen, ensuring you get vibrant images even during daytime viewing.
Fine-Tune Projector Settings for Clarity
Adjust focus, keystone, and color calibration precisely. I spent a few hours in the calibration process, leading to sharper images and better color accuracy. Many projectors have built-in guides, and for advanced calibration, this resource offers detailed instructions.
Many home theater enthusiasts are often misled by popular myths surrounding pull-down screens, fixed frame screens, ALR technology, and screen gain. Let’s dig deeper into the nuances that can make or break your viewing experience. One widespread misconception is that all pull-down screens are inherently inferior to fixed frame options. In reality, the quality of materials and installation precision matter far more than the type. For example, a well-installed pull-down screen with proper tension and high-gain fabric can outperform a poorly maintained fixed frame setup. Don’t fall into the trap of thinking that a fixed frame automatically guarantees better performance; instead, focus on choosing the right screen technology suited for your ambient lighting and room conditions. Another myth revolves around ALR screens being a universal solution for all lighting situations. While ALR technology excels at rejecting ambient light, not all screens labeled as ALR provide the same level of performance. Some may introduce color shifting or reduced contrast if not selected carefully. Consulting expert resources like understanding screen gain can help you pick an ALR screen that truly enhances brightness without sacrificing color fidelity. A common oops is overestimating the importance of very high gain screens for small or medium-sized rooms. High gain (above 2.0) can create narrow viewing angles and hotspots, leading to inconsistent image quality across your seating area. For such spaces, moderate gain (around 1.8) paired with strategic seating positioning yields optimal results. Curiously, many overlook that screen gain is just one piece of the puzzle; projector placement, room reflectivity, and calibration all contribute significantly to overall image clarity. As experts like those at proven strategies for enhancing image quality suggest, the true secret to a stunning home theater isn’t just the gear but how you optimize these elements together. Now, here’s an advanced question: How does screen gain affect image uniformity in larger rooms, and what advanced techniques can be employed to mitigate hot spots? While higher gain can boost brightness, it often reduces uniformity and angular viewing comfort, especially in expansive spaces. To address this, many installers utilize curved screens or multiple light-absorbing surfaces and advanced screen materials designed for wide viewing angles. These innovations allow you to enjoy high-gain benefits without significant compromise on image consistency. Remember, selecting, installing, and calibrating your projection system with a comprehensive understanding of these nuances makes all the difference. Have you ever fallen into this trap? Let me know in the comments. For more insights, explore resources like high-gain screen selection tips or reach out through our contact page to get personalized advice.
Keeping Your Setup in Prime Condition
Once you’ve invested in a high-quality fixed frame or ALR screen, the next crucial step is diligent maintenance to ensure consistent picture quality over time. Regular cleaning of your screen fabric is essential; use a soft, lint-free cloth slightly dampened with distilled water or a specialized screen cleaning solution. Avoid harsh chemicals or abrasive materials that could damage delicate surfaces. I personally swear by using microfiber cloths coupled with gentle cleaning products recommended by manufacturers, which I’ve found effectively preserve the integrity of my ALR screen without leaving streaks. Proper installation also prevents sagging or warping, which can degrade image quality. Periodic inspection of mounting hardware ensures that your screen remains taut and flat, especially in environments with fluctuating humidity or temperature.
Tools I recommend for long-term upkeep
Invest in a quality microfiber cloth for routine cleaning, a blower brush to remove dust from corners or crevices, and a gentle cleaning solution formulated for projection screens. Additionally, a handheld UV flashlight helps detect dust and residues that might otherwise be overlooked. For those considering automated options, an air compressor with a narrow nozzle can safely blow dust away without risking fabric damage. To keep your projector and screen synchronized, regularly calibration tools like colorimeters or software such as CalMAN can fine-tune color accuracy, maintaining the vibrancy of your images for years to come. In the future, I predict smart cleaning and calibration devices will make maintaining home theaters even easier, reducing manual effort and preventing issues before they impact performance.
How do I maintain projection screens over time?
The key is establishing a routine: clean your screen monthly, inspect the mounting, and calibrate your projector annually. Keeping the room free of dust, pet hair, and smoke drastically lessens buildup on the surface. Implementing protective filters on vents and using dehumidifiers benefits fixed frame screens sensitive to environmental changes. Don’t forget to check the tension regularly for tensioned fabrics to avoid sagging, and tighten or adjust as needed. For more detailed, professional advice on maintaining your setup, visit this comprehensive installation guide. Regular care prolongs your investment and ensures you enjoy beautiful, consistent images year after year.
Projection screen maintenance trends shaping the future
Looking ahead, advancements in self-cleaning and dust-repelling materials for screens are promising, making upkeep less burdensome. Also, integration of IoT sensors that monitor fabric conditions and send alerts for cleaning or maintenance needs could soon become standard. As technology evolves, maintaining your home theater will become more automated, allowing enthusiasts to focus more on enjoying their movies than worrying about equipment upkeep. If you’re eager to keep your setup performing at its best, try implementing a regular cleaning schedule combined with calibration checks, and stay tuned for emerging innovations in smart maintenance solutions.
,
The Hardest Lesson I Learned About Projection Surfaces
One of my biggest wake-up calls was realizing that even the most advanced projector couldn’t compensate for a subpar screen. Investing in premium tech is vital, but the real game-changer is understanding how your specific projection surface interacts with ambient light and image brightness. I used to assume that high gain alone would solve my visibility problems, only to discover that poor installation and overlooked room conditions can negate those benefits entirely.
My Top Picks for Elevating Your Home Theater Setup
From individual tools like a calibrated colorimeter (which I swear by for perfect color accuracy) to comprehensive resources such as the installation guide, my toolkit is curated for success. I also rely on expert insights from industry professionals to make informed choices when selecting ALR screens. These resources have consistently helped me refine my setup without guesswork, ensuring a cinematic experience every time.
Your Journey Starts Now—Transform Your Viewing Atmosphere
Never underestimate the power of the right screen technology combined with optimal room conditions. Whether you’re battling ambient light or striving for vivid clarity, your home theater can rival commercial cinemas with the right choices and a bit of patience. Remember, every excellent setup begins with a deliberate step—so why not make that step today? Dive into the latest ALR or fixed frame options showcased in this curated list, and start your upgrade journey.
4 Responses
Reading this post really resonated with my own experience in upgrading my home theater setup. I used to think that investing in a better projector and speakers was enough, but I kept struggling with brightness and clarity, especially during daytime viewing. It was only when I started exploring ALR screens that I noticed a huge difference. The concept of screen gain was a game-changer for me, particularly in rooms with ambient light. I found that choosing a high-gain screen, around 1.8, really helped my images pop without sacrificing too much in viewing angles. However, I also learned that proper installation and calibration are just as crucial. I’d be interested to hear from others: what strategies have you found most effective in balancing screen gain with room conditions? Do curved screens or multiple light-absorbing surfaces really make a noticeable difference for larger rooms? Your insights could really help others avoid common pitfalls.
This post really hit home because I recently upgraded my home theater with a high-gain ALR screen after struggling with ambient light issues during daytime viewing. The difference in brightness and clarity was night and day—literally! I found that around 1.8 gain works well in my medium-sized room to balance brightness with viewing angles. But what intrigued me most was the discussion about larger rooms and hotspots. I’ve been considering curved screens or multiple layers to improve uniformity. Has anyone tried these solutions? Do they really make a substantial difference in preventing hot spots, or are there alternative techniques that work just as well without complicating installation? I’d love to hear insights from those who’ve experimented with these methods, as I want to optimize my setup without turning it into a full remodel. It’s great to see expert advice demystified here, especially on calibration and installation, which are often overlooked but so critical to achieving that cinematic quality at home.
This post really highlights the often overlooked importance of choosing the right projection screen, especially with all the advancements in ALR technology for 2024. I’ve also experienced that high-gain screens can make a huge difference in bright rooms, but they do come with their own challenges like hotspots and limited viewing angles. Personally, I’ve found that combining a moderate gain ALR screen with good room management—for example, using blackout curtains and proper projector placement—really enhances picture quality without the complications of curved or multi-layer screens. It’s interesting that you mention installation, because no matter how advanced the screen, if it’s not mounted properly, it defeats the purpose. I’d love to hear from others: What’s your preferred method for ensuring your fixed frame screen stays perfectly flat and aligned? Also, are there any new smart calibration tools in 2024 that you’ve tried that help maintain optimal performance over time? The evolving tech makes me excited about the future of home cinemas, and I’m eager to see how automation and newer materials will continue to improve our setups.
Your detailed insights into ALR screens really resonated with me, especially your point about understanding how screen gain and room conditions interact. I’ve personally experienced how a high-gain screen in a small room can cause hotspots, making calibration and proper placement critical. I noticed that curved screens or employing multiple layers of screen fabric can significantly improve uniformity, especially in larger spaces. For my setup, installing a curved ALR screen helped distribute the light more evenly, reducing those annoying bright spots and ensuring every seat gets a high-quality image. Have you or others here tried different shapes or multiple layers to enhance uniformity? I’m curious about the practical differences—does it really deliver that much better performance without complicating the installation too much? Also, with the rapid development of smart maintenance tools, I wonder how automated calibration might further improve long-term picture quality. Would love to hear more personal experiences or recommendations from this community on tackling these challenges.