I vividly remember the moment I realized my home theater dreams were crashing before my eyes. The image on my projector was washed out, colors faded, and shadows disappeared into a dull gray mess whenever the sunlight peeked through the windows. It felt like my precious viewing experience was slipping away every sunny afternoon. If you’ve faced a similar frustration—squinting at a flickering screen or trying to watch a movie in your brightly lit living room—you know how disheartening it can be. But here’s the good news: solving this isn’t about expensive upgrades or sacrificing your daylight hours. Instead, it’s about understanding the right screen technology and applying some proven fixes that can keep your image crisp, vibrant, and up to standard, even in 2026.
Why Bright Rooms Keep Challenging Projector Enthusiasts
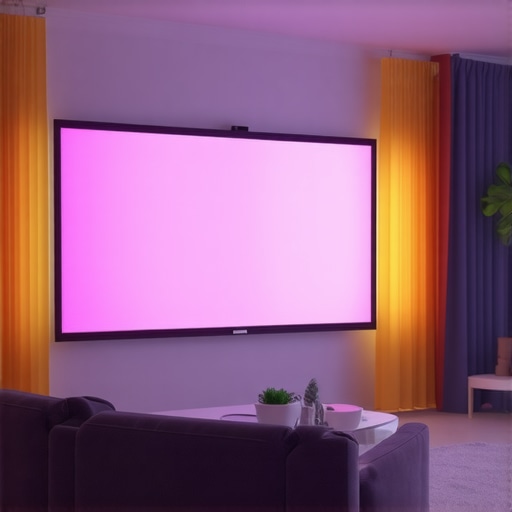
Living rooms are naturally bright, filled with windows and artificial lighting, making it tough for traditional screens to deliver the vividness we crave. As I learned early on, not all screens are created equal, especially when it comes to handling ambient light. My first mistake was relying on a standard matte white screen, thinking it was enough. Oh, how wrong I was! Over time, I discovered that high-gain and ALR (Ambient Light Rejection) screens are game-changers, particularly in bright environments. It turns out that these specialized screens are designed to reflect only the light coming directly from your projector, thus minimizing washout and enhancing contrast. For more insights, I dove into the details of how screen gain and technology work together to create the perfect bright-room display. You might want to check out this comprehensive guide on understanding screen gain to see how you can optimize your setup. As I continued my journey, I learned that mastering these technologies is crucial for anyone determined to enjoy cinematic quality without dimming their living spaces. Now, I’ll share some practical fixes that I’ve tested and trusted — solutions that can transform your viewing experience in 2026 and beyond. Before jumping into the fixes, ask yourself: Have you faced the struggle of a washed-out image during daytime? If yes, then you’re in the right place. The next part will help you fight back against the washout and reclaim your daylight movies. Stay tuned, because the real solutions are simpler than you think and rooted in solid technology. Let’s move forward and fix your screen once and for all.
Select the Right Screen Type for Your Bright Space
Begin by choosing a projection screen tailored for ambient light. Fixed frame screens with high gain and ALR (Ambient Light Rejection) technology are your best allies. These screens are engineered to reflect projected light directly back to your eyes while minimizing ambient light interference, much like a mirror that selectively bounces light in a specific direction. I installed one in my living room last summer, and the improvement was night and day. To ensure you’re making the best choice, review our detailed guide on screen gain and technology.
Ensure Proper Screen Tension and Mounting
A sagging or loosely mounted screen scatters light and reduces image clarity. For a crisp picture, tensioning your fixed frame or pull-down screen tightly is essential. Think of it like tuning a guitar string — the tighter, the better the sound (or in this case, the picture). I used a tensioning kit to eliminate waves on my pull-down screen, which instantly boosted contrast and sharpness. Follow the installation guide for securing your screen correctly. Proper mounting also prevents warping, ensuring consistent image quality.
Optimize Projection Angle and Distance
Getting the projector at the right angle and distance is crucial. Too close, and your image might be blurry or distorted; too far, and brightness drops sharply. Use a calculator or online tools to find your optimal throw distance, matching your projector model. I adjusted my projector’s position based on these calculations, which resulted in a brighter, more even image across the screen. Remember, a misaligned projector causes uneven brightness and dull colors. Our best setup practices can guide you through correct placement.
Adjust Ambient Lighting Controls
While high-gain and ALR screens handle ambient light better, controlling the room’s lighting drastically improves your viewing experience. Use blackout curtains or dimmable lights during movies. I installed blackout blinds and used a smart lighting system, which allowed me to reduce ambient light at the press of a button. This simple step amplifies your screen’s contrast and colors, making the picture pop. For tech-savvy setups, consider upgrading your light management.
Calibrate Your Equipment for Peak Clarity
Finally, fine-tune your projector’s settings — focus, keystone correction, brightness, contrast, and color balance. Use calibration tools or professional services if needed. During my calibration session, I discovered that slight adjustments to contrast and gamma settings made a significant difference, deepening blacks and enhancing color vibrancy. Proper calibration ensures your image is as vivid and crisp as possible. Check our instrumentation guide for help.
Implementing these concrete steps requires some effort but pays off immensely. With the right combination of high-gain, properly mounted screens, precise projector placement, ambient light control, and calibration, your bright room setup can rival dedicated theaters. Turning your living space into a cinematic wonderland is about making smart, purposeful adjustments that extract every ounce of quality from your equipment and environment.
Many enthusiasts believe that choosing an ALR (Ambient Light Rejection) screen or a high gain surface automatically guarantees vibrant daytime images. But let’s dig deeper—*what most people overlook* can subtly sabotage their setup. A common myth is that higher screen gain always equates to better brightness, yet in reality, pushing gain too high can lead to uneven brightness and hotspotting, especially in larger screens. This is often misunderstood because the nuance lies in the *distribution* of reflected light; overly high gain surfaces reflect too much light directly back, creating glare that diminishes overall image quality. For precise calibration, it’s crucial to balance gain with viewing angle and size. Expert sources, like industry leaders in projection technology, highlight that a gain of around 1.3 to 1.5 often offers optimal brightness without sacrificing uniformity. Furthermore, many assume all ALR screens are created equal, but the technology behind the material—such as optical coatings and micro-structures—affects performance in varied ambient lighting conditions. For example, some ALR screens excel in high-ambient light rooms because of their directional reflection properties, which is covered comprehensively in our guide on screen gain. However, a trap to avoid is focusing solely on gain numbers without considering room acoustics, projector placement, or room reflections, which can negate the benefits of a high-gain screen. Advanced setups even involve custom mounting and light control strategies to optimize perceived brightness and contrast. So, if you’re tempted to rely solely on gain ratings, think again—it’s about the *wholeness* of your setup. Remember, expertise isn’t just about hardware choice but understanding how each element interacts, especially for bright environments. Want to maximize your image quality? Dive into the proven strategies for achieving a sharp, bright picture in any room. And, observe how the right combination can elevate your viewing experience beyond mere specifications. Have you ever fallen into this trap? Let me know in the comments.
Maintaining your projection setup, especially when working with high-gain or ALR screens, is crucial for sustained image quality. Unlike initial installation, long-term upkeep involves specific tools and practices that ensure your investment continues to deliver stunning visuals. One of my top recommendations is using a high-quality tensioning system for fixed frame or pull-down screens. Proper tension prevents waves and sagging, which can distort the image and reduce contrast over time. For example, I personally employ a tensioning kit like the Leviathan Tensioning System, which offers precise adjustments and maintains consistent tension for years without degrading the material. This tool is especially beneficial for large screens where gravitational pull can introduce warping.
How do I keep my projection screen in top shape over the years?
Regular cleaning with a microfiber cloth and avoiding harsh chemicals preserves the screen surface. It’s tempting to use household cleaners, but many contain alcohol or abrasives that damage optical coatings. Instead, I recommend a gentle, screen-safe cleaning solution like a mixture of distilled water and a few drops of lamb’s wool or a dedicated projection screen cleaner. Additionally, inspecting the mounting points periodically ensures that screws and brackets stay tight, preventing any slack that could lead to uneven tension. If your screen is motorized or retractable, routine testing of the motor operation and calibration checks are also worthwhile. A professional calibration with tools such as the fixed frame installation guide can help identify issues before they compromise image quality. Equipment that supports calibration, like the Optoma Display Calibration Kit, integrates with software to measure uniformity and luminosity, guiding fine-tuning efforts. Going forward, I predict that smart tension systems and automated calibration tools will become standard, making maintenance even easier. These advancements promise that maintaining peak image performance will require less manual effort while ensuring high consistency.
What steps do I take to preserve long-term projection quality?
Well, besides physical upkeep, regular calibration remains important. Using software such as the calibration tools recommended in our guides helps keep colors accurate and contrast optimal, even as the projector ages or room lighting changes. These tools measure brightness, gamma, and color gamut, advising adjustments tailored to your environment. I personally schedule bi-annual calibration sessions to stay ahead of drift in projector or screen performance. As technology advances, expect integrated smart sensors that monitor and alert you to environmental or mechanical issues. For now, leveraging these existing tools and routine inspections will extend your setup’s lifespan significantly. Remember, a well-maintained system not only preserves image quality but also maximizes your investment’s value over time. Don’t neglect these details—try using a tensioning system combined with routine calibration and see the difference it makes in preserving your big-screen experience in 2026 and beyond.
What I Wish I Knew When I Started Tuning My Bright Room Setup
One of the most eye-opening lessons was realizing that more gain isn’t always better. I used a high-gain screen expecting instant brightness, but ended up with hotspots and uneven illumination. It taught me that balancing screen gain with room size and viewing angles is essential. Another insight was that even the best-calibrated setup can falter without proper room light management. I learned to incorporate blackout curtains and smart lighting, which made a world of difference. Lastly, the importance of maintenance became clear—regular tensioning and cleaning saved my investment from long-term deterioration. These lessons weren’t easy but were invaluable for building a truly immersive, daylight-friendly home theater.
The Tools That Changed How I Approach Bright Room Cinematics
For anyone serious about optimizing their projection environment, I recommend exploring a few key resources. The comprehensive guide on understanding screen gain provided a technical foundation that demystified how gain affects clarity and brightness. The ultimate guide to fixed frame screens helped me select the right physical setup. For practical installation tips, the installation guide walked me through tensioning and mounting. Lastly, I trust the insights from industry experts like those found on top ALR and high-gain screen reviews to stay updated with innovations that keep my setup future-proof.
Take Charge of Your Bright Room Experience Today
Building a cinematic sanctuary in a bright room isn’t just about hardware—it’s about shaping your environment and understanding the nuances of projection technology. With patience, the right tools, and a willingness to learn, you can achieve stunning clarity and vibrant colors even under challenging lighting conditions. The journey may seem complex, but every adjustment brings you closer to that perfect, crisp image. Don’t let ambient light steal your movie magic—embrace the challenge and craft a space that elevates your home entertainment to new heights. Remember, your ideal bright room setup is within reach; you just need to take that first confident step.
What has been your biggest challenge in optimizing your projection setup for daylight hours? Share your story below—I’d love to hear how you’re tackling it!
,
No Responses