I’ll be honest—early in my home theater journey, I was seduced by the idea of high-gain screens. Bright rooms? No problem! Just crank up that gain, right? But I quickly learned that this approach often led to washed-out images and poor contrast, especially as I upgraded my projector and HDR content. One evening, after a frustrating movie night where everything looked overly shiny and flat, I had my lightbulb moment: lower gain screens might actually be better for *my* setup—and perhaps yours too.
The Hidden Dangers of Chasing High Gain
For years, I believed that a screen with a gain above 1.0 would guarantee brighter images in well-lit rooms. After all, higher gain reflects more light toward the viewer. But I overlooked how excess reflection can cause glare, hotspots, and reduce contrast—crucial elements in HDR content, especially with those deeper blacks and vibrant highlights we’re eager to enjoy in 2026. Interestingly, recent tests reveal that screens with a gain around 0.8 can outperform high-gain options in delivering accurate colors and contrast, even in brighter environments. According to this expert analysis, low to moderate gain screens are more capable of harnessing the full potential of HDR in high-brightness spaces. So, if you’ve been caught in the high-gain hype, you might be missing out on stunning picture quality.
Are You Wasting Money on Overhyped Screens?
Early on, I made a common mistake: I invested heavily in high-gain screens without testing their real-world performance. I overlooked how their bright spots and glare affected the viewing experience. I wish I had known that a well-chosen screen gain of around 0.8 could have given me the clarity and contrast I craved, without the harsh reflections. If you’re frustrated with washed-out images or uneven brightness, you’re not alone. Many home theater enthusiasts find that focusing on the right gain—especially in 2026 HDR setups—can dramatically improve their picture quality. Want to know how to select the best screen gain for your room? Stay tuned—I’m here to guide you through the essentials of what truly works for your space and budget.
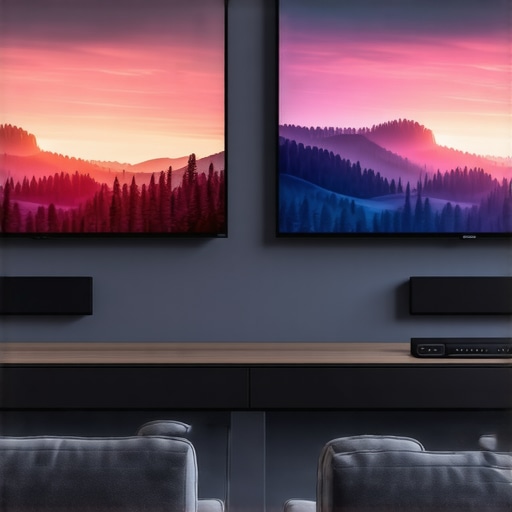
Select the Right Screen Type for Your Space
Begin by choosing between a fixed frame and a pull-down screen based on your room’s layout and usage habits. I once installed a motorized pull-down in my living room, but realized it wasn’t ideal for constant viewing. Fixed frames are more stable and produce a cleaner look, especially when paired with high-gain coatings for bright environments. For detailed comparisons, check out this guide.
Measure Your Room Accurately
Use a tape measure to record room dimensions. I once underestimated the throw distance needed for my projector, resulting in a distorted image. Make sure the distance from projector to screen aligns with your projector’s specifications. Proper measurements prevent common installation mishaps and ensure you pick a screen size that fills your field of view, maximizing immersion. For help with sizing, visit this sizing checklist.
Optimize Screen Gain for Brightness and Contrast
Select a screen with an appropriate gain value; lower gains (around 0.8) tend to offer better contrast and color accuracy, especially in bright rooms. I once swapped my high-gain (>1.5) screen for a 0.8 model after reading this article, and noticed improved black levels with less glare. Use a light meter to test ambient light levels and choose gain accordingly. Remember, high gain isn’t always better; it can cause hotspots, reducing picture uniformity.

Position Your Screen for Perfect Alignment
Mount or install your screen at eye level when seated. I once placed mine too high, making it uncomfortable to view. Use a level and tape measure to ensure alignment. For ceiling mounts, follow this installation guide to prevent sagging or misalignment. Proper positioning enhances the viewing experience and reduces eye strain.
Tension and Secure Your Pull-Down Screen
For pull-down models, tensioning is vital. An improperly tensioned screen will wave or sag over time. I experienced waves after a few months, but a simple tension adjustment fixed the issue. Use a torque wrench or tensioning tools as recommended, or consult the tensioning techniques. Regular maintenance prolongs the life of your screen and keeps the image sharp.
Ensure Proper Projection Angle and Distance
Position your projector at the correct height and distance according to its lens specifications. I initially placed my projector too close, which caused a distorted aspect ratio. Use calculators like this setup calculator for precise placement. An optimal angle minimizes keystone distortion and ensures even illumination across the screen surface.
Test and Fine-tune the Setup
Once everything is installed, run calibration software or test patterns to fine-tune brightness, contrast, and color settings. I used a test pattern and caught subtle color cast issues that I corrected with my projector’s calibration menu. Regularly revisit these settings—ambient light changes and projector aging can affect image quality over time. For advanced calibration tips, explore this resource.
While many home theater enthusiasts focus on selecting the right screen type, there are subtle details and misconceptions that can significantly impact your viewing quality. One prevalent myth is that higher screen gain always equates to better brightness and contrast, especially in bright rooms. However, in my experience, this is a trap that leads to unwanted hotspots and glare, which can diminish overall image uniformity. Experts like those at this resource warn against overestimating gain values without considering room conditions and projector capabilities. A common mistake is to assume that an ALR (Ambient Light Rejection) screen inherently solves all ambient light issues—when in reality, the technology’s effectiveness depends heavily on proper setup and understanding its limitations. If you’re considering an ALR screen, explore the latest breakthroughs to ensure you’re making an informed choice. Additionally, many users overlook the importance of projection angle and screen placement, which can cause undesirable reflections or uneven image quality. Advanced setups require meticulous measurement and calibration; otherwise, all the high-end equipment can be rendered ineffective. Think about it: are you relying solely on screen gain to improve your viewing, or are you paying attention to placement, room lighting, and calibration? One sophisticated question arises—how does the interaction between screen gain and ambient light spectrum affect HDR content quality? According to recent studies, the spectral reflectance properties of certain screen fabrics can influence color accuracy and contrast in mixed lighting environments, making it crucial to match your screen’s optics with your room’s lighting conditions. Remember, choosing a screen is not just about specs—it’s about understanding the complex interplay of technology, environment, and perception. Do you have any experiences where technical choices didn’t meet your expectations? Share your story in the comments. For comprehensive guidance, consider reviewing our detailed guide on selecting the most suitable screen setup for your space.Maintaining your projection setup over the long term is crucial to preserving image quality and ensuring your home theater continues to impress. One of the most effective ways to do this is by investing in the right tools and adopting routine maintenance practices. Personally, I swear by a few key items that have saved me countless headaches and kept my screens performing at peak levels.
First, a **high-quality calibration software** such as CalMAN or ColorMunki has been invaluable. These programs allow me to fine-tune my projector and screen setup with precise adjustments, ensuring color accuracy and optimal contrast over time. I specifically prefer CalMAN because it provides detailed test patterns and reporting, which help me identify and correct subtle deviations in image quality.
Complementing calibration software, I use a **lux meter**—like the Sekonic Light Meter—to regularly measure ambient light levels. This helps me verify that my room lighting remains within acceptable ranges and advises adjustments to my screen gain or room lighting controls. Consistent ambient light management is vital, especially if you’re using a high-gain or ALR screen, as excessive or uneven lighting can quickly diminish image contrast.
For physical maintenance, I utilize a **microfiber cloth** and gentle cleaning solutions designed for delicate projector screens. Regular dusting prevents the buildup of particles that can cause hotspots or glare. I avoid harsh cleaners that could damage the screen surface—especially important for specialized fabrics like those used in ALR screens.
When it comes to **reviewing and updating hardware**, I keep an eye on advances in screen technology. Experts recommend staying informed through resources like this comprehensive guide, which details how to maintain and improve your setup, especially as new screen materials and motorized options become available.
Looking ahead, the trend toward **automated calibration routines** and smart room controls indicates that maintaining your home theater will become more seamless. Integrating sensors that monitor light and contrast, paired with AI-driven calibration, could make ongoing maintenance almost effortless. I predict that future setups will include self-adjusting screens and projector settings that respond dynamically to room conditions.
To get started today, I recommend trying out a professional calibration software for your projector and screen. Even a basic, regular calibration can significantly boost image quality and extend the lifespan of your equipment. Remember, consistent attention and the right tools are your best assets for a long-lasting, breathtaking home theater experience.
What I Wish I Knew Before Overestimating Gain’s Power
One of the biggest surprises in my home theater journey was realizing that higher gain screens aren’t the universal solution many make them out to be. It took experimenting with various setups and observing how hotspots and glare affected HDR content to understand that a screen with a gain around 0.8 often provides more balanced brightness and contrast. This lightbulb moment taught me that focusing solely on gain can blind you to other crucial factors like room lighting and projector calibration.
Another lesson learned the hard way was that ambient light management and proper positioning are just as important as the screen choice. A high-gain screen in a poorly lit room can amplify glare and reduce picture quality, defeating its purpose. Deeply understanding your space—using tools like a light meter and referring to trusted resources such as this guide—can save you money and frustration, ensuring your setup genuinely enhances your HDR experience.
Finally, device calibration shouldn’t be an afterthought. Investing in professional calibration software and routinely checking your projector’s settings can elevate your picture to professional standards. Remember, the technology is only as good as how well it’s tuned to your environment—a lesson that applies whether you’re adjusting gain, contrast, or color saturation.
Tools and Insights That Transformed My Approach
My go-to tools include calibration software like CalMAN for precise adjustments, and a lux meter such as Sekonic to monitor ambient lighting — these keep my setup consistent and optimized. On top of that, regular cleaning with delicate microfiber cloths prevents dust build-up that could cause hotspots or glare, maintaining image integrity over time. For guidance on installation and setup, I trust this comprehensive resource that walks through every step for a seamless experience.
Looking ahead, I believe that emerging technologies like smart calibration and adaptive screen fabrics will make maintaining peak picture quality even easier, empowering enthusiasts to achieve a professional-level cinema in their own homes.
Your Next Step Towards Cinematic Excellence
Achieving that perfect home theater setup isn’t about chasing the latest tech blindly; it’s about understanding how your space, equipment, and choices interact. By focusing on nuanced details—like selecting a gain around 0.8, managing room light, and calibrating regularly—you’re investing in a truly immersive experience. Don’t let misconceptions hold you back from unlocking your setup’s full potential. Keep experimenting, keep learning, and enjoy the journey to home theater mastery.
Have you ever experienced unexpected issues with screen reflectivity or contrast? Share your stories in the comments—I’d love to hear how you’ve optimized your projection space.
,
One Response
Reading through this article really resonated with my own experience of switching from high-gain screens to something around 0.8. I initially thought that boosting gain was the quick way to improve brightness, but I soon noticed hotspots and glare that made the picture less enjoyable. Since making the switch, I’ve seen better contrast and less eye strain, especially in my brighter living room. It’s interesting how the common assumption that higher gain equals better performance isn’t always true—especially with HDR content where blacks and highlights need accurate rendering.
One thing I’ve struggled with is room lighting. Even the best screen gain can be compromised if ambient light isn’t well managed. How do others here handle room lighting during daytime viewing? Do you rely solely on curtains, or do you use ambient light rejection screens in brighter environments? Would love to hear some success stories or tips on optimizing light control and gain balance for enhanced HDR viewing.