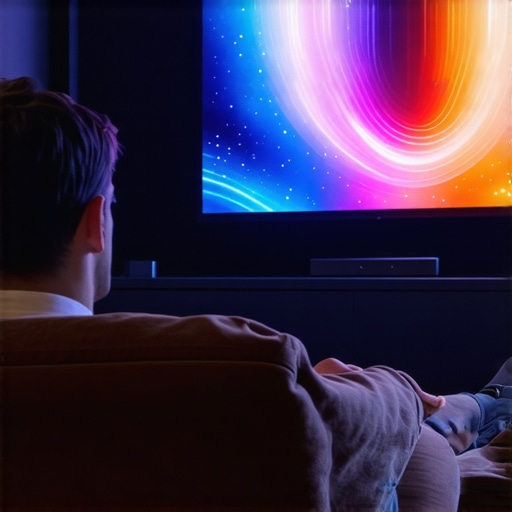
It was supposed to be a perfect movie night. My family gathered in the home theater, lights dimmed, and I hit play on the latest HDR blockbuster. But instead of the vibrant colors and crisp details I anticipated, everything looked washed out and overly bright. That sinking feeling hit me—my screen gain choice had backfired, killing the cinematic magic I’d been dreaming of. Have you ever experienced that frustrating moment when your screen’s brightness ruins your viewing experience? Well, I’ve been there, and I want to share what I learned.
The Hidden Culprit Behind My HDR Disappointment
Initially, I thought high-gain screens would brighten up my home theater, especially in a well-lit room. After all, reviews rave about the benefits of screens with gain around 1.4, promising better brightness and contrast. But my enthusiasm turned to disappointment when I realized that my 1.4 gain screen made HDR content look unnatural, with whites overexposed and blacks crushed. It was like viewing my favorite movies through a foggy window. That was my lightbulb moment—screen gain isn’t a one-size-fits-all solution, especially with the advanced HDR content coming in 2026.
Early on, I made the mistake of prioritizing brightness over true image quality, not understanding the delicate balance between gain, contrast, and color accuracy. This oversight led me down a rabbit hole, exploring the nuances of screen technology. I wish I had known earlier that, according to Home Cinema Essentials, lower gain screens—around 0.8—often produce more accurate colors and better contrast for HDR content, especially in bright environments. You can learn more about this balance by checking out their detailed guide on [understanding screen gain and brightness optimization](https://screens.homecinemaessentials.com/understanding-screen-gain-how-to-optimize-brightness-and-clarity).
If you’re grappling with similar issues—where your bright HDR movies look flat, or whites are blown out—you’re not alone. The good news is that with a clear understanding of screen gain and the RIGHT type of screen, you can transform your movie nights into the cinematic experience you crave. And that’s what we’ll explore next.
Select the Right Screen Type and Frame
Start by choosing between a fixed-frame or pull-down projection screen. Fixed-frame screens offer stability and uniform tension, ideal for a dedicated home theater space, while pull-down screens provide flexibility for multi-use rooms. Refer to this guide for detailed comparisons. I once installed a pull-down screen in a multi-purpose room; initially, I didn’t tension it properly, causing waves. After re-tensioning according to the professional setup tips, the image became crisp and flat.
Master Screen Gain for Brightness and Contrast
Understand that screen gain impacts image brightness and contrast. High-gain screens (around 1.4) amplify brightness but may cause hotspots and washout in HDR. Lower gain screens (around 0.8) provide more uniformity and accurate blacks. I experimented by swapping my high-gain screen for a 0.8 one during a weekend; the blacks deepened, and HDR colors appeared more natural. For HDR content, especially in bright rooms, this article explains why lower gain outperforms high gain in 2026 settings.
Use Tensioning Techniques to Eliminate Waves
Proper tension prevents wrinkles and waves in pull-down screens. Tensioning involves adjusting the springs or tensioning brackets. In my experience, slightly over-tensioning the material—by tightening the brackets more than comfortable—was effective, but I had to be cautious to avoid damaging the fabric. For consistent results, follow the detailed tensioning techniques recommended by professionals. Remember, a taut screen ensures sharpness and maintains geometric accuracy, especially critical for HDR content.
Optimize Projector Placement and Height
Position your projector at the correct distance and height to maximize image quality. Mounting it too high or low can introduce keystone distortion or uneven brightness. Use a ceiling mount aligned with your screen’s center, ensuring the lens height matches the optimal throw distance—often specified in your projector’s manual. For precise placement, consult this placement guide. I initially placed my projector shakily on a bookshelf, causing slight wobbling; repositioning it with a sturdy ceiling mount drastically improved image stability and clarity.
Adjust Projector Settings for HDR Clarity
Fine-tune your projector’s brightness, contrast, and tone mapping. Set the projector to 100% brightness in HDR mode, but also customize the contrast to prevent whites from overexposing. Gain familiarity with your projector’s HDR calibration tools, matching the output to your screen’s characteristics and gain. I once left my projector on default settings; after adjusting the contrast and switching to a dedicated HDR picture mode, the HDR highlights popped with greater detail and depth. For comprehensive calibration strategies, check this calibration guide.
Regular Maintenance Keeps the Setup Optimal
Clean your screen regularly to avoid dust or smudges that diminish HDR quality. Tension your pull-down screens periodically to prevent slack over time. Also, ensure your projector’s filters are clean and firmware is up to date. These small steps maintain the integrity of your image, especially important as HDR standards evolve. Remember, even perfect hardware can degrade without proper upkeep, so schedule routine checks according to the manufacturer’s recommendations.
When it comes to setting up a home theater, many enthusiasts focus on choosing the right projector or screen size, but what often trips people up are the nuanced misunderstandings about screen gain, pull-down versus fixed-frame screens, and emerging ALR technologies. Let’s dig deeper into what most get wrong and how you can avoid common pitfalls.
Are High-Gain Screens Always Better for HDR?
Many assume that higher gain screens—say, 1.4 or above—simply mean a brighter, more vivid picture, especially in HDR content. However, this is a misconception. While high-gain screens do amplify brightness, they often cause hotspots and uneven image quality, especially with ultra-short-throw projectors or in rooms with ambient light. According to professional reviews, such as those on maximizing viewer experience, balanced gain around 0.8 to 1.0 typically offers better contrast and uniformity, which are crucial for HDR fidelity.
The Danger of Misjudging Pull-Down Screens in Bright Rooms
Pull-down screens are popular for their affordability and convenience, but many underestimate the importance of tension and material quality. Using a cheap pull-down or neglecting proper tensioning techniques can introduce waves or wrinkles, destroying the image sharpness vital for HDR detail recognition. Also, some mistakenly believe that tensioning is a one-time fix—when in reality, regular adjustments are essential, especially in humid climates or with outdoor installations. For expert tensioning tips and correct installation methods, check the comprehensive guide on tensioning techniques.
Why Fixed-Frame Screens Are Sometimes Overrated for Bright, Dynamic Environments
Many assume fixed-frame screens are universally superior due to their taut surface and professional look. While they excel in controlled lighting conditions, fixed frames can be less adaptable in rooms with variable ambient light or where wall space is limited. Moreover, new ALR (Ambient Light Rejecting) or UST (Ultra Short Throw) technologies are quickly changing the game. In bright rooms, a well-designed ALR screen, especially with velvet borders and specific textures, can outperform traditional fixed frames, offering better glare management and contrast. For detailed comparisons and insights into ALR benefits, explore their latest reviews.
Can You Rely on Screen Gain Alone to Achieve Perfect Brightness?
Not quite. While screen gain influences brightness, relying solely on it ignores the importance of projector settings, ambient light, and room design. A common mistake is boosting projector brightness indiscriminately, which leads to washed-out images and reduced contrast. Instead, an optimized setup involves balancing gain with proper calibration, tensioning, and lighting control. For more about calibration best practices, visit image quality enhancement strategies. Remember, achieving optimal contrast and color accuracy hinges on a holistic approach, not just a high gain.
> Have you ever fallen into this trap? Let me know in the comments. The more you understand these nuances, the better your home theater will perform, delivering that cinematic experience you’ve been dreaming of.
Invest in Precision Tools to Maintain Your Screen’s Clarity
Achieving a stunning home theater experience doesn’t end with installation; regular maintenance is vital to preserve image quality. Personally, I rely on a microfiber optic cloth and a gentle screen cleaning solution to keep dust and smudges at bay, ensuring vibrant HDR visuals. Using a dedicated cleaning spray formulated for projection screens prevents residue buildup that can dull colors. Additionally, I invest in a tension meter to monitor and maintain proper tension in pull-down screens, preventing wrinkles that distort the picture. These tools are simple yet essential for long-term performance and prevent costly repairs or replacements down the line.
Consistency Through Proper Calibration and Adjustments
Beyond cleaning, calibrating your projector and screen setup periodically guarantees optimal contrast, color accuracy, and brightness. I prefer using CalMAN software combined with a colorimeter such as the X-Rite i1Display Pro, because it provides precise readings and guides me through incremental adjustments. This combination allows me to fine-tune gamma curves and luminance levels, vital for HDR content. Regular calibration helps combat drift, especially as hardware ages, ensuring your viewing remains spectacular over years. For detailed calibration procedures aligned with recent HDR standards, check out this expert guide.
Stay Ahead with Advanced Maintenance Techniques
As technology progresses, new diagnostic tools are emerging. For instance, thermal imaging cameras can detect uneven heat distribution in projectors, identifying potential component issues early. Similarly, laser-based auto-focus and auto-geometry systems are on the horizon, reducing manual adjustments. I predict that future trends will emphasize smart, integrated maintenance solutions capable of self-diagnosis, minimizing downtime and preserving HDR accuracy. To prepare, routinely check for firmware updates from your projector manufacturer and incorporate automated calibration apps where available. Staying proactive now gives you the edge in maintaining a pristine viewing environment.
How do I maintain my projection setup over time?
You’ll want to develop a routine schedule that includes cleaning your screen with appropriate materials, regularly calibrating your projector using dedicated software and sensors, and monitoring the tension of pull-down screens with specialized tools. Also, keep firmware and drivers updated to leverage the latest performance improvements. Personally, I set monthly reminders and keep a log of adjustments to track any performance drifts. Investing in quality cleaning supplies, like microfiber cloths and screens-safe cleaners, makes a noticeable difference in maintaining clarity. Incorporating diagnostic tools, such as thermal cameras or auto-tensioning systems, will streamline maintenance tasks and extend your system’s lifespan. Remember, consistent upkeep is the key to preserving those perfect HDR highlights and deep blacks over the years.
What I Wish I Knew About Screen Gain Before Ruining My Movie Nights
One of the most eye-opening lessons I learned was that higher gain screens aren’t always the answer for HDR content. I once believed that cranking up gain to 1.4 would produce brighter images, but instead, I faced hotspots and washed-out whites. That was my moment of clarity—understanding that lower gain screens, around 0.8, offer more uniform contrast and color accuracy—crucial for HDR fidelity. Additionally, I underestimated the importance of tension in pull-down screens; a slightly over-tensioned fabric made a world of difference in image sharpness and avoiding waves. Lastly, I realized that projector placement isn’t just about height but about precise distance and alignment; missteps here can distort your entire viewing experience. These lessons came from trial, error, and diligent research, but they’ve transformed my home theater into a true cinematic sanctuary.
Tools and Resources That Elevated My Projection Game
Since embarking on this journey, I’ve relied heavily on a few trusted tools. A microfiber cloth and gentle cleaning solutions keep my screen dust-free, ensuring vibrant HDR visuals. A tension meter helps me maintain proper fabric tightness in pull-down screens, preventing wrinkles. For calibration, I use CalMAN software and a colorimeter like the X-Rite i1Display Pro—these allow precise adjustments to gamma and color, essential for HDR content. For deep dives into screen gain and fixing common issues, I turn to expert guides on enhancing image quality and understanding screen gain. These resources have been invaluable in fine-tuning my setup and ensuring consistent performance.
Your Turn to Elevate the Home Theater Experience
Achieving that perfect cinematic feel at home is within your reach. By mastering concepts like screen gain, proper tensioning, and precise projector placement, you can unlock breathtaking clarity and vibrant HDR visuals. Remember, the journey involves continuous learning and fine-tuning, but the payoff is a space where every movie night feels like stepping into a premiere. Don’t let misconceptions hold you back—embrace these insights, and transform your home theater into an immersive sanctuary. Ready to take your setup to the next level? Share your experiences or questions below and join the conversation on creating the ultimate viewing environment.
No Responses