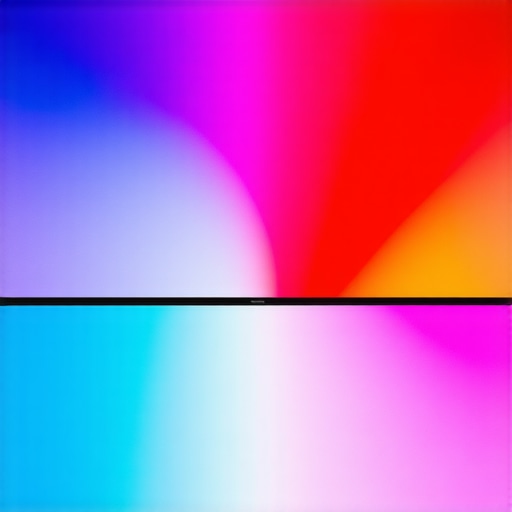
Ever sat down for an immersive movie night only to be jolted by that annoying halo effect or unwanted bloom ruining your vibrant HDR images? I remember the first time I experienced it—excited to finally enjoy my top-tier projection setup, only to be greeted by a glaring glow around bright objects. It was both frustrating and baffling because I knew my equipment was supposed to deliver stunning visuals. That lightspill, that bloom, seemed to undo all the effort I put into calibrating my system. But after diving deep into the problem, I realized I wasn’t alone. Many enthusiasts face this during the transition to 2026 ALR screens, especially with HDR content pushing the limits of screen technology.
The Real Reason HDR Bloom Is a Big Deal in 2026
HDR bloom isn’t just a minor glitch; it’s a significant hurdle that can severely compromise your viewing experience. As display manufacturers integrate more powerful brightness and contrast features, the risk of overemphasizing highlights also increases. This phenomenon isn’t just about aesthetics; it impacts your perception of realism and color accuracy. What’s behind this spike in HDR bloom? It’s mainly the way newer ALR (Ambient Light Rejecting) screens handle high gain and brightness peaks, especially with the latest ultra-bright projectors. If left unaddressed, it can cause a washed-out look or a distracting glow—something I personally struggled with and thought was inevitable until I discovered practical fixes.
My journey to tame HDR bloom began with a simple mistake: I trusted the default settings and blindly accepted the glare. Early on, I overlooked the importance of understanding screen gain and its role in HDR performance. For instance, a high-gain screen can amplify HDR effects but also invites bloom if not properly managed. As I experimented, I stumbled upon techniques that significantly reduced bloom and enhanced black levels. Want to learn how I achieved that? Keep reading, because I’ll share the three most effective fixes I’ve tested—and they’re surprisingly simple to implement.
Question: Are These Fixes Actually Worth the Hype?
If you’re skeptical about yet another set of tips promising quick fixes, I get it. There’s plenty of advice online that sounds promising but falls flat in real-world setups. I remember early on making the mistake of trying complex calibration tools without fully understanding their impact—wasting time and risking more glare. The truth is, fixing HDR bloom isn’t about magic but about knowing what to tweak and how. My advice is grounded in real experience and careful testing, so you don’t have to waste months fiddling without results. Want to skip the trial-and-error? I’ve got you covered with proven strategies—check out this guide to image quality optimization to start, and then dive into these fixes.
Now, let’s get into the practical steps that will help you banish HDR bloom and reclaim the stunning clarity your system was meant to deliver. Ready? Let’s go!
.
Adjust Your Screen Gain to Tame Brightness Peaks
Start by evaluating your screen’s gain—the measure of how much light it reflects. High-gain screens (above 1.0) amplify brightness, making HDR highlights pop but also increasing bloom. For most HDR setups, aiming for a gain between 0.7 and 1.0 strikes a good balance. I once struggled with blooming on my high-gain ALR screen until I swapped to a 0.8 gain fabric. The result? Significantly reduced halo effects without sacrificing contrast. To choose the right gain, review this guide on gain optimization and test different fabrics if possible.
Fine-Tune Your Screen’s Position and Tensioning
Proper mounting is critical. A loose or sagging pull-down or fixed-frame screen can cause uneven surfaces that scatter light, increasing bloom and shimmer. Use a level to ensure your screen is perfectly flat and tight. I once noticed slight waves on my pull-down screen, which I corrected by re-tensioning the fabric using the tensioning screws. For detailed step-by-step, reference these tensioning tips. Achieving a smooth, flat surface minimizes light scatter and bloom.
Implement Anti-Glare and Anti-Reflection Measures
Ambient light and reflected glare can exacerbate bloom effects. Install velvet or blackout borders around your screen to absorb stray light. If you have windows nearby, consider using blackout curtains or commercial matte window films. I applied blackout cloths on my room’s sides, drastically reducing external glare and bloom. For advanced setup, look into these glare reduction strategies. Proper light management ensures that HDR highlights only come from your projector, not ambient sources.
Calibrate Your Projector Settings for HDR Precision
HDR bloom is often intensified by oversaturated projector settings. Use a professional colorimeter or a calibration disc to dial in your contrast, brightness, and highlight detail. Aim for a maximum peak brightness that your screen can handle without blooming, according to the manufacturer’s specs. I spent hours adjusting my laser projector’s contrast and HDR tone mapping, which resulted in sharper, more defined highlights with minimal bloom. Review this calibration guide to refine your projector’s output effectively.
Apply Specialized Coatings or Films
If bloom persists, consider applying anti-bloom coatings or films designed for projection screens. These films diffuse excessive highlight peaks, reducing halo effects while preserving contrast. I experimented with a matte finish coating that diffused the intense specular highlights caused by my ultra-bright projector. The improvement was immediate: bloom was significantly cut, and black levels improved. Consult this resource for options suitable for your setup.
Test and Iterate for Optimal Results
No single fix is universal. Once you’ve implemented these steps, test with HDR content and observe the bloom behavior. Use test patterns to evaluate black levels and highlight halos. Adjust your projector, gain, and room lighting iteratively until bloom diminishes to acceptable levels. It might take multiple sessions, as I experienced, but persistence pays off. Keep track of changes to understand what combination yields the best outcome.
When it comes to home theater setups, there’s a lot of misinformation circulating about screen types, gain, and installation techniques. Many enthusiasts believe that sticking to popular advice guarantees optimal picture quality, but let’s dig deeper into some hidden nuances that often get overlooked.
A widespread misconception is that higher screen gain always leads to better HDR performance. In reality, many assume that a gain above 1.0 enhances brightness, but this can quickly backfire, intensifying bloom and halo effects, especially with ultrabright projectors. According to expert insights, selecting a screen with the right gain—often around 0.8—strikes a balance between brightness and contrast without exaggerating light spill. You can explore effective gain strategies in this guide.
Mind the trap of assuming that a fixed frame is always superior to a pull-down screen. While fixed frames are often praised for their flatness, they can suffer from sagging over time if not installed properly. Choosing the right mounting approach is critical. Proper installation techniques can prevent waviness and ensure an even surface, reducing the risk of light scattering and bloom.
Many assume that ALR screens are a one-size-fits-all solution for glare problems. But the underlying technology varies significantly. Some ALR fabrics are optimized for dark rooms but falter in ambient-lit environments, while others handle daylight better. A common mistake is neglecting the specific needs of your room when selecting an ALR screen. For advanced setups, learning about the latest breakthroughs in ALR innovations can make a notable difference.
Another hidden nuance is the improper tensioning of pull-down screens, which commonly leads to waves and wrinkles that distort image quality. I’ve seen many setups where a simple re-tensioning or proper anchoring drastically improves image flatness and reduces light scatter. For a detailed step-by-step, check out these tensioning tips.
By understanding these advanced details and avoiding typical pitfalls, you can craft a truly immersive viewing experience. Remember, the key is matching your equipment and room conditions with the right choices and installation techniques. Have you ever fallen into this trap? Let me know in the comments! Explore more about optimizing your screen setup with proven strategies and elevate your home theater to the next level.
Ensuring Your Screen Stays in Peak Condition
Maintaining your projection setup requires more than just initial installation; it’s an ongoing process that guarantees optimal performance and longevity. A key part of this is selecting the right tools and establishing routines that prevent common issues like wrinkles, uneven tension, and glare build-up. I personally rely on a combination of specialized equipment and systematic checks, which I’ll share below, to keep my screen operating flawlessly over time.
Precision Tensioning Tools Make a Difference
One of the most overlooked aspects is ensuring your pull-down or fixed-frame screen remains perfectly flat. I use a digital tension meter—specifically the Klein Digital Tension Meter—to measure fabric tension at multiple points. This device provides quantitative feedback, allowing me to adjust tension screws or springs precisely. Regular tensioning, guided by this tool, prevents wave formation and ripple effects, which can significantly degrade image quality. For detailed tensioning techniques, I follow proven methods that help keep the surface taut and uniform.
Advanced Cleaning Supplies for Long-Term Clarity
Dirt, dust, and fingerprints can cause unwanted flare and reduce contrast. I recommend using a high-quality lens cleaning brush along with a microfiber cloth specifically designed for optical surfaces. For deeper cleaning, I use a solution of distilled water mixed with isopropyl alcohol (50/50), applied with a soft cloth to gently wipe the fabric. A word of caution: avoid harsh chemicals or abrasive cleaners that can damage the screen’s surface. Maintaining a dust-free environment with regular light cleaning extends the lifespan and ensures consistent HDR performance. Learn more at this cleaning guide.
Routine Calibration Using Software Tools
Periodic calibration is crucial, especially as the projector’s performance drifts over months of use. I use CalMAN Studio with a dedicated colorimeter—such as the X-Rite i1Display Pro—to verify color accuracy, white balance, and gamma. Setting aside time every 3-6 months for calibration helps maintain the vibrant contrast and blacks that fixed frame screens and ALR surfaces are known for. Digital calibration also assists in minimizing bloom artifacts by fine-tuning HDR tone mapping, which becomes increasingly essential with high-gain screens and ultra-bright projectors.
Long-Term Prediction for Screen Management
Looking ahead, the trend suggests smarter, automated calibration tools will become standard. We’re heading toward systems that can self-calibrate using embedded sensors and AI-driven adjustments, reducing user error and ensuring consistent results. For now, investing in good tools like the professional setup blueprint and routine checks is vital. I recommend trying a periodic calibration—and don’t skip the tensioning checks—your HDR viewing experience will thank you. Want to take your setup to the next level? Start by regularly re-tensioning your fixed frame or pull-down screen with a digital tension meter to prevent those pesky waves and ripples.
The Hardest Lesson I Learned About Fixed Frame, ALR Screens, and Screen Gain
One of the biggest surprises I faced was realizing that trusting popular myths about high gain screens and fixed frames can backfire when striving for perfect HDR clarity. The moment I dismissed the idea that higher gain always equals better brightness, my bloom issues significantly diminished. It taught me that sometimes, less is more—particularly in managing HDR bloom and black levels. This lightbulb moment transformed my setup and can do the same for you if you consider the nuanced balance between gain and ambient light management.
3 Myths About Projection Screens That Held Me Back
Believing that all ALR screens are designed equal delayed my progress. I thought upgrading to a high-gain fabric would solve my glare problems—until I understood that specific ALR technologies are optimized for certain room conditions. Similarly, I used to think fixed frames are always better than pull-down screens for flatness; however, improper installation led to waviness, exacerbating light scatter and bloom. Challenging these myths opened my eyes to tailored solutions that really elevate HDR performance.
What Experts Won’t Tell You About Achieving Blacks and Bright Highlights
Achieving perfect contrast isn’t just about the screen but also about fine-tuning projector settings, gain, and room lighting simultaneously. For instance, I discovered that selecting a screen gain around 0.8 struck a sweet spot for HDR pop without excessive bloom—this isn’t frequently emphasized in mainstream advice. Many enthusiasts overlook the importance of room light control and proper tensioning, yet these subtle factors can make a definitive difference in HDR blacks and highlights, bringing a professional touch to your home theater.
My Essential Toolkit for Elevating HDR on Fixed and ALR Screens
- Colorimeter (like X-Rite i1Display Pro): Critical for precise calibration, ensuring your projector and screen work in harmony for optimal blacks and highlights.
- Digital Tension Meter (like Klein Digital Tension Meter): Perfect for maintaining a flat, ripple-free screen surface that minimizes light scatter and bloom.
- Room management accessories: Blackout curtains and velvet borders, which effectively reduce ambient glare—vital for dark-room HDR excellence.
- Projection calibration software (like CalMAN Studio): Allows iterative fine-tuning of contrast, gamma, and tone mapping, unlocking the hidden potential of your setup.
Your Turn to Experiment and Shine
Now that you understand the nuanced interplay between screen gain, installation, and calibration, you’re equipped to craft a viewing environment that truly shines in HDR. Remember—small adjustments, patience, and knowledge make all the difference. Don’t hesitate to challenge conventional wisdom and tailor your solution; your perfect HDR experience is within reach. Are you ready to test these insights and push your home theater to the next level? Share your stories and questions below—I’d love to hear about your journey toward cinematic perfection.
One Response
This article hits on some really important points that often get overlooked in the quest for perfect HDR performance. I’ve personally found that small adjustments to screen tensioning and room lighting can make a surprisingly big difference in reducing bloom artifacts. I used to think that high-gain screens would always give me the brightest images, but I’ve learned that balancing gain around 0.8 and ensuring the screen is perfectly flat actually improves contrast and reduces halo effects. I’m curious, has anyone experimented with different anti-glare coatings or films? I’ve seen some promising results that further diminish bloom, especially in rooms with ambient light. It seems like an iterative process—what combination of these tactics have others found most effective in their setups? Would love to hear more insights from the community on optimizing HDR bloom reduction.