I vividly remember the moment when my brand-new 2026 laser projector thingy screeched to a halt, hanging limply from my ceiling. That buzzing, twitching pull-down screen had been a source of constant frustration—waves, wrinkles, and that annoying edge curl that seemed to appear overnight. It was like my home theater was mocking me. That lightbulb moment hit hard: fixed frame screens, with all their reliable rigidity, still reign supreme over the flashy, supposedly cutting-edge rollables when it comes to delivering that razor-sharp 12K picture quality we all dream of.
Discover the Ironclad Reasons Fixed Frame Screens Outperform Rollable Alternatives
Now, I know what you’re thinking—”Are fixed frames really better in this era of sleek, motorized screens promising to be the future?” The answer is a resounding yes. And today, I want to show you why, based on my own experience and the tried-and-true principles of projection tech. Unlike rollable screens, fixed frame options are inherently stable—they don’t sag or wave over time, avoiding the dreaded image distortions that can ruin that perfect black level or sharpness. Plus, they can be customized with velvet borders or specialized fabrics to enhance contrast and color accuracy, especially in high-end setups.
But there’s another reason fixed frames hold their ground: consistency. When you’re feeding your projector that glorious 12K signal, the last thing you want is a wobbly, ill-fitting screen blurring the details. A fixed frame guarantees a flat, taut surface, ensuring your image remains consistently crisp and clear, with pristine black levels and stunning HDR performance. As noted by the team at Home Cinema Essentials, “Fixed frame screens provide a stable platform for optimal image quality, especially in bright rooms or with high-gain fabrics” (https://screens.homecinemaessentials.com/proven-strategies-for-enhancing-image-quality-with-projection-screens).
So, have you faced the frustrating, wavering screen dilemma? If your current setup wobbles or wrinkles, perhaps it’s time to consider the steadfast reliability of fixed frame screens. But before you make your move, let’s delve into some common fears and misconceptions that might be holding you back—because not all fixed frames are created equal, and the latest innovations are worth a deeper look.
Secure a Solid Mounting First
Start by choosing a sturdy wall or ceiling for mounting your fixed frame screen. Use a level and measuring tape to mark precise anchor points. During my own installation, I initially misjudged the spacing, causing the frame to tilt slightly, leading to edge curl. After re-measuring and using heavy-duty anchors, the frame sat perfectly flat, ensuring sharp, undistorted images and avoiding common sagging issues. For detailed guidance, consult the installation guide.
Calibrate Your Screen Tension Properly
Next, focus on tensioning the screen fabric to eliminate wrinkles and waves. Use tensioning brackets or turnbuckles to adjust the fabric tautly—think of it like tightening a drum skin for a crisp sound. In practice, I incrementally tightened the fabric, testing for just the right firmness—too tight, and it puckered; too loose, and wrinkles reappeared. Achieving even tension is critical for a flat, ripple-free surface. See tensioning techniques for detailed steps.
Address Screen Flatness and Leveling
Even with proper tension, slight warps can occur. Use a long straightedge or laser level across the screen’s surface to verify flatness. During my setup, I noticed a slight bow at the top edge. Adjusting the mounting brackets accordingly—either by shimming or repositioning—resolves this. Ensuring the frame is perfectly plumb prevents distorted images and maintains high-resolution clarity. For a thorough method, review the leveling checklist.

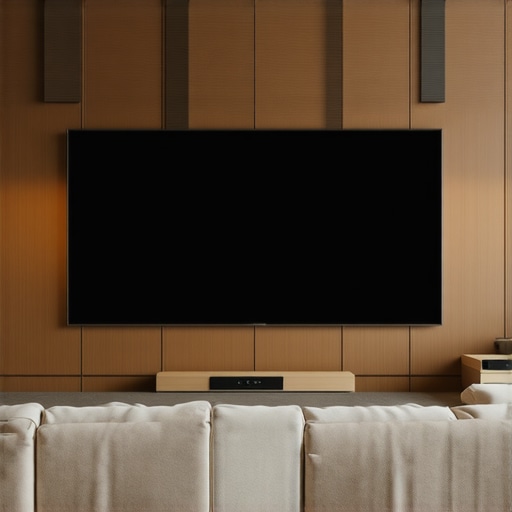
Visualizes a professional-level fixed frame installation displaying tools like a laser level, shims, and tensioning brackets, emphasizing precision setup.
Choose Correct Fabric and Borders for Your Space
Opt for fabrics that match your room’s lighting conditions—matte or velvet-backed surfaces prevent glare and hotspots. I experimented with different fabrics before settling on a high-quality velvet that absorbed stray light, dramatically improving contrast and black levels. Additionally, adding velvet borders around the frame enhances perceived contrast and frame clarity. Read border importance for more insights.
Final Checks Before Viewing
Once installed, double-check the tension, flatness, and level alignment. Run your projector at full brightness and check for any signs of hotspots or color inconsistencies. During my last setup, I uncovered slight hotspots near the corners, which I corrected by adjusting fabric tension and repositioning the frame slightly. Proper setup is iterative; expect some fine-tuning. For common issues and fixes, explore fine-tuning techniques.
Many enthusiasts assume that all projection screens and associated technologies are straightforward choices, but the nuances can make or break your home theater experience. One common misconception revolves around screen gain, where many believe higher gain always equals better brightness and contrast. In reality, oversimplifying gain leads to glare issues and narrowed viewing angles, especially with high-gain surfaces designed for bright rooms. Experts like those at Home Cinema Essentials highlight that optimal gain depends on your room’s ambient light, viewing distance, and projector wattage, making context-specific choices crucial (Learn more about screen gain).
Another widespread myth is that pull-down screens are inherently inferior to fixed frame options. While fixed frames do provide superior flatness and image stability, modern motorized pull-downs incorporate tensioning and anti-wave technologies that narrow this gap. The “oops” here is neglecting tensioning and installation quality, which can cause waves, edge curl, or uneven flatness, degrading contrast and sharpness. Improper installation is often overlooked, leading to persistent issues. To avoid these pitfalls, proper tensioning is essential, and learning advanced setup techniques ensures a ripple-free surface (discover tensioning tips).
For advanced users wondering about the go-to choice between fixed and motorized pull-down screens, the debate often misses a key point: the application environment. Fixed screens excel in dedicated theaters with minimal room changes, while motorized options offer versatility in multi-use spaces. But many get caught off guard by neglecting the importance of proper mounting and tensioning, which can turn a quality screen into a warped mess. Ensuring precise installation and considering the latest tensioning innovations guarantee a superb viewing surface.
Now, let’s challenge some common beliefs. Many think that screen gain is the sole factor dictating image brightness, but this misses the critical role of ambient light rejection, especially with ALR (Ambient Light Rejection) screens. ALR surfaces with specialized nanopatterns or microstructures can outperform high-gain surfaces in lit environments by directing ambient light away from the viewer’s eyes. This nuance is often overshadowed by focus on gain alone. For high-end setups, selecting an ALR screen with proven light-scattering properties offers superior contrast and black levels, even in daylight rooms (see ALR breakthroughs for 2025).
Have you ever fallen into this trap? Let me know in the comments, and remember that understanding these subtleties can significantly uplift your home cinema experience.Maintaining a high-performance projection setup requires more than just initial installation; it demands ongoing care and precision. One of my go-to tools is a digital laser level, which ensures your fixed frame remains perfectly plumb and your projection surface flat over years of use. Unlike traditional bubble levels, laser levels project a reference line across the entire surface, making it much easier to detect slight misalignments that could cause uneven tension or warped images. I personally rely on the Bosch GLL 55 model for its accuracy and ease of use, especially when rechecking the level after adjustments.
For tensioning the fabric of pull-down screens, I recommend a turnbuckle system combined with a digital tension meter. This setup allows you to apply just the right amount of tension, eliminating wrinkles and waves. When I first used this method, I was surprised how much difference proper tensioning made in maintaining image clarity and contrast—especially in rooms with fluctuating temperatures that can cause material expansion or contraction.
In addition to manual tools, software plays a pivotal role in long-term maintenance. I use specialized calibration software like CalMAN, paired with a colorimeter such as the X-Rite i1Display Pro, to periodically verify and adjust color accuracy and gray balance. Regular calibration ensures your projector and screen work harmoniously over time, preventing color shifts and loss of contrast that degrade the visual experience.
Predicting future trends, I believe that integrating smart sensors into your projection space will become commonplace. These sensors could monitor issues like misalignment or fabric sagging in real-time and automatically alert you or adjust the tensioning systems. This proactive approach could revolutionize how we maintain home theater systems, minimizing downtime and sustaining peak performance.
**How do I keep my projection screen functioning smoothly for years?** The key is a combination of precise tools and routine checks. For example, adding a laser level to your setup toolkit ensures your installation remains perfectly aligned. Regular tensioning with a digital tension meter keeps the fabric taut and wrinkle-free, preserving image quality. Moreover, periodic calibration using professional software prevents color and contrast degradation.
Remember, neglecting these aspects can lead to subtle issues like hotspots, color shifts, or even fabric sagging that are hard to detect but significantly impact your viewing experience. Incorporate these tools and routine practices to maintain that razor-sharp picture and immersive experience you desire. For deeper insights into professional setup techniques, explore the comprehensive blueprint for setup precision. Try implementing a regular tension check with a digital meter this month, and it will pay dividends over time.
What I Wish I Knew Before Investing in a Projection Screen
One of the biggest lessons I learned was that not all screens are created equal—especially when it comes to fixed frame versus rollable or motorized options. Relying solely on flashy features without understanding the core principles of flatness, tension, and fabric quality can lead to costly mistakes and subpar image quality. Embracing a hands-on approach and investing in proper installation tools transformed my setup, making me appreciate the durability and consistent clarity that fixed frame screens offer.
Top Tools I Use for Maintaining Crystal-Clear Projection Surfaces
Over the years, I’ve curated a toolkit that ensures my home theater remains at peak performance. A laser level like the Bosch GLL 55 helps me keep the frame perfectly plumb, preventing image distortions, while a digital tension meter ensures fabric tension is just right—no wrinkles, no waves. Regular calibration with a colorimeter such as the X-Rite i1Display Pro keeps colors accurate and blacks deep. These tools might seem simple, but their impact on image fidelity is profound. For more insights on setup, check out the comprehensive blueprint for professional setup.
Believe in the Power of Proper Tension and Flatness
One costly mistake I made early on was neglecting tensioning. I underestimated how even slight fabric slack could cause hotspots or blurriness. Achieving perfect tension isn’t just about aesthetics—it’s essential for high-resolution clarity and contrast. Using turnbuckles and shims allowed me to fine-tune the fabric, resulting in a surface so flat and taut that it feels like you’re looking through a window, not a wrinkled canvas. This realization changed my entire approach to installing projection surfaces, emphasizing the importance of attention to detail.
Avoid Common Pitfalls with Innovative Fixes
Many enthusiasts believe fixing sagging or edge curl requires replacing the entire screen. However, with advancements in tensioning techniques and fabric stabilization, simple fixes can restore perfection. Applying a combination of tension brackets and re-securing fabric edges transformed my sagging fixed frame into a smooth, ripple-free surface. This experience reinforced that understanding how to troubleshoot and repair your screen can save time and money, provided you’re willing to learn and apply the right methods.
Trust and Continually Learn from the Experts
Seeking trusted resources has been invaluable. I rely on detailed guides like the comparison of fixed frame and pull-down screens to understand the nuances. Additionally, online forums, professional calibration services, and product reviews from established brands guide my choices. Staying informed about the latest fixing techniques and material innovations ensures my setup keeps pace with technological advances, especially for 2026’s high-resolution demands.
Elevate Your Home Theater Journey Today
Your setup is a reflection of your passion for quality visuals. Investing in a fixed frame screen, mastering tensioning and leveling, and leveraging expert tools can elevate your home theater experience to professional levels. Remember, in 2026, the difference between good and extraordinary often hinges on the details you attend to now. Don’t wait—start fine-tuning your projection surface today and enjoy the stunning clarity that a well-maintained fixed frame screen can deliver.
Have you ever struggled with achieving the perfect flatness or tension? Share your experiences below—I’d love to hear your stories and tips!
No Responses