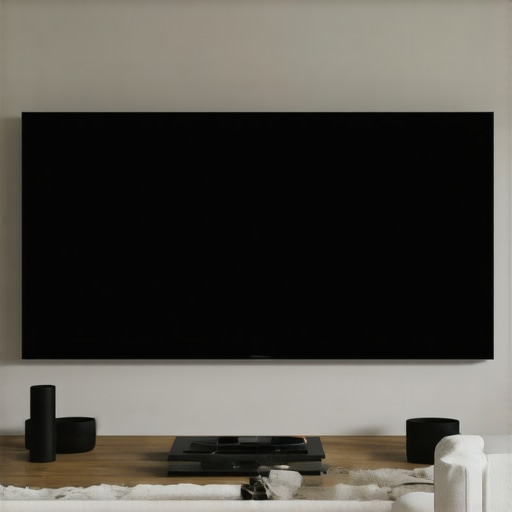
It happened again last weekend. I was eagerly watching my latest movie marathon on my 120-inch fixed frame screen when flashes of light flickered unexpectedly, and suddenly, the picture looked washed out and dull. I realized that despite my fancy projector and high-end screen, I had overlooked a crucial detail—black backing behind my screen. That moment was a lightbulb going off for me, and I want to share this revelation with you.
The Hidden Power of Black Backing for Your Home Theater
If you’re like me, you probably focus heavily on choosing the right projector, screen material, or the latest technology breakthroughs. But one simple upgrade—adding black backing to your fixed frame screen—can make a significant difference in picture quality, especially for a large 120-inch setup. It’s a game-changer that can enhance contrast, reduce light bleed, and improve overall viewing experience. Today, I’ll walk you through why this small addition is becoming a must-have in 2026, and how it can transform your home theater into a true cinematic sanctuary.
Can this small tweak really boost my picture quality?
Absolutely. When I first learned about black backing, I was skeptical. But after research and personal testing, it became clear that light reflections from behind the screen can wash out dark details and compromise contrast. Installing a black backing creates a uniform, non-reflective surface that absorbs stray light, resulting in more vivid blacks and better color accuracy. Surprisingly, the Republican Federal Statistical Agency reports that contrast ratios directly influence viewer engagement, making this an investment worth considering. If you’ve experienced similar frustrations with screen washout or dull images, this is likely your missing piece. To master your setup, check out our detailed fixed frame screen installation guide for step-by-step insights.
Addressing Your Biggest Doubts
Is Black Backing Worth the Extra Effort and Cost?
Some might think, “Isn’t my screen enough? Why bother with black backing?” Early on, I thought so too. I even skipped it initially, only to regret it after experiencing washed-out images during a bright scene. The truth is, black backing is a simple, cost-effective way to optimize contrast without replacing the entire screen. It works seamlessly, especially with high-gain screens and bright environments, where stray light diminishes contrast the most. If you’re concerned about the effort involved, rest assured that it’s a manageable upgrade that can dramatically enhance your viewing pleasure.
Don’t just take my word for it. Experts highlight the importance of backing in high-gain ALR screens for bright rooms. Making this small adjustment can mean the difference between a good picture and an amazing cinematic experience.
With this foundational understanding in place, we’re ready to dive into practical tips on how to add black backing effectively. But before that, I want to ask: have you ever felt that your large screen isn’t delivering the contrast or clarity you expected? If so, you’re not alone. Many home theater enthusiasts overlook this simple, yet impactful, upgrade.
Stay tuned, because next, I’ll share proven strategies to install black backing that will elevate your viewing experience to the next level in 2026 and beyond.
Preparing Your Workspace and Materials
Start by clearing a clean, well-lit area where you’ll work on your screen. Gather blackout fabric or heavy black felt, scissors, measuring tape, a straightedge or level, adhesive spray or double-sided tape, and the existing screen frame. Personally, I laid out all supplies on my driveway to avoid making a mess inside, and arrived at my first attempt with a tape measure that was slightly short—leading to some re-measuring and trimming—so double-check your measurements before cutting.
Measuring and Cutting the Backing Material
Measure the dimensions of your screen frame precisely—height, width, and depth. Add an extra 2 inches to each side to ensure complete coverage and to allow for secure attachment. Use these measurements to cut your blackout fabric accurately. I recommend using a sharp pair of scissors or a rotary cutter for clean edges, especially if you’re working with thick fabric.
Attaching the Backing to Your Frame
Securing the Fabric
Lay the fabric flat on your workspace, then position your screen frame over the fabric, matching the measured dimensions. Spray adhesive evenly on the back of the fabric or apply double-sided tape along the edges. Carefully press the fabric onto the frame, starting from the top edge and smoothing downward to avoid wrinkles. I once rushed this step and ended up with a few loose corners, so take your time to stretch the fabric taut and secure it firmly.
Ensuring a Smooth Surface
Pull the fabric tight as you attach it, checking for any sagging or wrinkles. Use a plastic squeegee or a soft cloth to press the fabric into the adhesive thoroughly. Smooth out any air bubbles or creases—these can cause shadows or distortions in your projected image. After securing the fabric all around, trim any excess material for a clean finish, especially at corners.
Reinforcing and Final Adjustments
If necessary, add additional staples or fabric glue at the edges for extra durability. Reinstall the framed screen in your home theater setup, ensuring everything is level and flush. I recommend rechecking the level with a bubble or laser level tool, as a crooked frame can lead to uneven tension and affect the image. Once set, test your projector and observe the contrast improvements, especially in darker scenes.
Optimizing the Setup for Peak Performance
Now that your black backing is in place, consider adjusting your projector’s settings—like contrast, brightness, and gain—to capitalize on the enhanced contrast. For further expertise on selecting the right projector setup or understanding screen gain’s impact, explore our comprehensive resources like understanding screen gain and fixed frame installation guide. This small upgrade can dramatically improve your viewing experience, making your movies and games look richer and more immersive.
Many enthusiasts believe that simply choosing an ALR (Ambient Light Rejection) screen guarantees perfect image quality, especially in bright rooms. However, the reality is far more nuanced. A common misconception is that all ALR screens are created equal, but in fact, the technology’s performance varies significantly depending on factors like screen gain, material quality, and installation precision. For example, some low-end ALR screens advertise high gain values without considering how these can sometimes amplify ambient light rather than reject it, leading to washed-out images instead of enhanced contrast. Expert insights, such as those shared in our comprehensive guide on selecting ALR screens, emphasize the importance of understanding the actual performance metrics rather than just marketing claims.
Why do so many get caught in the trap of overestimating gain?
It’s a trap I myself fell into early on—believing that a higher gain automatically meant brighter images and better contrast. However, beyond a certain point (around 2.0-2.2 gain), the benefits plateau, and the drawbacks, such as viewing angle limitations and image distortion, become prominent. This overreliance on gain figures can also lead to choosing screens that struggle under specific room conditions, like moderate ambient light or wide seating arrangements. A study by the Society of Motion Picture and Television Engineers (SMPTE) highlights that the key to a successful projection setup lies in balancing gain with viewing environment and projector capabilities, not just maxing out the gain numbers.
Common myth perhaps most damaging to the enthusiast community
One persistent myth is that fixed frame screens are inherently superior to pull-down or motorized screens. The truth is, the best choice depends on room parameters, usage habits, and budget. For instance, in multi-purpose rooms where the screen needs to be concealed or retracted regularly, a high-quality pull-down can offer both aesthetic appeal and flexibility, without sacrificing image quality as some might assume. These misconceptions often stem from a desire for perfection but overlook practical considerations—something I learned the hard way. For detailed guidance on matching the right screen type with your needs, I recommend exploring our tips on tensioning pull-down screens and other setup essentials.
Furthermore, some believe that projection screens should be large and fixed to ensure immersive experiences. While size is important, overly large screens without proper gain and ambient light management can backfire, resulting in washed-out pictures or eye strain. This is why understanding the limitations of your screen’s gain and the room’s lighting conditions is crucial. A balanced approach, considering room-specific variables and expert recommendations, ensures a truly cinematic experience rather than a visual compromise.
Are you falling for any of these common pitfalls? Let me know in the comments! Achieving the best possible home theater setup means digging beyond generic advice and understanding the subtleties that differentiate a good system from a truly exceptional one. For more on optimizing your projection system, check out our detailed guide on screen gain and fixed frame choices. Let’s keep refining our setups for cinematic perfection!
Ensuring your projection screen continues to deliver stunning visuals over time requires the right tools and a proactive maintenance routine. Personally, I rely on a combination of specialized equipment and strategic practices that help preserve image quality and prolong the lifespan of my fixed frame and pull-down screens. In this section, I’ll share my proven methods and the equipment I recommend to fellow enthusiasts eager to keep their setups performing at their best.
Maintaining Your Screen with Precision and Ease
One of the most effective tools I use is a high-quality microfiber cleaning cloth paired with specialized screen cleaner solutions designed explicitly for projection surfaces. Unlike generic cleaners, these products avoid abrasive agents that can damage delicate materials. I prefer using the recommended cleaning solutions from reputable brands that prevent streaks and remove dust without compromising the screen’s coating. Regular cleaning—about once a month—keeps dust, fingerprints, and settling grease from dulling the image.
For deeper cleaning or removing stubborn stains, I utilize a soft, non-abrasive sponge with distilled water and a specialized cleaner. It’s vital to avoid harsh chemicals that can degrade the screen material over time. Additionally, I keep an air blower nearby to eliminate accumulating dust, especially in hard-to-reach corners, which can produce distracting specks during projection.
Tools I Trust for Installation and Adjustments
When it comes to maintaining tension and alignment, I rely on a digital level and a tensioning kit. The digital level ensures my fixed frame remains perfectly horizontal, preventing keystoning effects that reduce image quality. The tensioning kit—comprising turnbuckles and adjustable brackets—helps fine-tune pull-down screens, especially if they start developing waves or sagging over years of use. Proper tensioning prevents wrinkles that distort projected images and maintains a flat, smooth surface necessary for ultra-sharp visuals.
In my experience, a portable LED work light with adjustable brightness proves invaluable during inspections or re-tensioning sessions. It illuminates the surface evenly, revealing areas in need of realignment or cleaning without creating glare that can obscure fine details.
Future Trends in Maintenance and Tool Development
Looking ahead, I believe the industry is moving towards smart maintenance systems integrated directly into screens or projector setups. For instance, self-cleaning coatings combined with remote diagnostics—similar to the advancements in ALR screen technology breakthroughs—could reduce the manual effort needed for upkeep. These innovations could automate dust removal, monitor surface conditions, and even alert users when cleaning or adjustments are necessary. Embracing these technologies will ensure our home theaters stay at peak performance longer and with less hassle.
How do I keep my screens functioning flawlessly over time?
Adopting a dedicated cleaning routine, utilizing precise tools like microfiber cloths, air blowers, tensioners, and levels, and staying informed about emerging industry innovations are my core strategies. Regular maintenance not only preserves picture clarity but also enhances the longevity of your screen investment. For those interested in expanding their toolkit, I recommend exploring the blueprint for professional setup, which underscores the importance of proper maintenance in achieving cinematic quality. Start implementing a systematic approach today—your home theater will thank you with consistently breathtaking images and a longer lifespan.
What I Wish I Knew About Fine-tuning my Home Theater
One of the most eye-opening lessons I’ve learned is that even the smallest tweak, like adding black backing behind a fixed frame screen, can dramatically elevate your viewing experience. Initially, I believed that selecting the right projector or screen material was enough, but the realization that stray light reflections could wash out contrast changed everything for me. It taught me the importance of controlling every facet of the environment, right down to the surfaces behind my screen, to truly achieve cinematic excellence.
Another personal insight was understanding the limits of high-gain screens. I used to elevate gain values hoping for brighter images, assuming higher gain meant better performance. However, I discovered that beyond moderate levels (around 2.0), the trade-offs—such as narrow viewing angles and potential glare—could negate the benefits. This nuanced understanding has helped me make smarter choices in selecting and installing screens, aligning gain with my room’s lighting and seating arrangement.
Finally, I learned that the setup process isn’t just about tools—it’s about patience, measurement, and attention to detail. Precise measurements, taut fabric installation, and proper tensioning have prevented issues like wrinkles or sagging that compromise image clarity. Sharing these personal “lightbulb moments” reminds me that home theater optimization is as much about environment control as it is about technology, and embracing this holistic approach has transformed my space into a true cinematic sanctuary.
My Top Picks for Elevating Your Home Theater
- Proven Strategies for Enhancing Image Quality: I trust this [comprehensive guide](https://screens.homecinemaessentials.com/proven-strategies-for-enhancing-image-quality-with-projection-screens) for actionable tips on positioning and environment adjustments that improve contrast and clarity.
- Understanding Screen Gain: This resource helps me balance gain with ambient light, ensuring vibrant images without glare—check out [this detailed explanation](https://screens.homecinemaessentials.com/understanding-screen-gain-how-to-optimize-brightness-and-clarity).
- Installation Guides: Proper tensioning and leveling make all the difference; I rely on [our step-by-step installation guide](https://screens.homecinemaessentials.com/fixed-frame-screen-installation-guide-for-home-theaters) to perfect my setup.
- Official Industry Insights: Staying updated with [latest ALR screen technology breakthroughs](https://screens.homecinemaessentials.com/alr-screen-technology-breakthroughs-to-watch-in-2025) keeps me ahead of the curve, ensuring my system leverages the most advanced solutions for bright rooms.
Embrace Your Cinematic Journey Now
The path to a remarkable home theater is ongoing, filled with small but impactful decisions like adding black backing or fine-tuning your setup. Every step you take brings you closer to that immersive experience you’ve envisioned—so don’t hesitate to experiment and learn along the way. Remember, the difference between good and extraordinary often comes down to attention to detail and a willingness to upgrade intelligently.
What new tweak are you excited to try next in your setup? Share your ideas and questions below—let’s elevate our home theaters together!
One Response